visit: http://rpf.io/raspberrypios
Thursday, May 28, 2020
Just announced: 8GB Raspberry Pi 4, 64-bit Raspberry Pi OS
Raspberry Pi Blog announced 8GB Raspberry Pi 4 on sale now at $75, and also introduced the early beta 64-bit Raspberry Pi OS.
source:
~ Raspberry Pi Blog - 8GB Raspberry Pi 4 on sale now at $75
~ You can find a link to the new 64-bit image, and some important caveats, in this forum post.
You can also read all about it in The MagPi magazine issue 94. Include download link for free PDF version.
~ https://magpi.raspberrypi.org/issues/94

Monday, May 25, 2020
Python to check CPUs speed of Raspberry Pi
In Terminal, you can use this command to get the current CPU current frequency:
$ cat /sys/devices/system/cpu/cpu0/cpufreq/scaling_cur_freq
where cpu0 can be cpu0~3 for Raspberry Pi 4B. You can enter this command to get frequency of all 4 CPUs.
$ cat /sys/devices/system/cpu/cpu[0-3]/cpufreq/scaling_cur_freq

Here is my Python exercise to display speeds of CPUs on Raspberry Pi 4B. It's found that running this script will make the CPUs running in higher speed. For demonstration, I insert a delay and repeat read the CPUs speed to show the effect.

checkCPUs.py
import sys
import subprocess
import time

cmd = "cat /proc/device-tree/model"
model = subprocess.check_output(cmd, shell=True).decode("utf-8")
print(model)
print("Python: " + sys.version)
print()

def readCPUs():
    #cmd = "find /sys/devices/system/cpu/cpu[0-3]/cpufreq/scaling_cur_freq -type f | xargs cat"
    cmd = "cat /sys/devices/system/cpu/cpu[0-3]/cpufreq/scaling_cur_freq"
    freqs = subprocess.check_output(cmd, shell=True).decode("utf-8")
    freqList = freqs.splitlines()

    for index, i in enumerate(freqList):
        curFreq = float(i)
        print("CPU" + str(index) + " : " + str(curFreq/1000000) + " GHz")

time.sleep(3)
readCPUs()
readCPUs()
readCPUs()
Python to check system info and status
Python script to check system info and status, for Python3. To print model of your board, Python version, IP, temperature, CPU usage, memory usage and disk usage.
checkit.py

checkit.py
import sys
import subprocess

cmd = "cat /proc/device-tree/model"
model = subprocess.check_output(cmd, shell=True).decode("utf-8")
print(model)

print("Python: " + sys.version)
cmd = "hostname -I"
IP = subprocess.check_output(cmd, shell=True).decode("utf-8")
print("IP: " + IP)

cmd = "vcgencmd measure_temp"
temp = subprocess.check_output(cmd, shell=True).decode("utf-8")
print(temp)

cmd = "top -bn1 | grep load | awk '{printf \"CPU Load: %.2f\", $(NF-2)}'"
CPU = subprocess.check_output(cmd, shell=True).decode("utf-8")
print(CPU)

cmd = "free -m | awk 'NR==2{printf \"Memory usage: %s/%s MB %.2f%%\", $3,$2,$3*100/$2 }'"
MemUsage = subprocess.check_output(cmd, shell=True).decode("utf-8")
print(MemUsage)

cmd = "df -h | awk '$NF==\"/\"{printf \"Disk usage: %d/%d GB %s\", $3,$2,$5}'"
DiskUsage = subprocess.check_output(cmd, shell=True).decode("utf-8")
print(DiskUsage)

Sunday, May 24, 2020
How to check Raspberry Pi 4B reversion 1.2
When the first time Raspberry Pi 4B released, it is a bug in USB-C power supply circuitry. If you use the official USB-C power supply, it should be no problem. If you use other cables (marked with an "e"), it may be have compatibility problem.
It's fixed in Raspberry Pi 4B rev 1.2. So, how can you identify the reversion of your board? Use any of the commands:
$ pinout

It is shown V1.2 in the output. And also shown c03112 in Revision column, you can check Raspberry Pi revision codes here.
or use the command:
$ cat /proc/device-tree/model

or:
$ cat /proc/cpuinfo
Revision is listed c03112.

You can also check it visually, refer to cnx-software post, Raspberry Pi 4 Rev 1.2 Fixes USB-C Power Issues, Improves SD Card Resilience.
Saturday, May 23, 2020
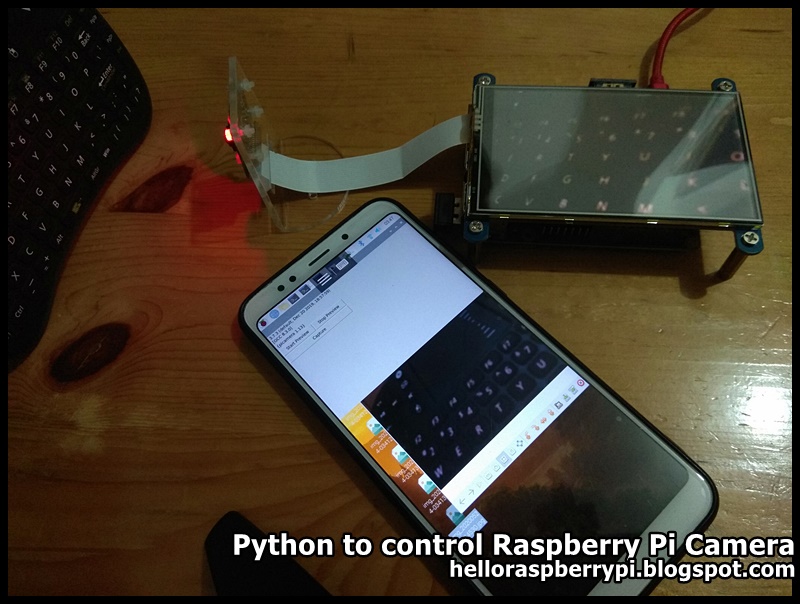
Python to control Raspberry Pi Camera
It's a simple Python script run on Raspberry Pi/Raspbian to perform simple control of camera, start preview, stop preview, and capture photo.
It run with Python3.
With Microsoft's Remote Desktop on Android device, it can be run remotely. The camera preview will be displayed on local screen.

xredp have to be installed in Raspberry Pi, with command:
$ sudo apt-get install xrdp
This video show how it run on Raspberry Pi 3 with Waveshare 4" HDMI LCD, run it on Android phone with Remote Desktop app. The local mounted display (4" HDMI LCD) is used as viewfinder.
Remark:
If you run the script locally, the preview will cover the GUI, but you can still click on it. Click the original position of the Stop Preview button to close the preview.
NOT WORK on High Quality Camera
Once I received High Quality Camera and tested on it, the script fail when capture continuously. Then I make a simple script to take photos using RPi Camera Module, work on v2.1, but also faile on High Quality Camera with "picamera.exc.PiCameraRuntimeError: No data received from sensor."
What's wrong on the script? or my Raspberry Pi High Quality Camera defected?
Tested on:
- Raspberry Pi 3B+
- Update Raspberry Pi OS
- Python 3.7.3
- picamera 1.13
doCappp.py
It run with Python3.
import sys
from tkinter import *
import picamera
from pkg_resources import require
import time

#event callback functions
def evStartPreviewBtnPressed():
    print("Start Preview")
    camera.start_preview()

def evStopPreviewBtnPressed():
    print("Stop Preview")
    camera.stop_preview()

def evCaptureBtnPressed():
    print("Capture")
    timeStamp = time.strftime("%Y%m%d-%H%M%S")
    targetPath="/home/pi/Desktop/img_"+timeStamp+".jpg"
    print(targetPath)
    camera.capture(targetPath)

print(sys.version)
print(require('picamera'))


#Prepare camera
camera = picamera.PiCamera()


root = Tk()
root.geometry("600x360")
root.wm_title("Hello")
#root.configure(bg = "#909090")

labelSys = Label(root, text=sys.version, justify=LEFT)
labelSys.grid(row=0, columnspan=2, sticky=W)
labelPiCameraVer = Label(root, text=require('picamera'), justify=LEFT)
labelPiCameraVer.grid(row=1, columnspan=2, sticky=W)


btnStartPreview = Button(root, text="Start Preview",
                         command=evStartPreviewBtnPressed)
btnStopPreview = Button(root, text="Stop Preview",
                        command=evStopPreviewBtnPressed)
btnStartPreview.grid(row=2, column=0, sticky=W+E)
btnStopPreview.grid(row=2, column=1, sticky=W+E)

btnCapture = Button(root, text="Capture",
                    command=evCaptureBtnPressed)
btnCapture.grid(row=3, columnspan=2, sticky=W+E)


root.mainloop()

#close tasks
camera.close()
With Microsoft's Remote Desktop on Android device, it can be run remotely. The camera preview will be displayed on local screen.
xredp have to be installed in Raspberry Pi, with command:
$ sudo apt-get install xrdp
This video show how it run on Raspberry Pi 3 with Waveshare 4" HDMI LCD, run it on Android phone with Remote Desktop app. The local mounted display (4" HDMI LCD) is used as viewfinder.
Remark:
If you run the script locally, the preview will cover the GUI, but you can still click on it. Click the original position of the Stop Preview button to close the preview.
NOT WORK on High Quality Camera
Once I received High Quality Camera and tested on it, the script fail when capture continuously. Then I make a simple script to take photos using RPi Camera Module, work on v2.1, but also faile on High Quality Camera with "picamera.exc.PiCameraRuntimeError: No data received from sensor."
What's wrong on the script? or my Raspberry Pi High Quality Camera defected?
Tested on:
- Raspberry Pi 3B+
- Update Raspberry Pi OS
- Python 3.7.3
- picamera 1.13
doCappp.py
import picamera
import time

with picamera.PiCamera() as camera:
    camera.start_preview()
    for i in range(5):
        camera.resolution = (1280, 720)
        time.sleep(1)
        filename = 'imageA%02d.jpg' % i
        camera.capture(filename)
        print('Captured %s' % filename)
    time.sleep(7)

    print("End")
    camera.stop_preview()
    time.sleep(1)
    print("End End")
    camera.close()
    print("End End End")
Tuesday, May 19, 2020
pinout command, to query Raspberry Pi GPIO pin-out information.
In update Raspbian, the pinout command was added. It's a funny and informative utility for querying Raspberry Pi GPIO pin-out information.
$ pinout

Related:
~ How to check Raspberry Pi 4B reversion 1.2, it provide more option to check your board version.
$ pinout

Related:
~ How to check Raspberry Pi 4B reversion 1.2, it provide more option to check your board version.
Check model and revision of your Raspberry Pi board
With the upadte Raspbian, you can read model and rev. of your Raspberry Pi board in /proc/device-tree/model. Enter the command in terminal:
$ cat /proc/device-tree/model

Related:
~ How to check Raspberry Pi 4B reversion 1.2, it provide more option to check your board version.
$ cat /proc/device-tree/model

Related:
~ How to check Raspberry Pi 4B reversion 1.2, it provide more option to check your board version.
Subscribe to:
Posts (Atom)