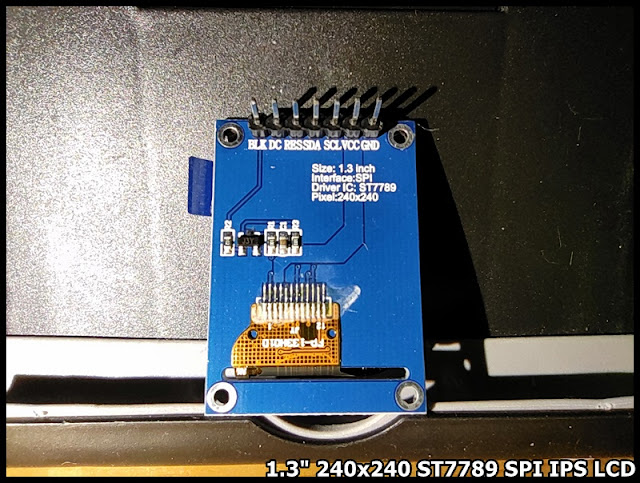
It's a 1.3" 240x240 ST7789 SPI IPS LCD.
This post show how to run MicroPython on Raspberry Pi Pico to drive this ST7789 SPI IPS LCD using library russhughes/st7789py_mpy.
Connection:
ST7789		Raspberry Pi Pico
=================================
VCC		3V3
GND		GND
SCL		GP10 (pin 14)
SDA		GP11 (pin 15)
RES		GP12 (pin 16)
DC		GP13 (pin 17)
BLK		3V3
Visit https://github.com/russhughes/st7789py_mpy, download lib/st7789py.py, save to Raspberry Pi Pico.
In my test, have to edit st7789py.py littlle bit, otherwise it will be reported with error:
AttributeError: 'ST7789' object has no attribute 'xstart'
Edit st7789py.py, to add the line under def __init__():
	self.xstart = xstart
	self.ystart = ystart
Download fonts/vga2_8x8.py and vga1_16x32.py (or any font files you want) to Raspberry Pi Pico under new directory "fonts".
Example MicroPython for Raspberry Pi Pico, mpyPico_st7789.py:
"""
Raspberry Pi Pico/MicroPython exercise
240x240 ST7789 SPI LCD
using MicroPython library:
https://github.com/russhughes/st7789py_mpy

"""

import uos
import machine
import st7789py as st7789
from fonts import vga2_8x8 as font1
from fonts import vga1_16x32 as font2
import random

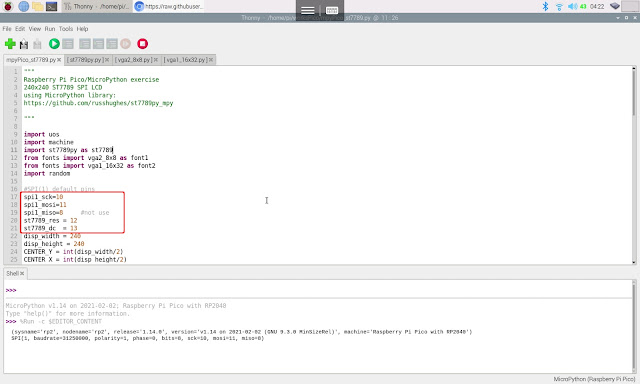
#SPI(1) default pins
spi1_sck=10
spi1_mosi=11
spi1_miso=8     #not use
st7789_res = 12
st7789_dc  = 13
disp_width = 240
disp_height = 240
CENTER_Y = int(disp_width/2)
CENTER_X = int(disp_height/2)

print(uos.uname())
spi1 = machine.SPI(1, baudrate=40000000, polarity=1)
print(spi1)
display = st7789.ST7789(spi1, disp_width, disp_width,
                          reset=machine.Pin(st7789_res, machine.Pin.OUT),
                          dc=machine.Pin(st7789_dc, machine.Pin.OUT),
                          xstart=0, ystart=0, rotation=0)

for r in range(255):
    display.fill(st7789.color565(r, 0, 0))

r_width = disp_width-20
r_height = disp_height-20
for g in range(255):
    display.fill_rect(10, 10, r_width, r_height, st7789.color565(0, g, 0))

r_width = disp_width-40
r_height = disp_height-40
for b in range(255):
    display.fill_rect(20, 20, r_width, r_height, st7789.color565(0, 0, b))

for i in range(255, 0, -1):
    display.fill(st7789.color565(i, i, i))

display.fill(st7789.BLACK)
display.text(font2, "Hello!", 10, 10)
display.text(font2, "RPi Pico", 10, 40)
display.text(font2, "MicroPython", 10, 70)
display.text(font1, "ST7789 SPI 240*240 IPS", 10, 100)
display.text(font1, "https://github.com/", 10, 110)
display.text(font1, "russhughes/st7789py_mpy", 10, 120)

for i in range(5000):
    display.pixel(random.randint(0, disp_width),
          random.randint(0, disp_height),
          st7789.color565(random.getrandbits(8),random.getrandbits(8),random.getrandbits(8)))

# Helper function to draw a circle from a given position with a given radius
# This is an implementation of the midpoint circle algorithm,
# see https://en.wikipedia.org/wiki/Midpoint_circle_algorithm#C_example
# for details
def draw_circle(xpos0, ypos0, rad, col=st7789.color565(255, 255, 255)):
    x = rad - 1
    y = 0
    dx = 1
    dy = 1
    err = dx - (rad << 1)
    while x >= y:
        display.pixel(xpos0 + x, ypos0 + y, col)
        display.pixel(xpos0 + y, ypos0 + x, col)
        display.pixel(xpos0 - y, ypos0 + x, col)
        display.pixel(xpos0 - x, ypos0 + y, col)
        display.pixel(xpos0 - x, ypos0 - y, col)
        display.pixel(xpos0 - y, ypos0 - x, col)
        display.pixel(xpos0 + y, ypos0 - x, col)
        display.pixel(xpos0 + x, ypos0 - y, col)
        if err <= 0:
            y += 1
            err += dy
            dy += 2
        if err > 0:
            x -= 1
            dx += 2
            err += dx - (rad << 1)

draw_circle(CENTER_X, CENTER_Y, 100)

for c in range(99):
    draw_circle(CENTER_X, CENTER_Y, c, st7789.color565(255, 0, 0))

for c in range(98):
    draw_circle(CENTER_X, CENTER_Y, c, st7789.color565(0, 255, 0))

for c in range(97):
    draw_circle(CENTER_X, CENTER_Y, c, st7789.color565(0, 0, 255))

print("- bye-")


No comments:
Post a Comment