Friday, March 25, 2016

Getting Started with Raspberry Pi Zero

Getting Started with Raspberry Pi Zero

This is an essential book about how to get started with Raspberry Pi Zero. Some common tasks and programming activities on Raspberry Pi Zero are described with a step-by-step approach. The following is highlight topics in this book:
* Introduction to Raspberry Pi Zero
* Operating System
* Powering Up and Running
* Connecting to a Network
* Deploying LAMP Stack
* Raspberry Pi Programming
* Accessing GPIO
* Raspberry Pi Zero Serial Debugging

Tuesday, March 22, 2016

Setup Bluetooth for Raspberry Pi 3/Raspbian Jessie, and pair/send file to Windows PC


To use the built-in Bluetooth of Raspberry Pi 3/Raspbian Jessie, we have to install some software:
$ sudo apt-get install pi-bluetooth
(it should be already installed in update Raspbian Jessie)
$ sudo apt-get install bluetooth bluez blueman

Then reboot.


This video show how to send/receive file between raspberry Pi 3/Raspbian Jessie and PC running Windows 10.


Monday, March 21, 2016

Make Buildroot (embedded Linux) for Raspberry Pi 2

Buildroot is a simple, efficient and easy-to-use tool to generate embedded Linux systems through cross-compilation.


To make sdcard image to run Buildroot on Raspberry Pi 2 using default config:

- Visit https://buildroot.org/ to download the latest stable release (2016.02 currently) - buildroot-2016.02.tar.gz.

- Unpack the downloaded file:
tar zxvf buildroot-2016.02.tar.gz

- Switch to the unpack folder:
cd buildroot-2016.02

- Copy the default config for Raspberry Pi 2:
$ cp configs/raspberrypi2_defconfig raspberrypi2_defconfig

- make:
$ make raspberrypi2_defconfig
$ make

- After make finished, buildroot-2016.02/output/images/sdcard.img will be created. It's the image file for Raspberry Pi 2.


- In my case, copy the sdcard.img file to Windows, and write to SD using Win32DiskImager.

- Then insert to Raspberry Pi 2 and boot-up. By default, the user "root" have no password.


Saturday, March 19, 2016

Install Qt5/Qt Creator for Raspberry Pi 3/Raspbian Jessie


This post show how to install Qt5 and QtCreator on Raspberry Pi 3 running Raspbian Jessie release 2016-03-18.

install qt5-default and qtcreator:
$ sudo apt-get install qt5-default
$ sudo apt-get install qtcreator

(Actually same as the steps to install on Raspberry Pi 2)

This video show installation remotely from Windows running PuTTY and Xming.


Remark:
The MicroSD used is:
Kingston Micro SDHC 32GB Class 10/U1 (Up to 80MB/s Read)
(KINGSTON SDC10G2/32GB - 80MB/s)


Remark@2017-04-11:
Please also read Jakob Brunhart comments below.


Friday, March 18, 2016

Thursday, March 17, 2016

Qt - Building Performant SDKs for Embedded Devices - feat. Raspberry Pi 2


by QtStudios

Learn how to develop C++/QML applications using Qt Creator IDE, while harnessing the full capabilities of the hardware with targeted cross-compiled build of Qt. This webinar will enable you to get the most out of the devices support out of the box with Qt for Device Creation and create highly performing SDKs for your own device of choice.

During the webinar, we will present:

* An overview of porting to an embedded device
* Highlight the importance of leveraging full hardware acceleration (OpenGL ES, vfp), hardware curser support
* Demonstrate custom Qt Wayland backend implementation for performance improvements
* How to create an integrated Qt SDK for a target device & cross compile Qt conveniently for any device
* Give guidance through the configure requirements required to get a performant version of Qt

We will demonstrate the performance of Qt on a Raspberry Pi 2, which is packaged for both the Rasbian & Arch Linux distributions & shipped with full Qt Creator integration and basic Wayland compositor to leverage OpenGL for hardware acceleration. Find an unparalleled development experience through a step by step process from integrating Qt with, but not limited to, the Raspberry Pi 2 to offloading more computational work on to the Pi hardware to free precious developer resources for ambitious projects.

Over 3 years ago, Qt was integrated on the Raspberry Pi, which included full hardware acceleration (OpenGL ES 2, vfp), hardware cursor support and a custom Qt Wayland backend implementation using Broadcom APIs. Although completed & publicly documented, packaging Qt in an optimal fashion has not been easy for a new user where mesa GL, no floating point unit usage, no Wayland, X11 standardization and on device compilation brings tears to any informed developers' eyes.


Monday, March 14, 2016

Install and run Chromium OS For Raspberry Pi 3

Chromium OS For All SBC is a project of porting The Chromium OS To The Raspberry Pi 2/3 And Other Single Board Computers.

Chromium OS run on Raspberry Pi 3

To install Chromium OS for Raspberry Pi 3 is very straightforward:
- Visit http://www.chromiumosforsbc.org/, download the latest version for Raspberry Pi 3; CHROMIUMRPI3 0.4 "Lenny Bruce" currently.
- Unpack and write the image to SD Card using Win32DiskImager.
- Boot-up on Raspberry Pi 3.

Install Chromium OS for Raspberry Pi 3 on SD Card


Run Chromium OS on Raspberry Pi 3 (and play Youtube video)

HTML5 test, Web Store, Google Photos and more...

Remark:
- MicroSD of SanDisk 32GB Ultra is used in my trail.


- Once the image wrote on SD, Windows cannot recognize it. To re-write image on the SD, my solution is to format it using digital camera, so Windows can recognize it.

Sunday, March 13, 2016

Install and run Kali Linux for Raspberry Pi 2

Kali Linux is a Penetration-Testing Distro Linux. It provide pre-built ARM Images for various devices, include Raspberry Pi and Raspberry Pi 2.

Kali Linux run on Raspberry Pi 2

The videos below show how to:
- Install Kali Linux for Raspberry Pi 2, on Windows 10 - download, verify, unpack and write image on SDCard.
To download Kali Linux for Raspberry Pi 2, visit http://docs.kali.org/kali-on-arm/install-kali-linux-arm-raspberry-pi, currently version 2.1.


- And first boot on Raspberry Pi 2.
(The default user and password are "root" and "toor" respectively)

Remark:
- SD card with at least 8 GB capacity. Class 10 cards are highly recommended. In my trial, 8G SD Card of Class 4 is used.


- I also tried to boot on Raspberry Pi 3, but not success and stop on color screen!

Thursday, March 10, 2016

Watch Youtube on Raspberry Pi 3/built-in WiFi


This video show how Youtube video play on Raspberry Pi 3:
- Raspbian Jessie 2016-02-26
- Load Youtube with built-in Web Browser
- Connect Internet via the Built- in WiFi


Display WiFi config using Linux command iwconfig


Iwconfig is similar to ifconfig(8), but is dedicated to the wireless interfaces. It is used to set the parameters of the network interface which are specific to the wireless operation (for example : the frequency). Iwconfig may also be used to display those parameters, and the wireless statistics (extracted from /proc/net/wireless).

All these parameters and statistics are device dependent. Each driver will provide only some of them depending on hardware support, and the range of values may change. Please refer to the man page of each device for details.

This video show iwconfig run on Raspberry Pi 3/Raspbian Jessie with build-in WiFi, to display WiFi info:


We can get WiFi link quality with command:
$ iwconfig wlan0 | grep -i quality


Raspberry Pi 3 open box and first boot Raspbian Jessie

This video show open box of the new Raspberry Pi 3:


This video show how Raspberry Pi 3 first boot Raspbian Jessie 2016-02-26 version. This version added support for Pi 3, including Wifi and Bluetooth, and provide option to set wifi country code in raspi-config.


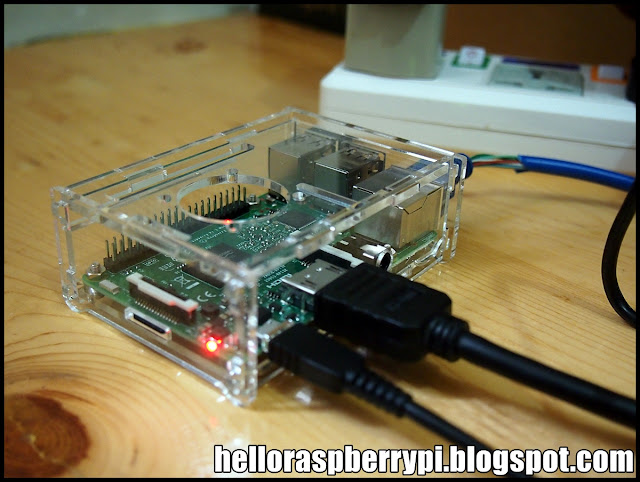
For temporary, a Raspberry Pi 2 transparent case is used.


Note, the LED is relocated on Raspberry Pi 3.


As always, I will update and upgrade apt-get and update firmware.
$ sudo apt-get update
$ sudo apt-get upgrade
$ sudo rpi-update

Sunday, March 6, 2016

Official Raspberry Pi 3 Case

The Official Case of the Raspberry Pi Foundation has been refreshed for the Pi 3. Designed with HATs in mind and featuring multiple removable panels. Enclose your board as much or as little as necessary to best suit your latest project.

Official case for the Raspberry Pi from the Raspberry Pi Foundation
Removable Lid provides easy access to the camera and display ports
Removable Side Panels with easy access to the GPIO port
Removable Top Frame
Designed with Pi HAT's in mind


Thursday, March 3, 2016

Buy Raspberry Pi 3 Model B Board

Raspberry Pi 3 Model B Board


  • Quad-Core Broadcom BCM2837 64bit ARMv8 processor 1.2GHz
  • 1GB RAM
  • BCM43143 WiFi on board
  • Bluetooth Low Energy (BLE) on board
  • Power source up to 2.5 Amps (can now power even more powerful devices over USB ports)


CanaKit Raspberry Pi 3 with 2.5A Micro USB Power Supply (UL Listed)


  • Includes Raspberry Pi 3 (RPi3) Model B Quad-Core 1.2 GHz 1 GB RAM
  • On-board WiFi and Bluetooth Connectivity
  • CanaKit 2.5A USB Power Supply with Micro USB Cable and Noise Filter - Specially designed for the Raspberry Pi 3 (UL Listed)
  • Set of 2 Heat Sinks
  • CanaKit Quick-Start Guide