Tuesday, December 31, 2013

Install PySide for Python 3 on Raspberry Pi

Enter the command to install PySide for Python 3:

$ sudo apt-get install python3-pyside

In Python 3, or IDLE3, enter:

import PySide

If no error reported, means PySide installed successfully. To check the installed version of PySide, enter:

PySide.__version__

Enter "Hello World" of Python 3 with PySide.
#!/usr/bin/python3

import sys
from PySide.QtCore import *
from PySide.QtGui import *

app = QApplication(sys.argv)
label=QLabel("Hello World")
label.show()
app.exec_()
sys.exit()

PySide for Python 3
PySide for Python 3


Related: Install PySide for Python 2 on Raspberry Pi

Install PySide for Python 2 on Raspberry Pi

PySide is an open source software project providing Python bindings for the Qt framework. To install PySide for Python 2 on Raspberry Pi, enter the command:
$ sudo apt-get install python-pyside

In Python, or IDLE, enter:

import PySide

If no error reported, means PySide installed successfully.
To check the installed version of PySide, enter:

PySide.__version__

Currently, version 1.1.1 installed.


"Hello World" of PySide for Python

Create a py module with the code, and run it.
#!/usr/bin/python

import sys
from PySide.QtCore import *
from PySide.QtGui import *

app = QApplication(sys.argv)
label=QLabel("Hello World")
label.show()
app.exec_()
sys.exit()

"Hello World" of PySide for Python


Related: Install PySide for Python 3 on Raspberry Pi

Java exercise: Schedule tasks run in a background thread using java.util.Timer

This example run a background task repeatly in 5 seconds to print system time.
java.util.Timer
Example of using java.util.Timer
import java.util.Timer;
import java.util.TimerTask;
import java.io.IOException;
import java.util.Date;

/**
 * @web helloraspberrypi.blogspot.com
 */
class testTimer{

    public static void main(String[] args) {
        Timer timer = new Timer(); 
        TimerTask timeTask = new TimerTask() {
            
            @Override
            public void run() {
                System.out.println((new Date()).toString());
            }
        };
        timer.schedule(timeTask, 0, 5000);
        
        System.out.println("Press ENTER to exit");
        
        try{
            System.in.read();
        }catch(IOException ex){
            System.out.println(ex.toString());
        }
        
        System.out.println("-BYE-");
        timer.cancel();
    }
}


Monday, December 30, 2013

How Raspberry Pi browsers support HTML5

This post compare how well the browsers in Raspberry Pi support HTML5, by visiting http://html5test.com. Tested browsers include the Pi's default browser Midori, Chromium by Google, and Iceweasel by Mozilla.

Midori 0.4.3
Midori 0.4.3

Chromium 22.0.1229.94 Built on Debian 7.0

Iceweasel 17.0.9
Iceweasel 17.0.9

Install Iceweasel browser on Raspberry Pi

Iceweasel is a derivative of Mozilla Firefox browser. To install Iceweasel, enter the command:
$ sudo apt-get install iceweasel

To run Iceweasel, enter the command:
$ iceweasel

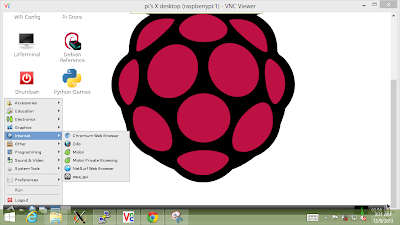
or click Start > Internet > Iceweasel
Iceweasel browser on Raspberry Pi


Related:
- Install Chromium on Raspberry Pi
How Raspberry Pi browsers support HTML5

Change text size of LXTerminal

To change text size of LXTerminal:

- Select Edit -> Preferences

- Click the Terminal Font button

- Select Size, and click OK.


Wednesday, December 25, 2013

Read Raspberry Pi system temperature in Java

This exercise show how to read Pi's system temperature in Java, using ProcessBuilder with command of "vcgencmd measure_temp".

Read Raspberry Pi system temperature in Java

import java.io.IOException;
import java.io.InputStream;
import java.util.logging.Level;
import java.util.logging.Logger;
import java.util.Scanner;

/**
 * @web helloraspberrypi.blogspot.com
 */
public class readTemp {

    public static void main(String[] args) {

        // Example to run "dir" in Windows
        String[] command = {"vcgencmd", "measure_temp"};
        StringBuilder cmdReturn = new StringBuilder();
        try {
            ProcessBuilder processBuilder = new ProcessBuilder(command);
            Process process = processBuilder.start();
            
            try (InputStream inputStream = process.getInputStream()) {
                int c;
                while ((c = inputStream.read()) != -1) {
                    cmdReturn.append((char) c);
                }
            }
            
            System.out.println(cmdReturn.toString());
            String stringTemp = measure_temp_toString(cmdReturn.toString());
            System.out.println("Get the numerical part as String: " + stringTemp);
            System.out.println("converte to float: " + cnvStringToFloat(stringTemp));

        } catch (IOException ex) {
            System.out.println(ex.toString());
        }
        
    }
    
    private static String measure_temp_toString(String src){
        return src.replaceAll("[^0123456789.]", "");
    }
    
    private static float cnvStringToFloat(String src){

        float result = (float)0.0;
        Scanner scanner = new Scanner(src);
        while(scanner.hasNext()){
            if(scanner.hasNextFloat()){
                result = scanner.nextFloat();
            }else{
                scanner.next(); //ignore
            }
        }
        return result;
    }
    
}

Sunday, December 22, 2013

Example of programming with java-gnome

Once installed libjava-gnome-java, we can prepare our "Hello World" using java-gnome. Basically it have the same function as "GTK+ exercise: GtkBox - A container box", a basic GTK+ Window with 3 Labels.

helloGnome
helloGnome
Edit helloGnome.java
import org.gnome.gtk.Gtk;
import org.gnome.gtk.Window;
import org.gnome.gtk.Widget;
import org.gnome.gdk.Event;
import org.gnome.gtk.Label;
import org.gnome.gtk.HBox;

public class helloGnome
{
    public static void main(String[] args) {
        final Window window;
        final HBox hBox;
        final Label label1, label2, label3;

        Gtk.init(args);

        window = new Window();
        window.setTitle("Hello Raspberry Pi - java-gnome exercise");
        window.connect(new Window.DeleteEvent() {
            public boolean onDeleteEvent(Widget source, Event event) {
                Gtk.mainQuit();
                return false;
            }
        });

        label1 = new Label("Label 1");
        label2 = new Label("Label 2");
        label3 = new Label("Label 3");

        hBox = new HBox(false, 3);
        hBox.add(label1);
        hBox.add(label2);
        hBox.add(label3);

        window.add(hBox);
        window.showAll();

        Gtk.main();
    }
}


Compile it with the command:
$ javac -classpath /usr/share/java/gtk-4.1.jar helloGnome.java

and run it:
$ java -classpath /usr/share/java/gtk-4.1.jar:. helloGnome

Install java-gnome on Raspberry Pi

java-gnome, currently 4.1, are the Java bindings for GTK and GNOME. Featuring a robust engineering design, completely generated internals, a lovingly crafted layer presenting the public API, and steadily increasing coverage of the underlying libraries.

You can use java-gnome to develop sophisticated user interfaces for Linux applications so that they richly integrate with the GNOME Desktop while leveraging the power of the Java language and your expertise with it.

To install java-gnome, enter the command:
$ sudo apt-get install libjava-gnome-java

Please notice that the file gtk-4.1.jar will be installed in /usr/share/java/, you will need it when compile and run the java using java-gnome.

/usr/share/java/gtk-4.1
Next:
Example of programming with java-gnome

Saturday, December 21, 2013

Java program with Swing GUI run on Raspberry Pi

This exercise create a hello.java with Swing GUI, develop and run on Raspberry Pi with JDK 8 Early Access Releases.

Java program with Swing GUI run on Raspberry Pi
hello.java
import java.awt.BorderLayout;
import java.awt.Dimension;
import java.awt.event.ActionEvent;
import java.awt.event.ActionListener;
import javax.swing.JButton;
import javax.swing.JFrame;
import javax.swing.JScrollPane;
import javax.swing.JTextArea;
import javax.swing.SwingUtilities;
 
/**
 * @web http://helloraspberrypi.blogspot.com/
 */
public class hello extends JFrame 
    implements ActionListener{
 
    JTextArea textArea;
    JButton buttonHello;
     
    public static void main(String[] args) {
        SwingUtilities.invokeLater(new Runnable() {
            public void run() {
                createAndShowGUI();
            }
        });
    }
 
    private static void createAndShowGUI() {
        hello myFrame = new hello();
 
        myFrame.setDefaultCloseOperation(JFrame.EXIT_ON_CLOSE);
         
        myFrame.prepareUI();
 
        myFrame.pack();
        myFrame.setVisible(true);
    }
     
    private void prepareUI(){
        textArea = new JTextArea();
        textArea.setEditable(false);
        JScrollPane panel = new JScrollPane(textArea);
        panel.setPreferredSize(new Dimension(300, 100));
         
        buttonHello = new JButton("Hello");
        buttonHello.addActionListener(this);
         
        getContentPane().add(panel, BorderLayout.CENTER);
        getContentPane().add(buttonHello, BorderLayout.PAGE_END);
    }
 
    @Override
    public void actionPerformed(ActionEvent e) {
        textArea.setText("Hello from Raspberry Pi");
    }

}

Compile it:
$ javac hello.java

Run:
$ java hello


"Hello World" Node.js on Raspberry Pi

This post create a Node.js code on Raspberry Pi, to run a http server on port 8081, it can be visit by other PC.
"Hello World" Node.js on Raspberry Pi
To create a "Hello World" of Node.js, create hellonode.js, enter the code:
var http = require("http");

var server = http.createServer(function(request, response) {
    response.writeHead(200, {"Content-Type": "text/plain"});
    response.write("Hello World of Node.js, on Raspberry Pi");
    response.end();
});
server.listen(8081);

This code setup a http server to monitor port 8081, using node.

Run node in Terminal:
$ node hellonode.js
or
$ node hellonode

From another PC in the network, open a browser and vist <Pi IP address>:8081 to visit the node's http server.


Related: Install Node.js on Raspberry Pi

Friday, December 20, 2013

Java exercise - Client and Server example III, run socket operation in background thread

This exercise implement socket operation of host in background thread, modify from last exercise, "ServerSocket stay in loop".

run socket operation in background thread
host.java
import java.io.IOException;
import java.io.OutputStream;
import java.io.PrintStream;
import java.net.ServerSocket;
import java.net.Socket;
import java.util.logging.Level;
import java.util.logging.Logger;

public class host {

    public static void main(String srgs[]) {

        int count = 0;

        //hard code to use port 8080
        try (ServerSocket serverSocket = new ServerSocket(8080)) {
            
            System.out.println("I'm waiting here: " + serverSocket.getLocalPort());
            
            while (true) {
                
                try {
                    Socket socket = serverSocket.accept();
                            
                    count++;
                    System.out.println("#" + count + " from "
                            + socket.getInetAddress() + ":" 
                            + socket.getPort());
                    
                    /*  move to background thread
                    OutputStream outputStream = socket.getOutputStream();
                    try (PrintStream printStream = new PrintStream(outputStream)) {
                        printStream.print("Hello from Raspberry Pi, you are #" + count);
                    }
                    */
                    HostThread myHostThread = new HostThread(socket, count);
                    myHostThread.start();
                    
                } catch (IOException ex) {
                    System.out.println(ex.toString());
                }
            }
        } catch (IOException ex) {
            System.out.println(ex.toString());
        }
    }
    
    private static class HostThread extends Thread{
        
        private Socket hostThreadSocket;
        int cnt;
        
        HostThread(Socket socket, int c){
            hostThreadSocket = socket;
            cnt = c;
        }

        @Override
        public void run() {

            OutputStream outputStream;
            try {
                outputStream = hostThreadSocket.getOutputStream();
                
                try (PrintStream printStream = new PrintStream(outputStream)) {
                        printStream.print("Hello from Raspberry Pi in background thread, you are #" + cnt);
                }
            } catch (IOException ex) {
                Logger.getLogger(host.class.getName()).log(Level.SEVERE, null, ex);
            }finally{
                try {
                    hostThreadSocket.close();
                } catch (IOException ex) {
                    Logger.getLogger(host.class.getName()).log(Level.SEVERE, null, ex);
                }
            }
        }
    }
}


Keep using the client.java in last exercise of "client and server to communicate using Socket".

Tuesday, December 17, 2013

Linux tips: run and kill process in background

To start a process and force it run in background, add the character '&' after the command:
$ [cmd] [args] &

To lists the jobs that you are running in the background, enter the command:
$ jobs

To kill a job running in background, using the kill command.

The video demo how it work on Raspberry Pi. A lxtask is open to monitor the running process. And two terminal are opened to run host (on right side) and client (on bottom-left). The host program is a long-running program. The client program send request to host. To know more about it, read the post "Java exercise - Client and Server example II, ServerSocket stay in loop". The video show how to run the host program in background.


Java exercise - Client and Server example II, ServerSocket stay in loop

In the previous exercise of "client and server to communicate using Socket", the host.java stay waiting request from client.java, and terminate after responsed. In this step, it's modified to stay in loop, for next request; until user press Ctrl+C to terminate the program.

host stey in loop
host stey in loop, until Ctrl+C.

import java.io.IOException;
import java.io.OutputStream;
import java.io.PrintStream;
import java.net.ServerSocket;
import java.net.Socket;

public class host {

    public static void main(String srgs[]) {

        int count = 0;

        //hard code to use port 8080
        try (ServerSocket serverSocket = new ServerSocket(8080)) {
            System.out.println("I'm waiting here: " 
                + serverSocket.getLocalPort());
            
            System.out.println(
                "This program will stay monitoring port 80.");
            System.out.println(
                "Until user press Ctrl+C to terminate.");
            
            while (true) {
                try (Socket socket = serverSocket.accept()) {
                    count++;
                    System.out.println("#" + count + " from "
                            + socket.getInetAddress() + ":" 
                            + socket.getPort());
                    OutputStream outputStream = socket.getOutputStream();
                    try (PrintStream printStream = 
                        new PrintStream(outputStream)) {
                            printStream.print(
                                "Hello from Raspberry Pi, you are #" 
                                + count);
                    }
                } catch (IOException ex) {
                    System.out.println(ex.toString());
                }
            }
        } catch (IOException ex) {
            System.out.println(ex.toString());
        }
    }
}

Keep using the client.java in last exercise of "client and server to communicate using Socket".


Next exercise: - Client and Server example III, run socket operation in background thread.

Develop Java application in Windows, run in Raspberry Pi.

This post show Java application developed jar in Windows using Netbeans IDE, can be run on both Windows and Raspberry Pi.

Java jar run on Windows and Raspberry Pi
Both Raspberry Pi and Windows 8.1 have the same JDK™ 8 Early Access Releases installed; JDK for Windows 32-bit on Windows, JDK of Linux ARMv6/7 VFP, HardFP ABI on Raspberry Pi.

demo video:

The code used here as a example can be found in "List system properties using java",  to list available system properties.

- Start Netbeans IDE in Windows, new a Java Application.

- Make sure it target the same Java platform running in Pi side. Right click on Project > Properties > Category of Libraries > Select Java Platform of JDK 1.8.

- Edit, and build your application.

- To know where is the generated jar, click Run > Clean and Build. The generated jar wil be in "Created dir: <...>\JavaTest\dist".

- Copy the generated jar, JavaTest.jar, to Raspberry Pi.

- Run it in Raspberry Pi side by enter:
java -jar JavaTest.jar


Updated:
- Remote run Java on Raspberry Pi, host from NetBeans on Windows 10

Monday, December 16, 2013

Tontec 2.4-inch TFT LCD 240x320 RGB Pixels Touch Screen Display Monitor For Raspberry Pi

Tontec 2.4-inch TFT LCD 240x320 RGB Pixels Touch Screen Display Monitor For Raspberry Pi

- This Raspberry Pi Screen is designed for raspberry pi tailored a expansion board, set LCD, touch, IO expansion, RTC functions in one, greatly enriched the raspberry pie can learn playability.

- "Display Part" use Hitachi's IPS technology company of the LCD, the screen viewing angle is large, close to 180 degrees; very high brightness and contrast, color of the screen is 8,16 I80 parallel, in order to save resources and high-speed IO the transmission of data, the owner after two months of struggle with CPLD design a SPI-I80 parallel converter, the measured SPI clock can reach 120M.

- "Touch Part" adopts TI (Texas Instruments) company TSC2003 chip, the chip I2C Interface 4-wire resistive controller, also with a 2-way BAT and AIN, can monitor 2-way 2-way voltage and other signals.

- "IO extension Part" using NS (National Semiconductor)'s LP3943, the I2C interface chip 16 IO expansion, which with the PWM circuit can drive the LED.

- "RTC real time clock" using NXP's PCF8563, the chip I2C interface, with a calendar. (This section is optional, standard shipping is blank, the customer can DIY)


  • Size: 2.4 inches
  • Color: 65K colors
  • Resolution: QVGA 240X320
  • Back light: 3 LED Parallel
  • Interface: SIP16, 8-pin 2.54mm single row


Related:
- Setup Tontec 2.4-inch TFT LCD 240x320 RGB Pixels Touch Screen Display Monitor For Raspberry Pi

Sunday, December 15, 2013

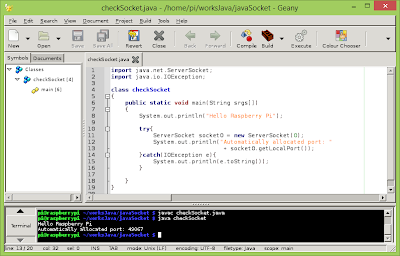
Find a free port using Java with ServerSocket(0)

Use the constructor ServerSocket(int port) of java.net.ServerSocket class with 0 to request a free port automatically, typically from an ephemeral port range. This port number can then be retrieved by calling getLocalPort.

Example:
import java.net.ServerSocket;
import java.io.IOException;

class checkSocket
{
    public static void main(String srgs[])
    {
        System.out.println("Hello Raspberry Pi");
        
        try{
            ServerSocket socket0 = new ServerSocket(0);
            System.out.println("Automatically allocated port: " 
                                + socket0.getLocalPort());
        }catch(IOException e){
            System.out.println(e.toString());
        }
        
    }
}

Find a free port using Java with ServerSocket(0)

Saturday, December 14, 2013

Friday, December 13, 2013

Install and program with GTK+ 3.0 in Python

To program Python with GTK+ 3.0, libgtk-3-dev have to be installed:
$ sudo apt-get install libgtk-3-dev
(referene: Install GTK+ 3.0 on Raspberry Pi)

Once installed, Python 2 (python and IDLE) can work use GTK+ 3.0 library to programming with GUI.

Dummy example of Python program with GTK+ 3.0
#!/usr/bin/python
from gi.repository import Gtk

win = Gtk.Window()
win.connect("delete-event", Gtk.main_quit)
win.show_all()
Gtk.main()

"Hello World" of Python 2.7.3 with GTK+ 3
To work with Python 3, python3-gi is needed. Otherwise will have ImportError of "No module named gi.repository". To install python3-gi, enter command:
sudo apt-get install python3-gi

ImportError: No module named gi.repository

"Hello World" of Python 3.2.3 with GTK+ 3

The Python GTK+ 3 Tutorial gives an introduction to writing GTK+ 3 applications in Python.

Raspberry Pi Cookbook: Finding your way around the GPIO connector

Learn what does what on the GPIO connector of Raspberry Pi board.


Thursday, December 12, 2013

Programming an Arduino from Raspberry Pi

Updated@2019-02-19:
Please check the updated post: Install Arduino IDE 1.8.8 on Raspberry Pi/Raspbian Stretch release 2018-11-13.

Learn how to install the Arduino IDE on your Raspberry Pi so that you can write and upload programs onto an Arduino.


Wednesday, December 11, 2013

Run system command and read output using Java

The exercise run system command with StringBuilder(), and read the output with InputStream.

import java.io.IOException;
import java.io.InputStream;
import java.util.logging.Level;
import java.util.logging.Logger;

/**
 *
 * @org java-buddy.blogspot.com
 * @web helloraspberrypi.blogspot.com
 */
public class df {

    public static void main(String[] args) {

        // Example to run "dir" in Windows
        String[] command = {"df", "-h", "/"};
        StringBuilder cmdReturn = new StringBuilder();
        try {
            ProcessBuilder processBuilder = new ProcessBuilder(command);
            Process process = processBuilder.start();
            
            try (InputStream inputStream = process.getInputStream()) {
                int c;
                while ((c = inputStream.read()) != -1) {
                    cmdReturn.append((char) c);
                }
            }
            System.out.println(cmdReturn.toString());

        } catch (IOException ex) {
            Logger.getLogger(df.class.getName())
                    .log(Level.SEVERE, null, ex);
        }
        
    }
    
}

Run system command and read output using Java

The code from Java-Buddy: ProcessBuilder to create operating system processes

Related: Read Pi's system temperature in Java, using ProcessBuilder with command of "vcgencmd measure_temp".

GTK+ C example with GUI created using Glade

This post show how to create GUI using Glade, and link the generated glade file in c code, then compile with gcc with GTK+ 3.0, to generate a executable program.


- Start glade, create something. Specify the window in TOPLEVEL with name "myname". Save as "testGlade.glade". We will refer them in our c code.
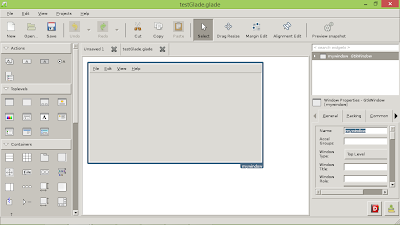
Create GUI with Glade
- Create our c source code, "test.c".
#include <gtk/gtk.h>

int main(int argc, char *argv[])
{
    GtkBuilder *gtkBuilder;
    GtkWidget *window;
    gtk_init(&argc, &argv);
    
    gtkBuilder = gtk_builder_new();
    gtk_builder_add_from_file(gtkBuilder, "testGlade.glade", NULL);
    window = GTK_WIDGET(gtk_builder_get_object(gtkBuilder, "mywindow"));
    
    g_object_unref(G_OBJECT(gtkBuilder));
    gtk_widget_show(window);
    gtk_main();
    
    return 0;
}

where "mywindow" is the window defined in Glade. And "testGlade.glade" is our saved glade file.

- Compile it with command:
$ gcc -Wall -g -o testGlade test.c `pkg-config --cflags --libs gtk+-3.0`

Where testGlade is the target executable file. Run it:
$ ./testGlade

Because we have do nothing on the code. The program just show a menu bar without action.


Remark:

It's commented to use following command:
gcc -Wall -g -o testGlade test.c $(pkg-config --cflags gtk+-3.0) $(pkg-config --libs gtk+-3.0)

~ thx teknikkim
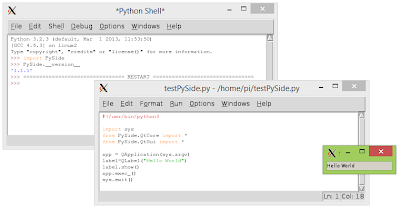
Install Glade on Raspberry Pi

Glade is a RAD tool to enable quick & easy development of user interfaces for the GTK+ toolkit and the GNOME desktop environment.

The user interfaces designed in Glade are saved as XML, and by using the GtkBuilder GTK+ object these can be loaded by applications dynamically as needed.

By using GtkBuilder, Glade XML files can be used in numerous programming languages including C, C++, C#, Vala, Java, Perl, Python,and others.


To install Glade on Raspberry Pi, enter the command:
sudo apt-get install glade

Glade on Raspberry Pi


Once installed, it can be found in Raspberry Pi desktop Start button > Programming > Glade. Or enter glade directly on Terminal.

The next post show how to link Glade file in c code, and compile a executable program.

Tuesday, December 10, 2013

GTK+ exercise: GtkBox - A container box

Example of using GtkBox.
GtkBox
Example of using GtkBox
helloGtkBox.c
#include <gtk/gtk.h>

int main(int argc, char *argv[])
{
    GtkWidget *window;
    GtkWidget *label1, *label2, *label3;
    GtkWidget *box;
    
    gtk_init(&argc, &argv);
    window = gtk_window_new(GTK_WINDOW_TOPLEVEL);
    
    gtk_window_set_title(GTK_WINDOW(window), 
        "Hello Raspberry Pi - GTK+ exercise"); 
        
    //terminate the application when the GtkWindow is destroyed
    g_signal_connect (window, "destroy", 
        G_CALLBACK(gtk_main_quit), NULL);
    
    label1 = gtk_label_new("Label 1");
    label2 = gtk_label_new("Label 2");
    label3 = gtk_label_new("Label 3");
    
    box = gtk_box_new(GTK_ORIENTATION_HORIZONTAL, 10);
    
    gtk_box_pack_start(GTK_BOX(box), label1, TRUE, FALSE, 5);
    gtk_box_pack_start(GTK_BOX(box), label2, TRUE, FALSE, 5);
    gtk_box_pack_start(GTK_BOX(box), label3, TRUE, FALSE, 5);
    
    gtk_container_add(GTK_CONTAINER(window), box);
    gtk_widget_show_all(window);
    
    gtk_main();
    
    return 0;
}


Use Remmina (remote desktop client) from Linux to log-in Raspberry Pi xrdp server
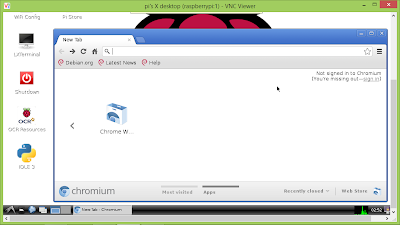
In previous posts, it show how to "install xrdp (X Remote Desktop Protocol) on Raspberry Pi and log-in from Windows using Remote Desktop Connection" and "log-in from Android using Microsoft Remote Desktop app". We can also log-in from Linux with Remmina (remote desktop client).

If you are running Ubuntu, may be you already have Remmina installed. If not, install with the command:
$ sudo apt-get install remmina

and run it with 

$ remmina


2.4GHz Wireless Entertainment Keyboard with Touchpad

Hausbell ® Mini H7 2.4GHz Wireless Entertainment Keyboard with Touchpad for PC, Pad, Andriod TV Box, Google TV Box, Xbox360, PS3 & HTPC/IPTV
Quickview: 
This is a wonderful combo, 2.4GHz Mini Wireless QWERTY keyboard, TouchPad combo, with USB interface adapter for the lectuer, sales manager, presenter and others, from within a 15' radius make a presentation and operate PC wirelessly. Change slides and screen options, write on the screen, emphasize words and objects just by using this wireless mini keyboard and mouse with touchpad. Perfect for PC, Pad, Andriod TV Box, Google TV Box, etc. 

Features: 
92 keys, 2.4GHz wireless Keyboard with Touchpad. 
Touchpad DPI adjustable functions. 
Built-in high sensitive smart touchpad with 360-degree flip design. 
Mini QWERTY keyboard with multimedia control keys and PC gaming control keys. 
Auto sleep and auto wake mode. 
Innovative shape, protable, elegant. 
The Ergonomically handheld design is easy to carry and operate. 
Build-in removable rechargable Li-ion battery that has longer standby time. 
Perfect for PC, Pad, Andriod TV Box, Google TV Box, for Xbox360, for PS3, HTPC/IPTV, etc. 

Specification: 
Operating range: 15 meters(MAX), without signal disturbance and no direction limit. 
Frequency range: 2.403GHZ ~ 2.480GHZ 
Operational voltage: 3.3V 
Charge Voltage: 4.4V ~ 5.25V 
Modulation: GFSK 
Channel: 78channels 
TX Power: less than +5dBm 
Transmission rate: 1M bit/sec 
Frequency tolerance: +/-30ppm 
Power consumption: 55mA(on), 1mA(sleep) 
Color:Black 
Battery Type: Built-in lithium-ion battery 
Notice: After 3 minutes without any operating will into sleep mode, press any key about 1s to wake up. 

Package including: 
1 * Wireless keyboard 
1 * Wireless receiver 
1 * Charging data cable 
1 * User manual 
Note:If your device without USB 2.0 jack(Plug the Wireless receiver),you need buy one.

Monday, December 9, 2013

Remote control Raspberry Pi from Android with Microsoft Remote Desktop app

With xrdp installed on your Raspberry Pi, you can remote log-in your Pi from Android device with Microsoft Remote Desktop app.

Microsoft Remote Desktop app
Microsoft Remote Desktop app run on Android, log-in Raspbery Pi

Demo video:

xrdp (X Remote Desktop Protocol) on Raspberry Pi + Remote Desktop Connection on Windows

xrdp (X Remote Desktop Protocol) is a Linux implementation of the Windows Remote Desktop Server/Terminal Server. With xrdp installed in your Raspberry Pi, you can remotely control your Raspberry Pi with Microsoft Remote Desktop Client (mstsc.exe) or any Linux client, also from Android device.

Remote Desktop Connection
Remote Desktop Connection run on Windows 8, log-in Raspberry pi.
You can install it in Raspberry Pi with the commnad:
sudo apt-get install xrdp

In Windows side, search Remote Desktop Connection, log-in with your your pi user name and password.


Related:
Remote control Raspberry Pi from Android with Microsoft Remote Desktop app
Use Remmina (remote desktop client) from Linux

Install GTK+ 3.0 on Raspberry Pi

The former post introduced how to "Install gtk+ 2.0 on Raspberry Pi". To install GTK+ 3.0, enter the command:
$ sudo apt-get install libgtk-3-dev
(NOT sudo apt-get install libgtk3.0-dev)

Then compile the Hello World in the example with gtk+ 3.0 config, enter the command:
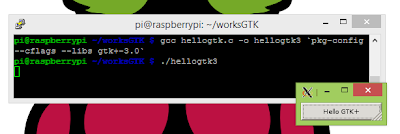
$ gcc hellogtk.c -o hellogtk3 `pkg-config --cflags --libs gtk+-3.0`

hellogtk3
hellogtk3


Comapre of Hello World compiled with GTK+ 2.0 vs GTK+ 3.0


Related:
- Install and program with GTK+ 3.0 in Python

Sunday, December 8, 2013

Install Chromium on Raspberry Pi

To install Chromium on Raspberry Pi, enter the command in Terminal:
$ sudo apt-get install chromium

After installed, you can run chromium in command line, by entering:
$ chromium

or from Pi's desktop, Start > Internet > Chromium Web Browser

run Chromium Web Browser from Raspberry Pi desktop
Start > Internet > Chromium Web Browser

Chromium on Raspberry Pi


Related:
- Install Iceweasel browser on Raspberry Pi
- How Raspberry Pi browsers support HTML5

GertDuino - Arduino Add-On Board for Raspberry Pi

Want to do more with your Arduino shields? The Gertduino is an Arduino and Arduino Uno compatible GPIO expansion board designed exclusively for the Raspberry Pi by Gert van Loo. 

GertDuino offers onboard Atmega 328 shield hosting which will execute Atmega 328 code written and compiled on the Raspberry Pi. The onboard Atmega 48 provides RTC, IrDA front-end, and additional computational capability.


  • Atmega 328 (Arduino-Uno® compatible)
  • Reset button
  • 2 user push buttons
  • 6 LEDs
  • IRDA interface


Create a simple custom HTTPServer with Python

The example demonstrate how to implement a simple HTTPServer using Python, with custom HTML. The port number, 8080, is hard coded in py. You can visit it by enter <Raspberry Pi IP>:8080 in your browser. To end the server, press Ctrl-C.

a simple custom HTTPServer with Python
Enter the code:
#!/usr/bin/python
from BaseHTTPServer import BaseHTTPRequestHandler,HTTPServer

class myHandler(BaseHTTPRequestHandler):
    def do_GET(self):
        self.send_response(200)
        self.send_header('Content-type','text/html')
        self.end_headers()
        self.wfile.write(
            "Hello from <b>Raspberry Pi</b> running <b><i>Python</i></b>")
        self.wfile.write(
            "<a href='http://helloraspberrypi.blogspot.com'>Hello Raspberry Pi</>")
        return

try:
    server = HTTPServer(('', 8080), myHandler)
    print 'HTTPServer started'
    server.serve_forever()

except KeyboardInterrupt:
    print 'server.socket.close()'
    server.socket.close()


You can run it in IDLE, or direct run it in command line:
$ python myPythonHttpServer.py

Saturday, December 7, 2013

JavaFX animation on raspberry Pi

The exercise draw animation on Raspberry Pi base on user input. What it can do:
  • Load image from internet
  • Detect mouse action to draw the path
  • The image will run following the path

Please note that the JavaFX code have not handle the exit case. So if you run on local console, you cannot exit the program.

The program is developed on Windows 8 with Netbeans. The original Java code is copied from Java-Buddy. Modified as:
package javafx_path;

import javafx.animation.PathTransition;
import javafx.animation.PathTransitionBuilder;
import javafx.application.Application;
import javafx.event.EventHandler;
import javafx.scene.Group;
import javafx.scene.Scene;
import javafx.scene.image.Image;
import javafx.scene.image.ImageView;
import javafx.scene.input.MouseEvent;
import javafx.scene.paint.Color;
import javafx.scene.shape.LineTo;
import javafx.scene.shape.MoveTo;
import javafx.scene.shape.Path;
import javafx.stage.Stage;
import javafx.util.Duration;

/**
 *
 * @org java-buddy.blogspot.com
 * @web helloraspberrypi.blogspot.com
 */
public class JavaFX_Path extends Application {

    PathTransition pathTransition;

    @Override
    public void start(Stage primaryStage) {
        primaryStage.setTitle("java-buddy.blogspot.com");
        Group root = new Group();
        Scene scene = new Scene(root, 800, 600, Color.WHITE);

        //load image from internet
        final Image image1 = new Image("http://goo.gl/kYEQl");
        
        final ImageView imageView = new ImageView();
        imageView.setImage(image1);

        final Path path = new Path();
        path.setStrokeWidth(1);
        path.setStroke(Color.BLACK);

        //Mouse button pressed 
        //- clear path and start from the current X, Y.
        scene.onMousePressedProperty().set(
                new EventHandler<MouseEvent>() {

            @Override
            public void handle(MouseEvent event) {
                path.getElements().clear();
                path.getElements().add(
                        new MoveTo(event.getX(), event.getY()));
            }
        });

        //Mouse dragged - add current point.
        scene.onMouseDraggedProperty().set(
                new EventHandler<MouseEvent>() {

            @Override
            public void handle(MouseEvent event) {
                path.getElements().add(
                        new LineTo(event.getX(), event.getY()));
            }
        });

        //Mouse button released,  finish path.
        scene.onMouseReleasedProperty().set(
                new EventHandler<MouseEvent>() {

            @Override
            public void handle(MouseEvent event) {
                pathTransition = PathTransitionBuilder.create()
                        .node(imageView)
                        .path(path)
                        .duration(Duration.millis(5000))
                        .orientation(PathTransition.OrientationType
                                .ORTHOGONAL_TO_TANGENT)
                        .cycleCount(1)
                        .build();

                pathTransition.play();
            }
        });

        root.getChildren().add(imageView);
        root.getChildren().add(path);
        primaryStage.setScene(scene);
        primaryStage.show();
    }

    public static void main(String[] args) {
        launch(args);
    }

}

Copy the generated jar,JavaFX_Path.jar, to Raspberry Pi. Then run it in text console by enter:
$ java -jar JavaFX_Path.jar


Related:
- Run JavaFX on Raspberry Pi

Friday, December 6, 2013

Hello GTK+ 2.0

Modified Hello GTK+
Last post show how to Install gtk+ on Raspberry Pi and with a very simple "Hello World" to GTK+. It's modified version of the Hello World:

  • To terminal terminate the application when the GtkWindow is destroyed, connect "destroy" to gtk_main_quit callback using g_signal_connect()
  • Add a GtkWidget of button to print "Hello GTK+\n" on screen by calling g_print().
Example code:
#include <gtk/gtk.h>

static void hello(GtkWidget *widget, gpointer   data)
{
 g_print("Hello GTK+\n");
}

int main(int argc, char *argv[])
{
 GtkWidget *window;
 GtkWidget *buttonHello;
 
 gtk_init(&argc, &argv);
 window = gtk_window_new(GTK_WINDOW_TOPLEVEL);
 
 buttonHello = gtk_button_new_with_label("Hello GTK+");
 g_signal_connect(buttonHello, "clicked", 
  G_CALLBACK(hello), NULL);
 
 //terminate the application when the GtkWindow is destroyed
 g_signal_connect (window, "destroy", 
  G_CALLBACK(gtk_main_quit), NULL);
  
 gtk_container_add(GTK_CONTAINER (window), buttonHello);
 gtk_widget_show(buttonHello);
 gtk_widget_show(window);

 gtk_main();

 return(0);
}


Compile and run the program as describe in last post.