Monday, March 30, 2015

Java get CPU frequency by "cat /sys/.../scaling_cur_freq"

This example show Java program to get CPU frequency with Linux command "cat /sys/devices/system/cpu/cpu#/cpufreq/scaling_cur_freq", where # is the cpus' number.


Last post show a Python version to get CPU frequency, and the post in my another blog show a Android version. Here is a Java SE version.

JavaRead_scaling_cur_freq.java
package javaread_scaling_cur_freq;

import java.io.BufferedReader;
import java.io.File;
import java.io.FileFilter;
import java.io.IOException;
import java.io.InputStreamReader;
import java.util.logging.Level;
import java.util.logging.Logger;
import java.util.regex.Pattern;

public class JavaRead_scaling_cur_freq {

    public static void main(String[] args) {
        readCpuFreqNow();
    }

    static private void readCpuFreqNow() {
        File[] cpuFiles = getCPUs();
        System.out.println("number of cpu: " + cpuFiles.length);

        for (File cpuFile : cpuFiles) {
            String path_scaling_cur_freq 
                = cpuFile.getAbsolutePath() + "/cpufreq/scaling_cur_freq";
            System.out.println(path_scaling_cur_freq);
            System.out.println(cmdCat(path_scaling_cur_freq));
        }

    }
    
    //run Linux command 
    //$ cat f
    static private String cmdCat(String path){
        StringBuilder stringBuilder = new StringBuilder();
        
        Process process;
        try {
            process = Runtime.getRuntime().exec("cat " + path);
            process.waitFor();
            
            BufferedReader reader = 
                new BufferedReader(new InputStreamReader(process.getInputStream()));
            
            String line;   
            while ((line = reader.readLine())!= null) {
                stringBuilder.append(line).append("\n");
            }
            
        } catch (IOException | InterruptedException ex) {
            Logger.getLogger(JavaRead_scaling_cur_freq.class
                .getName()).log(Level.SEVERE, null, ex);
        }

        return stringBuilder.toString();
    }

    /*
     * Get file list of the pattern
     * /sys/devices/system/cpu/cpu[0..9]
     */
    static private File[] getCPUs() {

        class CpuFilter implements FileFilter {

            @Override
            public boolean accept(File pathname) {
                return Pattern.matches("cpu[0-9]+", pathname.getName());
            }
        }

        File dir = new File("/sys/devices/system/cpu/");
        File[] files = dir.listFiles(new CpuFilter());
        return files;
    }

}


This video show the code build on Raspberry Pi 2 using NetBeans IDE.


The code work on other Linux also, such as Ubuntu. This video show the jar build on Raspberry Pi 2, copy to Ubuntu Linux and run directly.


Related:
- Install NetBeans IDE on Raspberry Pi 2/Raspbian, to program using Java

Python display CPUs frequency graphically, run on Raspberry Pi 2/Linux


In Linux, the file "/sys/devices/system/cpu/*/cpufreq/scaling_cur_freq" show the available frequency your CPU(s) are scaled to currently, in KHz.

In Raspberry Pi 2/Raspbian, where is:
/sys/devices/system/cpu/cpu0/cpufreq/scaling_cur_freq
/sys/devices/system/cpu/cpu1/cpufreq/scaling_cur_freq
/sys/devices/system/cpu/cpu2/cpufreq/scaling_cur_freq
/sys/devices/system/cpu/cpu3/cpufreq/scaling_cur_freq

This Python 2 example run on Raspberry Pi 2, to display CPU frequency graphically. (It seem that all CPU run on the same frequency)


plotCpuFreq.py
import os
import matplotlib.pyplot as plt
from drawnow import *

# Run on Raspberry Pi 2
# 4 CPUs
cpu0Freq = []
cpu1Freq = []
cpu2Freq = []
cpu3Freq = []

plt.ion()
cnt=0

def plotCpuFreq():
    plt.ylim(0,1500000)
    plt.title('Raspberry Pi 2 CPUs Frequency')
    plt.grid(True)
    plt.ylabel('KHz')
    plt.plot(cpu0Freq, 'r^-', label='cpu0')
    plt.plot(cpu1Freq, 'c>-', label='cpu1')
    plt.plot(cpu2Freq, 'bv-', label='cpu2')
    plt.plot(cpu3Freq, 'm<-', label='cpu3')
    plt.legend(loc='upper right')

#pre-load dummy data
for i in range(0,100):
    cpu0Freq.append(0)
    cpu1Freq.append(0)
    cpu2Freq.append(0)
    cpu3Freq.append(0)
    
while True:
    cpu0 = os.popen("awk '{print $1}' /sys/devices/system/cpu/cpu0/cpufreq/scaling_cur_freq").readline()
    cpu1 = os.popen("awk '{print $1}' /sys/devices/system/cpu/cpu1/cpufreq/scaling_cur_freq").readline()
    cpu2 = os.popen("awk '{print $1}' /sys/devices/system/cpu/cpu2/cpufreq/scaling_cur_freq").readline()
    cpu3 = os.popen("awk '{print $1}' /sys/devices/system/cpu/cpu3/cpufreq/scaling_cur_freq").readline()

    print(cpu0 + " " + cpu1 + " " + cpu2 + " " + cpu3)
    cpu0Freq.append(cpu0)
    cpu0Freq.pop(0)
    cpu1Freq.append(cpu1)
    cpu1Freq.pop(0)
    cpu2Freq.append(cpu2)
    cpu2Freq.pop(0)
    cpu3Freq.append(cpu3)
    cpu3Freq.pop(0)
    
    drawnow(plotCpuFreq)
    plt.pause(1)


To install needed libraries on Raspberry Pi, refer to "Install numpy, matplotlib and drawnow for Python 2".


The almost same code run on Linux with dual core.


plot2CpuFreq.py
import os
import matplotlib.pyplot as plt
from drawnow import *

# Run on Dual Core Atom
# with 2 CPU
cpu0Freq = []
cpu1Freq = []

plt.ion()
cnt=0

def plotCpuFreq():
    plt.ylim(0,2000000)
    plt.title('Dual Core CPUs Frequency')
    plt.grid(True)
    plt.ylabel('KHz')
    plt.plot(cpu0Freq, 'r^-', label='cpu0')
    plt.plot(cpu1Freq, 'c>-', label='cpu1')
    plt.legend(loc='upper right')

#pre-load dummy data
for i in range(0,100):
    cpu0Freq.append(0)
    cpu1Freq.append(0)
    
while True:
    cpu0 = os.popen("awk '{print $1}' /sys/devices/system/cpu/cpu0/cpufreq/scaling_cur_freq").readline()
    cpu1 = os.popen("awk '{print $1}' /sys/devices/system/cpu/cpu1/cpufreq/scaling_cur_freq").readline()

    print(cpu0 + " " + cpu1)
    cpu0Freq.append(cpu0)
    cpu0Freq.pop(0)
    cpu1Freq.append(cpu1)
    cpu1Freq.pop(0)
    
    drawnow(plotCpuFreq)
    plt.pause(1)


Sunday, March 29, 2015

Python display Raspberry Pi load average graphically

The file /proc/loadavg indicate the load average figures giving the number of jobs in the run queue (state R) or waiting for disk I/O (state D) averaged over 1, 5, and 15 minutes. This Python 2 example read the first figure (over 1 minutes) every second, and plot to figure using Matplotlib.


plotLoadAvg.py
import os
import matplotlib.pyplot as plt
from drawnow import *

loadavg = []

plt.ion()
cnt=0

def plotLoadAvg():
    plt.ylim(0,4)
    plt.title('Raspberry Pi load average')
    plt.grid(True)
    plt.ylabel('usage')
    plt.plot(loadavg, 'bo-', label='usage')
    plt.legend(loc='upper right')

#pre-load dummy data
for i in range(0,100):
    loadavg.append(0)
    
while True:

    usage = os.popen("awk '{print $1}' /proc/loadavg").readline()
    print(usage)
    loadavg.append(usage)
    loadavg.pop(0)
    drawnow(plotLoadAvg)
    plt.pause(1)


For installation of the libraries, read "Install numpy, matplotlib and drawnow for Python 2".

Display Raspberry Pi CPU temperature graphically, using Python 2 with Matplotlib and drawnow

Python 2 example to display Raspberry Pi CPU temperature graphically, with Matplotlib and drawnow.


This exercise work on Python 2 and need matplotlib and drawnow, refer to "Install numpy, matplotlib and drawnow for Python 2".

plotTemp.py
import os
import matplotlib.pyplot as plt
from drawnow import *

tempC = []

plt.ion()
cnt=0

def plotTempC():
    plt.ylim(20,80)
    plt.title('Raspberry Pi core temperture')
    plt.grid(True)
    plt.ylabel('Temp C')
    plt.plot(tempC, 'rx-', label='Degrees C')
    plt.legend(loc='upper right')

#pre-load dummy data
for i in range(0,26):
    tempC.append(0)
    
while True:

    ostemp = os.popen('vcgencmd measure_temp').readline()
    temp = (ostemp.replace("temp=", "").replace("'C\n", ""))
    print(temp)
    tempC.append(temp)
    tempC.pop(0)
    drawnow(plotTempC)
    plt.pause(.5)


For Python 3:

Matplotlib for Python 3 is not support currently. I tried to build it from source (refer "Install numpy, matplotlib and drawnow for Python 2" and "Fail to build matplotlib for Python3, run on Raspberry Pi 2"), but nothing plotted while running.


Similar example without using drawnow, "Plot RPi 2 core temperature using Python 2 and matplotlib.pyplot".

Fail to build matplotlib for Python3, run on Raspberry Pi 2

matplotlib is not support Python 3 on Raspberry Pi/Raspbian currently. I tried to build from source. Even success in build (with something error in middle steps), install, and import in IDLE 3. But fail (nothing plotted) in running.

Here is my steps to build matplotlib on Raspberry Pi 2/Raspbian:
$ sudo apt-get install python3-dev
$ git clone https://github.com/matplotlib/matplotlib
$ cd matplotlib
$ python3 setup.py build
$ sudo python3 setup.py install


BUT, fail to plot anything at run time! refer to the post "Display Raspberry Pi CPU temperature graphically, using Python 2 with Matplotlib".


Install numpy, matplotlib and drawnow for Python 2

This post show steps to install numpy, matplotlib and drawnow for Python 2 on Raspberry Pi, to prepare my exercise "Display Raspberry Pi CPU temperature graphically, using Python 2 with Matplotlib". The steps are same as in other Linux such as Ubuntu.

To check if your system have numpy, matplotlib and drawnow installed, enter the command in Python Shell:

>>> import numpy
>>> import matplotlib
>>> import drawnow

If you get error message like this, you have to install it.
ImportError: No module named numpy
ImportError: No module named matplotlob
ImportError: No module named drawnow

Install numpy, matplotlib and drawnow for Python 2:
$ sudo apt-get install python-numpy
$ sudo apt-get install python-matplotlib
$ sudo apt-get install python-pip
$ sudo pip install drawnow


For Python 3:

To install numpy and drawnow for Python 3 on Raspberry Pi, enter the command:
Install for Python 3:
$ sudo apt-get install python3-numpy
$ sudo apt-get install python3-pip
$ sudo pip-3.2 install drawnow

For matplotlib for Python 3, it seem not supported on Raspbian currently. I tried to build from source, refer to the post "Fail to build matplotlib for Python3, run on Raspberry Pi 2".


Saturday, March 28, 2015

Python to get core temperature of Raspberry Pi

On Raspberry Pi/Raspbian, the command "vcgencmd measure_temp" shows core temperature. It's a Python example to get current temperature.


import os 

#Get CPU temperature using 'vcgencmd measure_temp'                                      
def measure_temp():
    temp = os.popen('vcgencmd measure_temp').readline()
    return(temp.replace("temp=","").replace("'C\n",""))

print(measure_temp())


more:
- Display Raspberry Pi CPU temperature graphically, using Python 2 with Matplotlib

Python display memory usage on Raspberry Pi/Linux

Linux command free display amount of free and used memory in the system. This example run the command "free -h" using Python, to display memory usage. It work on Raspberry Pi and also other Linux.


#Linux command free - Display amount of free and used memory in the system
# Example:
#pi@raspberrypi ~ $ free -h
#             total       used       free     shared    buffers     cached
#Mem:          863M       272M       591M         0B        19M       174M
#-/+ buffers/cache:        77M       785M
#Swap:          99M         0B        99M
#
# This sample run "free -h" in Python and get the result 
import os 

def getFreeDescription():
    free = os.popen("free -h")
    i = 0
    while True:
        i = i + 1
        line = free.readline()
        if i==1:
            return(line.split()[0:7])
                                 
def getFree():
    free = os.popen("free -h")
    i = 0
    while True:
        i = i + 1
        line = free.readline()
        if i==2:
            return(line.split()[0:7])

# Disk information
description = getFreeDescription()
mem = getFree()

print(description)
print(mem)
print(description[0] + " : " + mem[1])
print(description[1] + " : " + mem[2])
print(description[2] + " : " + mem[3])
print(description[3] + " : " + mem[4])
print(description[4] + " : " + mem[5])
print(description[5] + " : " + mem[6])


Run on Raspberry Pi 2/Raspbian:

Run on Ubuntu Linux:

Python get file system disk space usage, on Raspberry Pi/Linux

The linux command df report file system disk space usage. This example implement with Python, run the command "df -h /" to get disk usage in root, /.


# Linux command df - report file system disk space usage
# Example:
# pi@raspberrypi ~ $ df -h /
# Filesystem      Size  Used Avail Use% Mounted on
# /dev/root        30G  6.8G   22G  25% /
#
# This sample run "df -h /" in Python and get the result 
import os 

def getDfDescription():
    df = os.popen("df -h /")
    i = 0
    while True:
        i = i + 1
        line = df.readline()
        if i==1:
            return(line.split()[0:6])
                                 
def getDf():
    df = os.popen("df -h /")
    i = 0
    while True:
        i = i + 1
        line = df.readline()
        if i==2:
            return(line.split()[0:6])

# Disk information
description = getDfDescription()
disk_root = getDf()

print(disk_root)
print(description[0] + " : " + disk_root[0])
print(description[1] + " : " + disk_root[1])
print(description[2] + " : " + disk_root[2])
print(description[3] + " : " + disk_root[3])
print(description[4] + " : " + disk_root[4])
print(description[5] + " : " + disk_root[5])


Basically, it work on any Linux.

Thursday, March 26, 2015

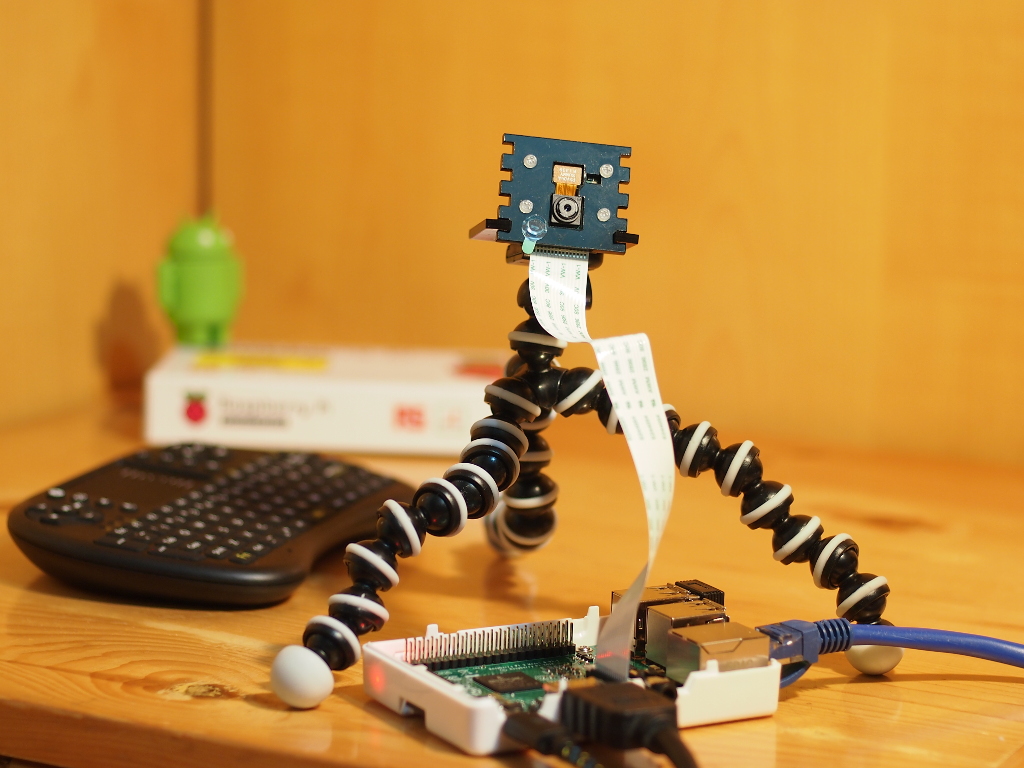
My Raspberry Pi Camera Module

Just purchased a Raspberry Pi Camera Module :)


first shoot:
raspistill -o cam.jpg


Setup Raspberry Pi Camera Module:


Refer to the documentation page to setup.

Microsoft Remote Desktop on Android, login xrdp on Raspberry Pi

Easy install xrdp on Raspberry Pi (suppose it work on any Linux), remote login from Android with Microsoft Remote Desktop app.


In Raspberry Pi, enter the command to install xrdp:
$ sudp apt-get install xrdp


In Android, install the Microsoft Remote Desktop app from Google Play:


This video show how to login Raspberry Pi xrdp using Microsoft Remote Desktop on Android.

Wednesday, March 25, 2015

Monday, March 23, 2015

Set JAVA_HOME for Raspbian pre-loaded java 1.8.0

Current Raspbian (version 2015-02-16) preload with java 1.8.0. By default, both java and javac are in PATH (that's why we can run java and javac directly), but no JAVA_HOME set.

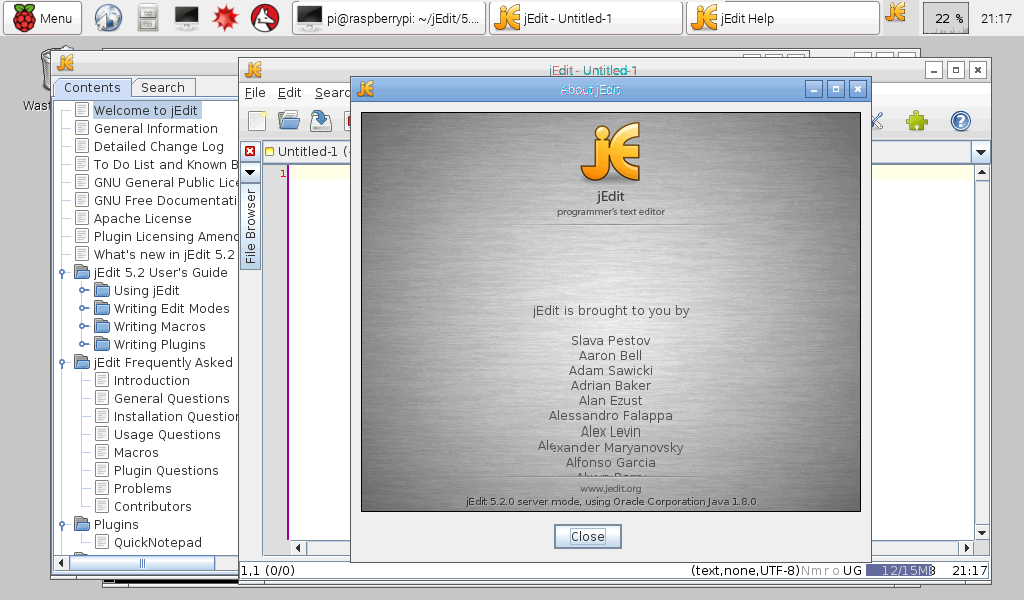
This video show how to verify java location, set JAVA_HOME in .bashrc, and verify using jEdit.


- By default, java should be in /usr

- Edit hidden file .bashrc with command:
$ nano .bashrc

- Add the line:
export JAVA_HOME=/usr

- Save and reboot.


Sunday, March 22, 2015

Install C/C++ plugins for NetBeans on Raspberry Pi 2/Raspbian

It is assumed you have NetBeans 8.0.2 installed on your Raspberry Pi 2/Raspbian. By installing C/C++ plugins to NetBeans IDE, you can develop in C/C++.


- Click Tools -> Plugins
- Select Available Plugins tab
- Search C/C++, and check it.
- Click Install


Install NetBeans IDE on Raspberry Pi 2/Raspbian, to program using Java

NetBeans IDE is the official IDE for Java 8. With quad-core ARM Cortex-A7 CPU on Raspberry Pi 2, pre-loaded Java 8 on Raspbian, it's easy to install NetBeans 8 on Raspberry Pi.


Visit NetBeans Download page (https://netbeans.org/downloads/), select Platform of OS Independent Zip, download and un-zip to any folder you want.

Switch to the unzipped /netbeans/bin folder, run the executable file netbeans:
$ ./netbeans

This video show how to download and install NetBeans IDE 8.0.2 on Raspberry Pi 2.


It is seem JavaFX not supported currently


x Error of failed request: BadMatch (invalid parameter attributes)

In the above demo video, I log-in Raspberry Pi 2 remotely with xrdp run on RPi 2, and remmina (Remote Desktop Client) on another PC running Ubuntu Linux.

Originally, I set Color depth of High color (15 bpp), it work once only. After then, I run netbeans next time, it fail with following error:

x Error of failed request: BadMatch (invalid parameter attributes)
  Major opcode of failed request: 72 (x_PutImage)
  Serial number of failed request: 51
  Current serial number in output stream: 55

To fix it in my case, set Color depth of High color (16 bpp).


Next:
- Install C/C++ plugins for NetBeans on Raspberry Pi 2/Raspbian

Related:
- A example of Java to get CPU frequency, build with NetBeans on Raspberry Pi, the jar run on other Linux machine also.

Install jEdit on Raspberry Pi


jEdit is a mature programmer's text editor. It provide a Java-based installer, for any operating system. To install jEdit on Raspberry Pi, visit http://jedit.org/index.php?page=download, click to download the Java-based installer.

Then open a Terminal, switch to the downloaded location, run it with java with -jar option:
$ java -jar <downloaded jar>

and follow the steps.

Thursday, March 19, 2015

Install Eclipse JDT on Raspberry Pi 2/Raspbian


To install Eclipse with JDT (Java development tools) on Raspberry Pi 2/Raspbian, enter the commands:
$ sudo apt-get install eclipse
$ sudo apt-get install eclipse-jdt

This video show how to:


Please notice:
- The installed version of Eclipse 3.8.0
- After installed, the default java and javac will be changed to 1.6.0 of OpenJDK!


This video show example of "Hello World" using Eclipse JDT.

Wednesday, March 18, 2015

Install Android 4.4.2 KitKat on Raspberry Pi 2 with BerryBoot v2.0

With BerryBoot (refer to the post "Install Ubuntu Linaro on Raspberry Pi 2 with BerryBoot v2.0"), we can install Android 4.4.2 KitKat on Raspberry Pi.

This video show how the Android run on Raspberry Pi 2.

But the performance is so...! Hope it can be improved soon.

Install OpenSSH server on Linaro Ubuntu on RPi 2

In order to permit remote login Linaro Ubuntu on Raspberry Pi 2 via ssh, install OpenSSH server with command:
$ sudo apt-get install openssh-server


Install GIMP on Linaro Ubuntu on RPi 2


To install GIMP on Linaro Ubuntu on Raspberry Pi 2, enter the command:
$ sudo apt-get install gimp


Install scrot on Linaro Ubuntu on RPi 2, to capture screen

In order to capture screen in Linaro Ubuntu on Raspberry Pi 2, we can install scrot with the command:
$ sudo apt-get install scrot


Tuesday, March 17, 2015

Install Ubuntu Linaro on Raspberry Pi 2 with BerryBoot v2.0

BerryBoo is a bootloader/universal operating system installer. It is a simple boot selection screen, allowing you to put multiple Linux distribution on a single SD card. In addition it allows you to put the operating system files on an external USB hard drive instead of on the SD card itself.

Berryboot for the original Raspberry Pi and for the quad-core Raspberry Pi 2 is available at http://www.berryterminal.com/doku.php/berryboot.

To install: extract the contents of the .zip file to a normal (FAT formatted) SD card, and put it in your Raspberry Pi. Once you start your Pi it will start an installer that reformats the SD card and downloads the operating systems files from the Internet.

This video show booting up Raspberry Pi 2 with BerryBoot, download and install Ubuntu Linaro. Both the default user and password is "linaro".


Something to install on Linaro Ubuntu on Raspberry Pi:
- scrot, to capture screen
- GIMP image editor
- OpenSSH server


You can also try "Install Android 4.4.2 KitKat on Raspberry Pi 2 with BerryBoot v2.0".

Config WiFi for Raspberry Pi/Raspbian


This video show steps to config WiFi on Raspberry Pi 2 running Raspbian.

Read CPUs frequency of Raspberry Pi 2

There are 4 cpu core on Raspberry Pi 2. ls /sys/devices/system/cpu show 4 cpu, cpu0~cpu3. The files hold the scaling current frequency of each cpu.
/sys/devices/system/cpu/cpu0/cpufreq/scaling_cur_freq
/sys/devices/system/cpu/cpu1/cpufreq/scaling_cur_freq
/sys/devices/system/cpu/cpu2/cpufreq/scaling_cur_freq
/sys/devices/system/cpu/cpu3/cpufreq/scaling_cur_freq

Tested on Raspberry Pi 2, running Raspbian.


Related:

Get CPU load from /proc/loadavg

/proc
The proc filesystem is a pseudo-filesystem which provides an interface to kernel data structures.  It is commonly mounted at /proc.  Most of it is read-only, but some files allow kernel variables to be changed.

/proc/loadavg
The first three fields in this file are load average figures giving the number of jobs in the run queue (state R) or waiting for disk I/O (state D) averaged over 1, 5, and 15 minutes.  They are the same as the load average numbers given by uptime(1) and other programs.  The fourth field consists of two numbers separated by a slash (/).  The first of these is the number of currently runnable kernel scheduling entities (processes, threads).  The value after the slash is the number of kernel scheduling entities that currently exist on the system.  The fifth field is the PID of the process that was most recently created on the system.

reference: http://man7.org/linux/man-pages/man5/proc.5.html

Test on Raspberry Pi running Raspbian.


Related:
Python display Raspberry Pi load average graphically

Monday, March 16, 2015

Make a hardware button to shutdown Raspberry Pi, using Python

This example show how to detect pressing on hardware button, then shutdown Raspberry Pi by calling os.system() to send command of "sudo shutdown -h now".


Connection (same as the example of "Read/Write GPIO of Raspberry Pi 2 using Python"):

shutdownPi.py
import sys
import RPi.GPIO as GPIO
import time
import os

print("sys.version:")
print(sys.version + "\n")

print("GPIO.VERSION: " + GPIO.VERSION)
print("GPIO.RPI_INFO['P1_REVISION'] = " + str(GPIO.RPI_INFO['P1_REVISION']));

io20 = 20
io21 = 21
GPIO.setmode(GPIO.BCM)
GPIO.setup(io20, GPIO.IN, pull_up_down=GPIO.PUD_UP)
GPIO.setup(io21, GPIO.OUT)

print("Press button to shutdown Raspberry Pi!");

def blinkLED():
    GPIO.output(io21, GPIO.HIGH)
    time.sleep(0.5)
    GPIO.output(io21, GPIO.LOW)
    time.sleep(0.5)

def shutdownRPi():
    print ("- Shutdown Raspberry Pi -")
    blinkLED()
    blinkLED()
    blinkLED()
    os.system("sudo shutdown -h now")
    GPIO.cleanup()
    exit()

try:
    while(True):
        if (not GPIO.input(io20)):
            shutdownRPi()
        time.sleep(0.1)
    
except KeyboardInterrupt:
    print ("\n")
    print ("Exit by KeyboardInterrupt\n")
  
except:
    print ("\n")
    print ("Exit by Other case!\n")
  
finally:  
    GPIO.cleanup()
    print ("Clean up GPIO\n")


View dynamic system info with Linux command top and htop

$ top

The top program provides a dynamic real-time view of a running system. It can display system summary information as well as a list of processes or threads currently being managed by the Linux kernel. The types of system summary information shown and the types, order and size of information displayed for processes are all user configurable and that configuration can be made persistent across restarts.

The program provides a limited interactive interface for process manipulation as well as a much more extensive interface for personal configuration--encompassing every aspect of its operation. And while top is referred to throughout this document, you are free to name the program anything you wish. That new name, possibly an alias, will then be reflected on top's display and used when reading and writing a configuration file.


$ htop

Htop is a free (GPL) ncurses-based process viewer for Linux.

It is similar to top, but allows you to scroll vertically and horizontally, so you can see all the processes running on the system, along with their full command lines.

Tasks related to processes (killing, renicing) can be done without entering their PIDs.

To install htop, enter the command:
$ sudo apt-get install htop


Python to determine number of CPUs

multiprocessing.cpu_count() return the number of CPUs in the system.

Example code, run on Raspberry Pi 2 with quad-core ARM Cortex-A7 CPU:


import sys
import multiprocessing

print("sys.version:")
print(sys.version + "\n")

numOfCPU = multiprocessing.cpu_count()
print("Number of CPU: " + str(numOfCPU))


Sunday, March 15, 2015

Install and run Chromium web browser on Raspberry Pi 2


To install Chromium web browser on Raspberry Pi 2, running Raspbian current version of 2015-02-16, enter the command:
$ sudo apt-get install chromium

To run it, enter command:
$ chromium

or from MENU > Internet > Chromium web browser


Fix "GDBus.Error.org.freedesktop.PolicyKit1.Error.Failed: Cannot determine user of subject" on Raspberry Pi 2/Raspbian

My Raspberry Pi 2 run Raspbian 2015-02-16. It always report error of "GDBus.Error.org.freedesktop.PolicyKit1.Error.Failed: Cannot determine user of subject" in first run startx after boot-up.


To fix it:
- Run lxsession-edit in LXTerminal
lxsession-edit

- Uncheck LXPolKit and OK.


- Reboot.

Friday, March 13, 2015

Photoflash Glitch on Raspberry Pi 2

This video show my test of Photoflash Glitch on Raspberry Pi 2. The RPi 2 is running a Python program to toggle LED 0.5 sec On/0.5 sec Off. Once the RPi 2 crashed, the LED will stop blinking, re-start is needed.


from Wikikpedia.org ~

In February 2015, a switched-mode power supply chip, designated U16, of the Raspberry Pi 2 model B version 1.1 (the initially released version) was found to be vulnerable to flashes of light, particularly the light from xenon camera flashes and green and red laser pointers. However, other bright lights, particularly ones that are on continuously, were found to have no effect. The symptom was the Raspberry Pi 2 spontaneously rebooting or turning off when these lights were flashed at the chip. Initially, some users and commenters suspected that the electromagnetic pulse from the xenon flash tube was causing the problem by interfering with the computer's digital circuitry, but this was ruled out by tests where the light was either blocked by a card or aimed at the other side of the Raspberry Pi 2, both of which did not cause a problem. The problem was narrowed down to the U16 chip by covering first the system on a chip (main processor) and then U16 with opaque poster mounting compound. Light being the sole culprit, instead of EMP, was further confirmed by the laser pointer tests, where it was also found that less opaque covering was needed to shield against the laser pointers than to shield against the xenon flashes. The U16 chip seems to be bare silicon without a plastic cover (i.e. a chip-scale package or wafer-level package), which would, if present, block the light. Based on the facts that the chip, like all semiconductors, is light-sensitive (photovoltaic effect), that silicon is transparent to infrared light, and that xenon flashes emit more infrared light than laser pointers (therefore requiring more light shielding), it is currently thought that this combination of factors allows the sudden bright infrared light to cause an instability in the output voltage of the power supply, triggering shutdown or restart of the Raspberry Pi 2. Unofficial workarounds include covering U16 with opaque material (such as electrical tape, lacquer, poster mounting compound, or even balled-up bread), putting the Raspberry Pi 2 in a case, and avoiding taking photos of the top side of the board with a xenon flash. This issue was not caught before the release of the Raspberry Pi 2 because while commercial electronic devices are routinely subjected to tests of susceptibility to radio interference, it is not standard or common practice to test their susceptibility to optical interference.

Thursday, March 12, 2015

Control RPi.GPIO PWM, using Python on Raspberry Pi 2

Example show how to control PWM of RPi.GPIO using Python (work on both Python 2 and 3), run on Raspberry Pi 2.


Connection:


testGPIO.py
import sys
import RPi.GPIO as GPIO
import time

print("sys.version:")
print(sys.version + "\n")

print("GPIO.VERSION: " + GPIO.VERSION)
print("GPIO.RPI_INFO['P1_REVISION'] = " + str(GPIO.RPI_INFO['P1_REVISION']));

io20 = 20
io21 = 21

GPIO.setmode(GPIO.BCM)
GPIO.setup(io20, GPIO.IN, pull_up_down=GPIO.PUD_UP)
GPIO.setup(io21, GPIO.OUT)
#config GPIO 21 as PWM, frequency = 50 cycle/sec
pwm21 = GPIO.PWM(io21, 50)
pwm21.start(10)

print("Press button to change PWM");
try:
    while(True):
        if (GPIO.input(io20)):
            #duty cycle = 10%
            pwm21.ChangeDutyCycle(10)
        else:
            #duty cycle = 90%
            pwm21.ChangeDutyCycle(90)
    
except KeyboardInterrupt:
    print ("\n")
    print ("Exit by KeyboardInterrupt\n")
  
except:
    print ("\n")
    print ("Exit by Other case!\n")
  
finally:
    pwm21.stop()
    GPIO.cleanup()
    print ("Clean up GPIO\n")


Wednesday, March 11, 2015

Read/Write GPIO of Raspberry Pi 2 using Python

This example show how to read button on GPIO 20 and turn ON/OFF LED on GPIO 21 accordingly, for Raspberry Pi 2 using Python.


Connection:


testGPIO.py
import sys
import RPi.GPIO as GPIO
import time

print("sys.version:")
print(sys.version + "\n")

print("GPIO.VERSION: " + GPIO.VERSION)
print("GPIO.RPI_INFO['P1_REVISION'] = " + str(GPIO.RPI_INFO['P1_REVISION']));

io20 = 20
io21 = 21

GPIO.setmode(GPIO.BCM)
GPIO.setup(io20, GPIO.IN, pull_up_down=GPIO.PUD_UP)
GPIO.setup(io21, GPIO.OUT)

print("Press button to turn ON LED");
try:
    while(True):
        if (GPIO.input(io20)):
            GPIO.output(io21, GPIO.LOW)
        else:
            GPIO.output(io21, GPIO.HIGH)
    
except KeyboardInterrupt:
    print ("\n")
    print ("Exit by KeyboardInterrupt\n")
  
except:
    print ("\n")
    print ("Exit by Other case!\n")
  
finally:  
    GPIO.cleanup(io20)
    GPIO.cleanup(io21)
    print ("Clean up GPIO\n")


More Python examples for Raspberry Pi/Raspberry Pi 2:
- Control RPi.GPIO PWM
Make a hardware button to shutdown Raspberry Pi

Control Raspberry Pi 2 GPIO using Python

Example show how to control GPIO of Raspberry Pi 2 using Python.


Connection:


testGPIO.py
import sys
import RPi.GPIO as GPIO
import time

print("sys.version:")
print(sys.version + "\n")

print("GPIO.VERSION: " + GPIO.VERSION)
print("GPIO.RPI_INFO['P1_REVISION'] = " + str(GPIO.RPI_INFO['P1_REVISION']));

io21 = 21

GPIO.setmode(GPIO.BCM)
GPIO.setup(io21, GPIO.OUT)

print("LED at GPIO21 is blinking");
try:
    while(True):
        GPIO.output(io21, GPIO.HIGH)
        time.sleep(1.5)
        GPIO.output(io21, GPIO.LOW)
        time.sleep(0.5)
    
except KeyboardInterrupt:
    print ("\n")
    print ("Exit by KeyboardInterrupt\n")
  
except:
    print ("\n")
    print ("Exit by Other case!\n")
  
finally:  
    GPIO.cleanup(io21)
    print ("Clean up GPIO\n")


Tuesday, March 10, 2015

Linux command: blkid - locate/print block device attributes

The Linux command blkid is used to display information about available block devices.


GPU demo program, run on Raspberry Pi 2

Raspbian (http://www.raspberrypi.org/downloads/) come with a number of demo program for the GPU, Broadcom VideoCore, in /opt/vc/src/hello_pi.


/opt/vc/src/hello_pi/README
Building on Pi
++++++++++++++

To build the test apps on the pi, first build the libs:
make -C libs/ilclient
make -C libs/vgfont

then by entering each test app directory and run make. E.g.
  cd hello_world
  make
  ./hello_world.bin

Running ./rebuild.sh will rebuild the all libs and and apps.


Building on a different PC
++++++++++++++++++++++++++

If you want to build the samples on a different machine (cross-compile) then set:
SDKSTAGE=<path/to/firmware-directory> and CC=<path/to/cross-compiler>
before running make.

To build all the demo program, switch to the folder /opt/vc/src/hello_pi, enter command:
$ ./rebuild.sh

Press Ctrl+C to exit running demo program.

Monday, March 9, 2015

Update Raspberry Pi 2 firmware

To update Raspberry Pi 2 firmware, enter command
$ sudo rpi-update

The firmware of version 2015-02-16 is 3.18.7-v7+

After updated and re-boot, it changed to 3.18.9-v7+

Boot-up Raspbian on Raspberry Pi 2

Boot-up and setup Raspberry Pi 2 with Raspbian, version 2015-02-16.


Test viewing Youtube on Raspberry Pi 2

Viewing Youtube video on Raspberry Pi 2, running at default frequency of 700MHz, using default browser.

Boot-up Raspberry Pi 2 running Snappy Ubuntu Core

This video show boot-up Raspberry Pi, running Snappy Ubuntu Core version 2015-02-03. Available in Raspberry Pi download page: http://www.raspberrypi.org/downloads/

user: ubuntu
password: ubuntu


Thursday, March 5, 2015