Monday, November 29, 2021

Simple exercise to control GPIO on Raspberry Pi, C and Python

Simple exercise to control GPIO on Raspberry Pi, tested on Raspberry Pi Zero 2 W running "Raspbian GNU/Linux 11 (bullseye)".

blink.c, in C language:
#include <stdio.h>
#include <pigpio.h>

#define led 17

int main(void){
	printf("- IO Test on\n");
	printf("- Raspberry Pi Zero 2 W\n");
	
	gpioInitialise();
	gpioSetMode(led, PI_OUTPUT);
	
	while(1){
		gpioWrite(led, 1);
		time_sleep(1);
		gpioWrite(led, 0);
		time_sleep(1);
	}

}

To compile it link to pigpio library:
$ gcc blink.c -o blink -lpigpio

To run it with sudo:
$ sudo ./blink


py_LED.py, in Python:
from gpiozero import LED
from time import sleep

led = LED(17)

while True:
    led.on()
    sleep(1)
    led.off()
    sleep(1)


Thursday, November 18, 2021

My Raspberry Pi Zero 2 W

 My Raspberry Pi Zero 2 W received:


Raspberry Pi Zero 2 W installed new 32-bit Raspberry Pi OS (bullseye), running neofetch:


Check Board name and version using cpuinfo:
pi@raspberrypi:~ $ cat /proc/cpuinfo
processor	: 0
model name	: ARMv7 Processor rev 4 (v7l)
BogoMIPS	: 38.40
Features	: half thumb fastmult vfp edsp neon vfpv3 tls vfpv4 idiva idivt vfpd32 lpae evtstrm crc32 
CPU implementer	: 0x41
CPU architecture: 7
CPU variant	: 0x0
CPU part	: 0xd03
CPU revision	: 4

processor	: 1
model name	: ARMv7 Processor rev 4 (v7l)
BogoMIPS	: 38.40
Features	: half thumb fastmult vfp edsp neon vfpv3 tls vfpv4 idiva idivt vfpd32 lpae evtstrm crc32 
CPU implementer	: 0x41
CPU architecture: 7
CPU variant	: 0x0
CPU part	: 0xd03
CPU revision	: 4

processor	: 2
model name	: ARMv7 Processor rev 4 (v7l)
BogoMIPS	: 38.40
Features	: half thumb fastmult vfp edsp neon vfpv3 tls vfpv4 idiva idivt vfpd32 lpae evtstrm crc32 
CPU implementer	: 0x41
CPU architecture: 7
CPU variant	: 0x0
CPU part	: 0xd03
CPU revision	: 4

processor	: 3
model name	: ARMv7 Processor rev 4 (v7l)
BogoMIPS	: 38.40
Features	: half thumb fastmult vfp edsp neon vfpv3 tls vfpv4 idiva idivt vfpd32 lpae evtstrm crc32 
CPU implementer	: 0x41
CPU architecture: 7
CPU variant	: 0x0
CPU part	: 0xd03
CPU revision	: 4

Hardware	: BCM2835
Revision	: 902120
Serial		: 000000009470cd94
Model		: Raspberry Pi Zero 2 Rev 1.0


Check OS version using /etc/os-release:
pi@raspberrypi:~ $ cat /etc/os-release
PRETTY_NAME="Raspbian GNU/Linux 11 (bullseye)"
NAME="Raspbian GNU/Linux"
VERSION_ID="11"
VERSION="11 (bullseye)"
VERSION_CODENAME=bullseye
ID=raspbian
ID_LIKE=debian
HOME_URL="http://www.raspbian.org/"
SUPPORT_URL="http://www.raspbian.org/RaspbianForums"
BUG_REPORT_URL="http://www.raspbian.org/RaspbianBugs"


Related:

Documents:


Saturday, October 16, 2021

CircuitPython 7.0.0 run on Raspberry Pi Pico RP2040

 CircuitPython 7.0.0 run on Raspberry Pi Pico RP2040:

"""
CircuitPython 7 exercise run on Raspberry Pi Pico PR2040,
get system info.
"""
import board
import sys
import os
import microcontroller
# ref:
# The entire table of ANSI color codes working in C:
# https://gist.github.com/RabaDabaDoba/145049536f815903c79944599c6f952a
class color:
   RED = '\033[1;31;48m'
   BLUE = '\033[1;34;48m'
   BLACK = '\033[1;30;48m'
   END = '\033[1;37;0m'

print(board.board_id)
print(sys.implementation[0] + ' ' +
      str(sys.implementation[1][0]) +'.'+
      str(sys.implementation[1][1]) +'.'+
      str(sys.implementation[1][2]))
print("=====================================")
info = color.RED + \
       sys.implementation[0] + ' ' + \
       os.uname()[3] + color.END + '\n' + \
       'run on ' + color.BLUE + os.uname()[4] + color.END
print(info)
print("=====================================")
print("with number of cpu: " + color.RED +
      str(len(microcontroller.cpus)) + color.RED)

print()

To install CircuitPython firmware on Raspberry Pi, read the HERE.


Saturday, September 25, 2021

Editor with split views feature, support Raspberry Pi - Kate

Kate is a feature-packed text editor, lets you to edit and view many files at the same time, both in tabs and split views, and comes with a wide variety of plugins, including an embedded terminal that lets you launch console commands directly from Kate, powerful search and replace plugins, and a preview plugin that can show you what your MD, HTML and even SVG will look like.

To install Kate on Raspberry i:
$ sudo apt install kate


Monday, September 20, 2021

Download and Install openEuler on Raspberry Pi

This video show how to download, install and run openEuler on Raspberry Pi, and switch language to English. Tested on Raspberry Pi 4B/4G with 7 inch mini HDMI LCD. Chinese is set system language by default, this video also show how to switch to English.

Download openEuler image for Raspberry Pi
(prepare on Raspberry Pi)

Visit https://www.openeuler.org/en/, scroll down and click on "use openEuler OS", choose Raspberry Pi.

In the new opened page, scroll down to How to download latest image, (https://gitee.com/openeuler/raspberrypi#how-to-download-latest-image).

Select the image to download, in my test: openEuler 20.03 LTS SP1 alpha4 (DDE desktop and Chinese input method),  openEuler-20.03-LTS-SP1-DDE-raspi-aarch64-alpha4.img.xz.

Extract the downloaded file. Then we can write the extracted image on microSD using Raspberry Pi Imager.

Then you can boot-up Raspberry Pi with the microSD. 

User and password:

The image pre-set with System user/password:
- root/openeuler 
- pi/raspberry

DDE cannot log in with root account, you can login user pi using password "raspberry".


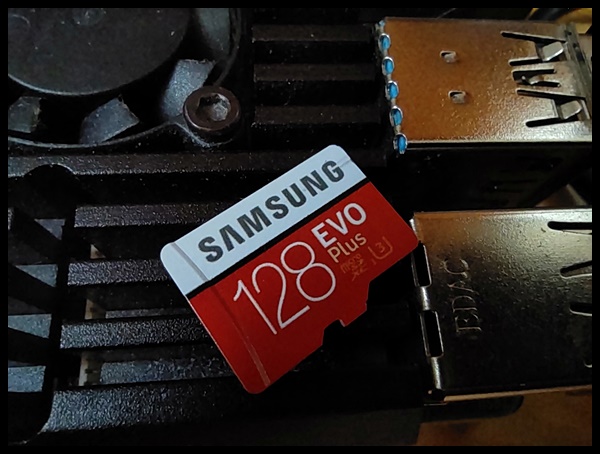
FYI: the microSD I used in this test is 128G Samsung Evo Plus:


Related:

Saturday, September 18, 2021

Install openEuler in VirtualBox, and install Deepin Desktop Environment (DDE)

openEuler is an innovative platform nurtured by community collaboration. It aims to build a unified and open OS that supports multiple processor architectures, and to advance the hardware/software application ecosystem.

This video show how to install openEuler in VirtualBox 6.1/Windows 10.


Visit https://www.openeuler.org/en/download/ to download ISO. It's openEuler-20.03-LTS-SP2-x86_64-dvd.iso in my case.

It's very straightforward to install openEuler in VirtualBox. But there are no desktop environment by default. Deepin Desktop Environment (DDE) can be installed using dnf (a Linux software package management tool).

Most probably you cannot run dnf, fail with error [Could not resolve host: repo.openeuler.org], as shown in the video.

To fix it:
edit /etc/sysconfig/network-scripts/ifcfg-enp0s3
set ONBOOT=yes

save and then reboot.

Then install DDE with command:
sudo dnf update
sudo dnf install dde
sudo systemctl set-default graphical.target
sudo reboot
After the restart is complete, use the user created during the installation process or the openeuler user to log in to the desktop.

dde cannot log in with root account.
dde has built-in openeuler user, the password of this user is openeuler.


Related:

Wednesday, August 25, 2021

Bi-direction BLE communication between Raspberry Pi/Python (with PyQt5 GUI) and ESP32/Arduino Nano RP2040 Connect

Raspberry Pi/Python/bluepy + ESP32

With bluepy installed, this exercise implement BLE client side on Raspberry Pi using Python, connect to ESP32 BLE uart server, send and receive data in between.


Prepare ESP32 BLE_uart

ESP32 side (NodeMCU ESP-32S) is programmed in Arduino framework. 

In Arduino IDE
- Open Examples > ESP32 BLE Arduino > BLE_uart in Arduino IDE, and upload to ESP32 board.

It's a BLE setup as server, wait connection. Once connected, send data to client repeatedly and display received data to Serial Monitor.

Test with nRF Connect App 

To verify the function of ESP32 BLE_art on Android device, install nRF Connect for Mobile App by Nordic Semiconductor ASA.

Simple test Python code -

Automatically connect to BLE_uart, send and receive data repeatedly.

 ex_bluepy_uart.py

from bluepy import btle
import time

class MyDelegate(btle.DefaultDelegate):
    def __init__(self):
        btle.DefaultDelegate.__init__(self)
        # ... initialise here

    def handleNotification(self, cHandle, data):
        #print("\n- handleNotification -\n")
        print(data)
        # ... perhaps check cHandle
        # ... process 'data'

# Initialisation  -------

p = btle.Peripheral("3c:71:bf:0d:dd:6a")   #NodeMCU-32S
#p = btle.Peripheral("24:0a:c4:e8:0f:9a")   #ESP32-DevKitC V4

# Setup to turn notifications on, e.g.
svc = p.getServiceByUUID("6E400001-B5A3-F393-E0A9-E50E24DCCA9E")
ch_Tx = svc.getCharacteristics("6E400002-B5A3-F393-E0A9-E50E24DCCA9E")[0]
ch_Rx = svc.getCharacteristics("6E400003-B5A3-F393-E0A9-E50E24DCCA9E")[0]

p.setDelegate( MyDelegate())

setup_data = b"\x01\00"
p.writeCharacteristic(ch_Rx.valHandle+1, setup_data)

lasttime = time.localtime()

while True:
    """
    if p.waitForNotifications(1.0):
        pass  #continue

    print("Waiting...")
    """
    
    nowtime = time.localtime()
    if(nowtime > lasttime):
        lasttime = nowtime
        stringtime = time.strftime("%H:%M:%S", nowtime)
        btime = bytes(stringtime, 'utf-8')
        try:
            ch_Tx.write(btime, True)
        except btle.BTLEException:
            print("btle.BTLEException");
        #print(stringtime)
        #ch_Tx.write(b'wait...', True)
        
    # Perhaps do something else here
Python code with PyQt5 GUI -
- Click "Start BLE" button to connect to BLE_uart.
- Display received data on QPlainTextEdit, and send user entered data to BLE


pyqt5_bluepy_thread_.py
import sys
import time

import requests
from PyQt5.QtCore import QObject, QRunnable, QThreadPool, QTimer, pyqtSignal, pyqtSlot
from PyQt5.QtWidgets import (
    QApplication, QLabel, QMainWindow,  QPlainTextEdit, QPushButton, QVBoxLayout, QWidget,
    )

from bluepy import btle

class WorkerSignals(QObject):
    signalMsg = pyqtSignal(str)
    signalRes = pyqtSignal(str)
    
class MyDelegate(btle.DefaultDelegate):
    
    def __init__(self, sgn):
        btle.DefaultDelegate.__init__(self)
        self.sgn = sgn

    def handleNotification(self, cHandle, data):
        
        try:
            dataDecoded = data.decode()
            self.sgn.signalRes.emit(dataDecoded)
        except UnicodeError:
            print("UnicodeError: ", data)

class WorkerBLE(QRunnable):
    
    def __init__(self):
        super().__init__()
        self.signals = WorkerSignals()
        self.rqsToSend = False
        
    @pyqtSlot()
    def run(self):
        self.signals.signalMsg.emit("WorkerBLE start")
        
        #---------------------------------------------
        p = btle.Peripheral("3c:71:bf:0d:dd:6a")
        p.setDelegate( MyDelegate(self.signals) )

        svc = p.getServiceByUUID("6E400001-B5A3-F393-E0A9-E50E24DCCA9E")
        self.ch_Tx = svc.getCharacteristics("6E400002-B5A3-F393-E0A9-E50E24DCCA9E")[0]
        ch_Rx = svc.getCharacteristics("6E400003-B5A3-F393-E0A9-E50E24DCCA9E")[0]

        setup_data = b"\x01\00"
        p.writeCharacteristic(ch_Rx.valHandle+1, setup_data)

        # BLE loop --------

        while True:
            """
            if p.waitForNotifications(1.0):
                # handleNotification() was called
                continue

            print("Waiting...")
            """
            
            p.waitForNotifications(1.0)
            
            if self.rqsToSend:
                self.rqsToSend = False

                try:
                    self.ch_Tx.write(self.bytestosend, True)
                except btle.BTLEException:
                    print("btle.BTLEException");
            
        #---------------------------------------------hellohello
        self.signals.signalMsg.emit("WorkerBLE end")
        
    def toSendBLE(self, tosend):
        self.bytestosend = bytes(tosend, 'utf-8')
        self.rqsToSend = True
        """
        try:
            self.ch_Tx.write(bytestosend, True)
        except BTLEException:
            print("BTLEException");
        """
            
class MainWindow(QMainWindow):
    
    def __init__(self):
        super().__init__()
        
        layout = QVBoxLayout()
        
        buttonStartBLE = QPushButton("Start BLE")
        buttonStartBLE.pressed.connect(self.startBLE)
        
        self.console = QPlainTextEdit()
        self.console.setReadOnly(True)
        
        self.outconsole = QPlainTextEdit()
        
        buttonSendBLE = QPushButton("Send message")
        buttonSendBLE.pressed.connect(self.sendBLE)

        layout.addWidget(buttonStartBLE)
        layout.addWidget(self.console)
        layout.addWidget(self.outconsole)
        layout.addWidget(buttonSendBLE)
        
        w = QWidget()
        w.setLayout(layout)
        
        self.setCentralWidget(w)
        
        self.show()
        self.threadpool = QThreadPool()
        print(
            "Multithreading with Maximum %d threads" % self.threadpool.maxThreadCount())
            
    def startBLE(self):
        self.workerBLE = WorkerBLE()
        self.workerBLE.signals.signalMsg.connect(self.slotMsg)
        self.workerBLE.signals.signalRes.connect(self.slotRes)
        self.threadpool.start(self.workerBLE)
        
    def sendBLE(self):
        strToSend = self.outconsole.toPlainText()
        self.workerBLE.toSendBLE(strToSend)
        
    def slotMsg(self, msg):
        print(msg)
        
    def slotRes(self, res):
        self.console.appendPlainText(res)
        
app = QApplication(sys.argv)
window = MainWindow()
app.exec()


Raspberry Pi/Python/bluepy + Arduino Nano RP2040 Connect

Now, replace ESP32 with Arduino Nano RP2040 Connect, running following code using ArduinoBLE library. Please  note that you have to modify Python code to match with Arduino Nano RP2040 Connect's MAC address.


BLE_peripheral_uart.ino
/*
 * BLE_peripheral_uart:
 * modifid from Examples > ArduinoBLE > Peripheral > CallbackLED
 * 
 * Bi-direction BLE communication between Raspberry Pi/Python (with PyQt5 GUI) 
 * and ESP32/Arduino Naon RP2040 Connect
 * http://helloraspberrypi.blogspot.com/2021/08/bi-direction-ble-communication-between.html
 * 
*/

#include <ArduinoBLE.h>

#define SERVICE_UUID           "6E400001-B5A3-F393-E0A9-E50E24DCCA9E" // UART service UUID
#define CHARACTERISTIC_UUID_RX "6E400002-B5A3-F393-E0A9-E50E24DCCA9E"
#define CHARACTERISTIC_UUID_TX "6E400003-B5A3-F393-E0A9-E50E24DCCA9E"

//BLEService ledService("19B10000-E8F2-537E-4F6C-D104768A1214"); // create service
BLEService uartService(SERVICE_UUID); // create service

// create switch characteristic and allow remote device to read and write
//BLEByteCharacteristic switchCharacteristic("19B10001-E8F2-537E-4F6C-D104768A1214", BLERead | BLEWrite);

BLEStringCharacteristic rxCharacteristic(CHARACTERISTIC_UUID_RX, BLEWrite, 30);
BLEStringCharacteristic txCharacteristic(CHARACTERISTIC_UUID_TX, BLENotify, 30);

// const int ledPin = LED_BUILTIN; // pin to use for the LED

void setup() {
  Serial.begin(115200);
  while (!Serial);
  
  // pinMode(ledPin, OUTPUT); // use the LED pin as an output

  // begin initialization
  if (!BLE.begin()) {
    Serial.println("starting BLE failed!");

    while (1);
  }
  
  // set the local name peripheral advertises
  BLE.setLocalName("BLE_peripheral_uart");
  // set the UUID for the service this peripheral advertises
  BLE.setAdvertisedService(uartService);

  // add the characteristic to the service
  uartService.addCharacteristic(rxCharacteristic);
  uartService.addCharacteristic(txCharacteristic);

  // add service
  BLE.addService(uartService);

  // assign event handlers for connected, disconnected to peripheral
  BLE.setEventHandler(BLEConnected, blePeripheralConnectHandler);
  BLE.setEventHandler(BLEDisconnected, blePeripheralDisconnectHandler);

  // assign event handlers for characteristic
  rxCharacteristic.setEventHandler(BLEWritten, rxCharacteristicWritten);
  // set an initial value for the characteristic
  rxCharacteristic.setValue("BLE_peripheral_uart");

  // start advertising
  BLE.advertise();

  Serial.println(("Bluetooth device active, waiting for connections..."));
  Serial.println(BLE.address());
}

void loop() {
  // poll for BLE events
  BLE.poll();
}

void blePeripheralConnectHandler(BLEDevice central) {
  // central connected event handler
  Serial.print("Connected event, central: ");
  Serial.println(central.address());
}

void blePeripheralDisconnectHandler(BLEDevice central) {
  // central disconnected event handler
  Serial.print("Disconnected event, central: ");
  Serial.println(central.address());
}

void rxCharacteristicWritten(BLEDevice central, BLECharacteristic characteristic) {
  // central wrote new value to characteristic, update LED
  Serial.print("Characteristic event, written: ");

  Serial.println("len=" + 
                  String(rxCharacteristic.valueLength()));
  String valString = rxCharacteristic.value();
  Serial.println(valString);
  valString.toUpperCase();
  Serial.println(valString);
  txCharacteristic.setValue(valString);
}


Wednesday, August 18, 2021

ov7670/ov2640 + ST7789 (IPS Display) on Raspberry Pi Pico/CircuitPython 7.0.0 alpha 6

This post show how to connect OV7670/OV2640 0.3-Megapixel Camera Module to Raspberry Pi Pico (in CircuitPython 7.0.0 alpha 6), display on ST7789 SPI IPS screen; running example ov2640_jpeg_sd_pico_st7789_2in.py.

ov7670:


It's library named adafruit_ov7670.mpy and example named ov7670_displayio_pico_st7789_2in.py in CircuitPython Bundle Libraries. I tried to run it on Pico with current stable CircuitPython 6.3.0. But fail with error of:

ImportError: cannot import name Colorspace


Then I tried on CircuitPython 7.0.0 alpha 6.

The connection between Pico and ov7670 camera module and st7789 SPI IPS display follow the ov7670_displayio_pico_st7789_2in.py example. But I have to add reset pin for display.


Connection:
Connection between Pico and ov7670 cam module
=============================================
	+-----------+
3V3	|3V3	DGND|	GND
GP9	|SCL	SDA |	GP8
GP7	|VS	HS  |	GP21
GP11	|PLK	XLK |	GP20
GP19	|D7	D6  |	GP18
GP17	|D5	D4  |	GP16
GP15	|D3	D2  |	GP14
GP13	|D1	D0  |	GP12
GP10	|RET	PWDN|
	+-----------+
		
*SCL/SDA are I2C control pin, pull-up resistors are needed.
 I use 2K ohm resistor for it.
		
Connection between Pico and ST7789 SPI IPS
==========================================
3V3		BLK
GP1		CS
GP0		DC
GP4		RES
GP3		SDA
GP2		SCL
3V3		VCC
GND		GND

Makesure Raspberry Pi Pico is installed with CircuitPython 7.0.0 alpha 6, download the matched bundle libraries 7.x. Copy adafruit_st7789.mpy and adafruit_ov7670.mpy from lib folder to Pico CIRCUITPY lib folder. Modify ov7670_displayio_pico_st7789_2in.py from examples folder to add reset pin to GP4, as shown in above screenshot.

remark:
In my test, once the program ran and stopped, to re-run it, have to disconnect and reconnect USB to Pico.


ov2640:


My ov2640 module have same pin assignment in ov7670, aligned to top with D0/D1 opened.

Connection:
Connection between Pico and ov2640 cam module
=============================================
	+-----------+
3V3	|3V3	GND |	GND
GP9	|SIOC	SIOD|	GP8
GP7	|VSYNC	HREF|	GP21
GP11	|PCLK	XCLK|	GP20
GP19	|D9	D8  |	GP18
GP17	|D7	D6  |	GP16
GP15	|D5	D4  |	GP14
GP13	|D3	D2  |	GP12
GP10	|RESET	PWDN|
	|D1	D0  |
	+-----------+
		
Library:
Copy adafruit_ov2640.mpy and adafruit_st7789.mpy from CircuitPython bundle 7.x lib to CIRCUITPY lib folder.

Example:

Locate and edit ov2640_displayio_pico_st7789_2in.py from CircuitPython bundle 7.x examples, as shown in this video:


Wednesday, August 11, 2021

ST7789 SPI (2" 240x320/1.54" 240x240) IPS RGB Display, on Raspberry Pi Pico/CircuitPython

Test 2" 240x320 and 1.54" 240x240 ST7789 SPI IPS RGB Display, on Raspberry Pi Pico/CircuitPython.


Connection:

3V3  - BLK
GP11 - CS
GP12 - DC
GP13 - RES
GP15 - SDA
GP14 - SCL
3V3  - VCC
GND  - GND

Prepare Libraries:

Visit https://circuitpython.org/libraries, download the appropriate bundle for your version of CircuitPython.

Unzip the file, copy adafruit_st7789.mpy, adafruit_display_text and adafruit_display_shapes folder to the lib folder on your CIRCUITPY drive.


Examples code for 2" 240x320 ST7789 SPI IPS RGB Display :

cpyPico_spiST7789_320.py
"""
Example of CircuitPython/RaspberryPi Pico
to display on 2.0" IPS 240x320 (RGB) screen
with ST7789 driver via SPI interface.

Connection between Pico and
the IPS screen, with ST7789 SPI interface.
3V3  - BLK (backlight, always on)
GP11 - CS
GP12 - DC
GP13 - RES
GP15 - SDA
GP14 - SCL
3V3  - VCC
GND  - GND
"""

import os
import board
import time
import terminalio
import displayio
import busio
from adafruit_display_text import label
#from adafruit_st7789 import ST7789
import adafruit_st7789

print("==============================")
print(os.uname())
print("Hello Raspberry Pi Pico/CircuitPython ST7789 SPI IPS Display")
print(adafruit_st7789.__name__ + " version: " + adafruit_st7789.__version__)
print()

# Release any resources currently in use for the displays
displayio.release_displays()

tft_cs = board.GP11
tft_dc = board.GP12
tft_res = board.GP13
spi_mosi = board.GP15
spi_clk = board.GP14

"""
classbusio.SPI(clock: microcontroller.Pin,
                MOSI: Optional[microcontroller.Pin] = None,
                MISO: Optional[microcontroller.Pin] = None)
"""
spi = busio.SPI(spi_clk, MOSI=spi_mosi)

display_bus = displayio.FourWire(
    spi, command=tft_dc, chip_select=tft_cs, reset=tft_res
)

display = adafruit_st7789.ST7789(display_bus,
                    width=240, height=320)

# Make the display context
splash = displayio.Group(max_size=10)
display.show(splash)

color_bitmap = displayio.Bitmap(135, 240, 1)
color_palette = displayio.Palette(1)
color_palette[0] = 0x00FF00

bg_sprite = displayio.TileGrid(color_bitmap,
                               pixel_shader=color_palette, x=0, y=0)
splash.append(bg_sprite)

# Draw a smaller inner rectangle
inner_bitmap = displayio.Bitmap(133, 238, 1)
inner_palette = displayio.Palette(1)
inner_palette[0] = 0x0000FF
inner_sprite = displayio.TileGrid(inner_bitmap,
                                  pixel_shader=inner_palette, x=1, y=1)
splash.append(inner_sprite)

# Draw a label
text_group1 = displayio.Group(max_size=10, scale=2, x=20, y=40)
text1 = "RPi Pico"
text_area1 = label.Label(terminalio.FONT, text=text1, color=0xFF0000)
text_group1.append(text_area1)  # Subgroup for text scaling
# Draw a label
text_group2 = displayio.Group(max_size=10, scale=1, x=20, y=60)
text2 = "CircuitPython"
text_area2 = label.Label(terminalio.FONT, text=text2, color=0xFFFFFF)
text_group2.append(text_area2)  # Subgroup for text scaling

# Draw a label
text_group3 = displayio.Group(max_size=10, scale=1, x=20, y=100)
text3 = adafruit_st7789.__name__
text_area3 = label.Label(terminalio.FONT, text=text3, color=0x0000000)
text_group3.append(text_area3)  # Subgroup for text scaling
# Draw a label
text_group4 = displayio.Group(max_size=10, scale=2, x=20, y=120)
text4 = adafruit_st7789.__version__
text_area4 = label.Label(terminalio.FONT, text=text4, color=0x000000)
text_group4.append(text_area4)  # Subgroup for text scaling

splash.append(text_group1)
splash.append(text_group2)
splash.append(text_group3)
splash.append(text_group4)

time.sleep(3.0)

rot = 0
while True:
    time.sleep(5.0)
    rot = rot + 90
    if (rot>=360):
        rot =0
    display.rotation = rot

cpyPico_spiST7789_bitmap_320.py
"""
Example of CircuitPython/Raspberry Pi Pico
to display on 2.0" IPS 240x320 (RGB) screen
with ST7789 driver via SPI interface.

Connection between Pico and
the IPS screen, with ST7789 SPI interface.
3V3  - BLK (backlight, always on)
GP11 - CS
GP12 - DC
GP13 - RES
GP15 - SDA
GP14 - SCL
3V3  - VCC
GND  - GND
"""

import os
import board
import time
import terminalio
import displayio
import busio
from adafruit_display_text import label
import adafruit_st7789

print("==============================")
print(os.uname())
print("Hello Raspberry Pi Pico/CircuitPython ST7789 SPI IPS Display")
print(adafruit_st7789.__name__ + " version: " + adafruit_st7789.__version__)
print()

# Release any resources currently in use for the displays
displayio.release_displays()

tft_cs = board.GP11
tft_dc = board.GP12
tft_res = board.GP13
spi_mosi = board.GP15
spi_clk = board.GP14

"""
classbusio.SPI(clock: microcontroller.Pin,
                MOSI: Optional[microcontroller.Pin] = None,
                MISO: Optional[microcontroller.Pin] = None)
"""
spi = busio.SPI(spi_clk, MOSI=spi_mosi)

display_bus = displayio.FourWire(
    spi, command=tft_dc, chip_select=tft_cs, reset=tft_res
)

display = adafruit_st7789.ST7789(display_bus,
                    width=240, height=320)
display.rotation = 270

group = displayio.Group(max_size=10)
display.show(group)

bitmap_width = 320
bitmap_height = 240
bitmap = displayio.Bitmap(bitmap_width, bitmap_height, bitmap_height)

palette = displayio.Palette(bitmap_height)
for p in range(bitmap_height):
    palette[p] = (0x010000*p) + (0x0100*p) + p

for y in range(bitmap_height):
    for x in range(bitmap_width):
        bitmap[x,y] = y
        
tileGrid = displayio.TileGrid(bitmap, pixel_shader=palette, x=0, y=0)
group.append(tileGrid)

time.sleep(3.0)

while True:
    for p in range(bitmap_height):
        palette[p] = p
    time.sleep(3.0)

    for p in range(bitmap_height):
        palette[p] = 0x0100 * p
    time.sleep(3.0)

    for p in range(bitmap_height):
        palette[p] = 0x010000 * p
    time.sleep(3.0)

cpyPico_spiST7789_shape_320.py
"""
Example of CircuitPython/Raspberry Pi Pico
to display on 2.0" IPS 240x320 (RGB) screen
with ST7789 driver via SPI interface.

modify example from:
https://circuitpython.readthedocs.io/projects/display-shapes/en/latest/index.html

Connection between Pico and
the IPS screen, with ST7789 SPI interface.
3V3  - BLK (backlight, always on)
GP11 - CS
GP12 - DC
GP13 - RES
GP15 - SDA
GP14 - SCL
3V3  - VCC
GND  - GND
"""

import os
import board
import time
import terminalio
import displayio
import busio
import adafruit_st7789
from adafruit_display_shapes.rect import Rect
from adafruit_display_shapes.circle import Circle
from adafruit_display_shapes.roundrect import RoundRect
from adafruit_display_shapes.triangle import Triangle

print("==============================")
print(os.uname())
print("Hello Raspberry Pi Pico/CircuitPython ST7789 SPI IPS Display")
print(adafruit_st7789.__name__ + " version: " + adafruit_st7789.__version__)
print()

# Release any resources currently in use for the displays
displayio.release_displays()

tft_cs = board.GP11
tft_dc = board.GP12
tft_res = board.GP13
spi_mosi = board.GP15
spi_clk = board.GP14

"""
classbusio.SPI(clock: microcontroller.Pin,
                MOSI: Optional[microcontroller.Pin] = None,
                MISO: Optional[microcontroller.Pin] = None)
"""
spi = busio.SPI(spi_clk, MOSI=spi_mosi)

display_bus = displayio.FourWire(
    spi, command=tft_dc, chip_select=tft_cs, reset=tft_res
)

display = adafruit_st7789.ST7789(display_bus,
                    width=240, height=320)
display.rotation = 270

splash = displayio.Group()
display.show(splash)

color_bitmap = displayio.Bitmap(320, 240, 1)
color_palette = displayio.Palette(1)
color_palette[0] = 0xFFFFFF
bg_sprite = displayio.TileGrid(color_bitmap, pixel_shader=color_palette, x=0, y=0)
splash.append(bg_sprite)

triangle = Triangle(170, 50, 120, 140, 210, 160, fill=0x00FF00, outline=0xFF00FF)
splash.append(triangle)

rect = Rect(80, 20, 41, 41, fill=0x0)
splash.append(rect)

circle = Circle(100, 100, 20, fill=0x00FF00, outline=0xFF00FF)
splash.append(circle)

rect2 = Rect(50, 100, 61, 81, outline=0x0, stroke=3)
splash.append(rect2)

roundrect = RoundRect(10, 10, 61, 81, 10, fill=0x0, outline=0xFF00FF, stroke=6)
splash.append(roundrect)

while True:
    pass

Examples code for 1.54" 240x240 ST7789 SPI IPS RGB Display :


cpyPico_spiST7789_240.py
"""
Example of CircuitPython/RaspberryPi Pico
to display on 2.0" IPS 240x320 (RGB) screen
with ST7789 driver via SPI interface.

Connection between Pico and
the IPS screen, with ST7789 SPI interface.
3V3  - BLK (backlight, always on)
GP11 - CS
GP12 - DC
GP13 - RES
GP15 - SDA
GP14 - SCL
3V3  - VCC
GND  - GND
"""

import os
import board
import time
import terminalio
import displayio
import busio
from adafruit_display_text import label
#from adafruit_st7789 import ST7789
import adafruit_st7789

print("==============================")
print(os.uname())
print("Hello Raspberry Pi Pico/CircuitPython ST7789 SPI IPS Display")
print(adafruit_st7789.__name__ + " version: " + adafruit_st7789.__version__)
print()

# Release any resources currently in use for the displays
displayio.release_displays()

tft_cs = board.GP11
tft_dc = board.GP12
tft_res = board.GP13
spi_mosi = board.GP15
spi_clk = board.GP14

"""
classbusio.SPI(clock: microcontroller.Pin,
                MOSI: Optional[microcontroller.Pin] = None,
                MISO: Optional[microcontroller.Pin] = None)
"""
spi = busio.SPI(spi_clk, MOSI=spi_mosi)

display_bus = displayio.FourWire(
    spi, command=tft_dc, chip_select=tft_cs, reset=tft_res
)

display = adafruit_st7789.ST7789(display_bus,
                    width=240, height=240, rowstart=80)

# Make the display context
splash = displayio.Group(max_size=10)
display.show(splash)

color_bitmap = displayio.Bitmap(135, 240, 1)
color_palette = displayio.Palette(1)
color_palette[0] = 0x00FF00

bg_sprite = displayio.TileGrid(color_bitmap,
                               pixel_shader=color_palette, x=0, y=0)
splash.append(bg_sprite)

# Draw a smaller inner rectangle
inner_bitmap = displayio.Bitmap(133, 238, 1)
inner_palette = displayio.Palette(1)
inner_palette[0] = 0x0000FF
inner_sprite = displayio.TileGrid(inner_bitmap,
                                  pixel_shader=inner_palette, x=1, y=1)
splash.append(inner_sprite)

# Draw a label
text_group1 = displayio.Group(max_size=10, scale=2, x=20, y=40)
text1 = "RPi Pico"
text_area1 = label.Label(terminalio.FONT, text=text1, color=0xFF0000)
text_group1.append(text_area1)  # Subgroup for text scaling
# Draw a label
text_group2 = displayio.Group(max_size=10, scale=1, x=20, y=60)
text2 = "CircuitPython"
text_area2 = label.Label(terminalio.FONT, text=text2, color=0xFFFFFF)
text_group2.append(text_area2)  # Subgroup for text scaling

# Draw a label
text_group3 = displayio.Group(max_size=10, scale=1, x=20, y=100)
text3 = adafruit_st7789.__name__
text_area3 = label.Label(terminalio.FONT, text=text3, color=0x0000000)
text_group3.append(text_area3)  # Subgroup for text scaling
# Draw a label
text_group4 = displayio.Group(max_size=10, scale=2, x=20, y=120)
text4 = adafruit_st7789.__version__
text_area4 = label.Label(terminalio.FONT, text=text4, color=0x000000)
text_group4.append(text_area4)  # Subgroup for text scaling

splash.append(text_group1)
splash.append(text_group2)
splash.append(text_group3)
splash.append(text_group4)

time.sleep(3.0)

rot = 0
while True:
    time.sleep(5.0)
    rot = rot + 90
    if (rot>=360):
        rot =0
    display.rotation = rot

cpyPico_spiST7789_bitmap_240.py
"""
Example of CircuitPython/Raspberry Pi Pico
to display on 2.0" IPS 240x320 (RGB) screen
with ST7789 driver via SPI interface.

Connection between Pico and
the IPS screen, with ST7789 SPI interface.
3V3  - BLK (backlight, always on)
GP11 - CS
GP12 - DC
GP13 - RES
GP15 - SDA
GP14 - SCL
3V3  - VCC
GND  - GND
"""

import os
import board
import time
import terminalio
import displayio
import busio
from adafruit_display_text import label
import adafruit_st7789

print("==============================")
print(os.uname())
print("Hello Raspberry Pi Pico/CircuitPython ST7789 SPI IPS Display")
print(adafruit_st7789.__name__ + " version: " + adafruit_st7789.__version__)
print()

# Release any resources currently in use for the displays
displayio.release_displays()

tft_cs = board.GP11
tft_dc = board.GP12
tft_res = board.GP13
spi_mosi = board.GP15
spi_clk = board.GP14

"""
classbusio.SPI(clock: microcontroller.Pin,
                MOSI: Optional[microcontroller.Pin] = None,
                MISO: Optional[microcontroller.Pin] = None)
"""
spi = busio.SPI(spi_clk, MOSI=spi_mosi)

display_bus = displayio.FourWire(
    spi, command=tft_dc, chip_select=tft_cs, reset=tft_res
)

display = adafruit_st7789.ST7789(display_bus,
                    width=240, height=240, rowstart=80)
display.rotation = 270

group = displayio.Group(max_size=10)
display.show(group)

bitmap_width = 240
bitmap_height = 240
bitmap = displayio.Bitmap(bitmap_width, bitmap_height, bitmap_height)

palette = displayio.Palette(bitmap_height)
for p in range(bitmap_height):
    palette[p] = (0x010000*p) + (0x0100*p) + p

for y in range(bitmap_height):
    for x in range(bitmap_width):
        bitmap[x,y] = y
        
tileGrid = displayio.TileGrid(bitmap, pixel_shader=palette, x=0, y=0)
group.append(tileGrid)

time.sleep(3.0)

while True:
    for p in range(bitmap_height):
        palette[p] = p
    time.sleep(3.0)

    for p in range(bitmap_height):
        palette[p] = 0x0100 * p
    time.sleep(3.0)

    for p in range(bitmap_height):
        palette[p] = 0x010000 * p
    time.sleep(3.0)

cpyPico_spiST7789_shape_240.py
"""
Example of CircuitPython/Raspberry Pi Pico
to display on 2.0" IPS 240x320 (RGB) screen
with ST7789 driver via SPI interface.

modify example from:
https://circuitpython.readthedocs.io/projects/display-shapes/en/latest/index.html

Connection between Pico and
the IPS screen, with ST7789 SPI interface.
3V3  - BLK (backlight, always on)
GP11 - CS
GP12 - DC
GP13 - RES
GP15 - SDA
GP14 - SCL
3V3  - VCC
GND  - GND
"""

import os
import board
import time
import terminalio
import displayio
import busio
import adafruit_st7789
from adafruit_display_shapes.rect import Rect
from adafruit_display_shapes.circle import Circle
from adafruit_display_shapes.roundrect import RoundRect
from adafruit_display_shapes.triangle import Triangle

print("==============================")
print(os.uname())
print("Hello Raspberry Pi Pico/CircuitPython ST7789 SPI IPS Display")
print(adafruit_st7789.__name__ + " version: " + adafruit_st7789.__version__)
print()

# Release any resources currently in use for the displays
displayio.release_displays()

tft_cs = board.GP11
tft_dc = board.GP12
tft_res = board.GP13
spi_mosi = board.GP15
spi_clk = board.GP14

"""
classbusio.SPI(clock: microcontroller.Pin,
                MOSI: Optional[microcontroller.Pin] = None,
                MISO: Optional[microcontroller.Pin] = None)
"""
spi = busio.SPI(spi_clk, MOSI=spi_mosi)

display_bus = displayio.FourWire(
    spi, command=tft_dc, chip_select=tft_cs, reset=tft_res
)

display = adafruit_st7789.ST7789(display_bus,
                    width=240, height=240, rowstart=80)
display.rotation = 270

splash = displayio.Group()
display.show(splash)

color_bitmap = displayio.Bitmap(240, 240, 1)
color_palette = displayio.Palette(1)
color_palette[0] = 0xFFFFFF
bg_sprite = displayio.TileGrid(color_bitmap, pixel_shader=color_palette, x=0, y=0)
splash.append(bg_sprite)

triangle = Triangle(170, 50, 120, 140, 210, 160, fill=0x00FF00, outline=0xFF00FF)
splash.append(triangle)

rect = Rect(80, 20, 41, 41, fill=0x0)
splash.append(rect)

circle = Circle(100, 100, 20, fill=0x00FF00, outline=0xFF00FF)
splash.append(circle)

rect2 = Rect(50, 100, 61, 81, outline=0x0, stroke=3)
splash.append(rect2)

roundrect = RoundRect(10, 10, 61, 81, 10, fill=0x0, outline=0xFF00FF, stroke=6)
splash.append(roundrect)

while True:
    pass


Related:

Next:

Thursday, July 15, 2021

Install PyQt5 for Python3 on Raspberry Pi OS

 To install PyQt5 on Raspberry Pi OS, for Python3, enter the command:

$ sudo apt install python3-pyqt5

Currently, it's 5.11.3.


Raspberry Pi: change screen orientation

To rotate screen in Raspberry Pi OS:

Click on MENU -> Preferences -> Screen Configuration
RIGHT Click on the monitor > Orientation -> Select direction


Tested on 4 inch HDMI IPS Touch Display. Without installing custom driver, the screen will be in vertical (portrait).

Tuesday, July 13, 2021

Install bluepy on Raspberry Pi, for Python3, and examples.

bluepy is a Python interface to Bluetooth LE on Linux.

To install bluepy on Raspberry Pi for Python3, enter the command:

$ sudo apt-get install python3-pip libglib2.0-dev
$ sudo pip3 install bluepy


ref:


bluepy examples:

There are two examples in bluepy, scanner and notification. Here how I modify it for Python3 working on Raspberry Pi, work with ESP32 BLE_uart example.


scanner.py
from bluepy.btle import Scanner, DefaultDelegate

class ScanDelegate(DefaultDelegate):
    def __init__(self):
        DefaultDelegate.__init__(self)

    def handleDiscovery(self, dev, isNewDev, isNewData):
        if isNewDev:
            print("Discovered device", dev.addr)
        elif isNewData:
            print("Received new data from", dev.addr)

scanner = Scanner().withDelegate(ScanDelegate())
devices = scanner.scan(10.0)

for dev in devices:
    print("Device %s (%s), RSSI=%d dB" % (dev.addr, dev.addrType, dev.rssi))
    for (adtype, desc, value) in dev.getScanData():
        print("  %s = %s" % (desc, value))

notification.py
from bluepy import btle

class MyDelegate(btle.DefaultDelegate):
    def __init__(self):
        btle.DefaultDelegate.__init__(self)
        # ... initialise here

    def handleNotification(self, cHandle, data):
        print("\n- handleNotification -\n")
        print(data)
        # ... perhaps check cHandle
        # ... process 'data'


# Initialisation  -------

p = btle.Peripheral("3c:71:bf:0d:dd:6a")
p.setDelegate( MyDelegate() )

# Setup to turn notifications on, e.g.
svc = p.getServiceByUUID("6E400001-B5A3-F393-E0A9-E50E24DCCA9E")
ch = svc.getCharacteristics("6E400003-B5A3-F393-E0A9-E50E24DCCA9E")[0]
#   ch.write( setup_data )

setup_data = b"\x01\00"
p.writeCharacteristic(ch.valHandle+1, setup_data)

# Main loop --------

while True:
    if p.waitForNotifications(1.0):
        # handleNotification() was called
        continue

    print("Waiting...")
    # Perhaps do something else here


Next:

Monday, July 12, 2021

RPi Pico (Arduino framework) + 128x160 ST7735 SPI TFT, using TFT_eSPI library.


With Arduino Mbed OS RP2040 Boards on Arduino IDE, this post show how to connect 128x160 ST7735 SPI TFT to Raspberry Pi Pico, and control with TFT_eSPI library in Arduino framework.


The TFT Display:

The TFT display used here is a 1.8 inch 128x160 ST7735 SPI TFT. The product page is here: 1.8inch SPI Module ST7735S SKU:MSP1803.


Connection between Raspberry Pi Pico and 128x160 ST7735 SPI TFT:

The connection follow the default setup in TFT_eSPI library, Setup60_RP2040_ILI9341.h.


ST7735 TFT			Pico
Pin#	name				
1	VCC	5V/3.3V		3V3	(pin 36)
2	GND	Ground		GND	(pin 38)
3	CS	chip select	20	(pin 26)
4	RESET	reset		19	(pin 25)
5	A0	reg/data	18	(pin 24)
6	SDA	SPI data	3	(pin 5)
7	SCK	SPI clock	2	(pin 4)
8	LED	Backlight	3V3
Prepare Library, TFT_eSPI:

The library used is Bodmer/TFT_eSPI, a Arduino and PlatformIO IDE compatible TFT library optimised for the Raspberry Pi Pico (RP2040), STM32, ESP8266 and ESP32 that supports different driver chips.

To install TFT_eSPI in Arduino IDE, simple open Library Manager, search and install TFT_eSPI by Bodmer.

Take a note on the Tips section in the TFT_eSPI Library page: 
 If you load a new copy of TFT_eSPI then it will overwrite your setups if they are kept within the TFT_eSPI folder. One way around this is to create a new folder in your Arduino library folder called "TFT_eSPI_Setups". You then place your custom setup.h files in there. After an upgrade simply edit the User_Setup_Select.h file to point to your custom setup file.


Here is how I practice it:
- create a new folder in your Arduino library folder called "TFT_eSPI_Setups".
- copy TFT_eSPI/User_Setups/Setup60_RP2040_ILI9341.h to new created "TFT_eSPI_Setups" folder, rename as Setup60_RP2040_ST7735.h.


- Edit Setup60_RP2040_ST7735.h for ST7735:
//                            USER DEFINED SETTINGS
//   Set driver type, fonts to be loaded, pins used and SPI control method etc
//
//   See the User_Setup_Select.h file if you wish to be able to define multiple
//   setups and then easily select which setup file is used by the compiler.
//
//   If this file is edited correctly then all the library example sketches should
//   run without the need to make any more changes for a particular hardware setup!
//   Note that some sketches are designed for a particular TFT pixel width/height


// ##################################################################################
//
// Section 1. Call up the right driver file and any options for it
//
// ##################################################################################

// Tell the library to use 8 bit parallel mode (otherwise SPI is assumed)
//#define TFT_PARALLEL_8_BIT

// Display type -  only define if RPi display
#define RPI_DISPLAY_TYPE // 20MHz maximum SPI

// Only define one driver, the other ones must be commented out
//#define ILI9341_DRIVER
#define ST7735_DRIVER      // Define additional parameters below for this display
//#define ILI9163_DRIVER     // Define additional parameters below for this display
//#define S6D02A1_DRIVER
//#define RPI_ILI9486_DRIVER // 20MHz maximum SPI
//#define HX8357D_DRIVER
//#define ILI9481_DRIVER
//#define ILI9486_DRIVER
//#define ILI9488_DRIVER     // WARNING: Do not connect ILI9488 display SDO to MISO if other devices share the SPI bus (TFT SDO does NOT tristate when CS is high)
//#define ST7789_DRIVER      // Full configuration option, define additional parameters below for this display
//#define ST7789_2_DRIVER    // Minimal configuration option, define additional parameters below for this display
//#define R61581_DRIVER
//#define RM68140_DRIVER
//#define ST7796_DRIVER
//#define SSD1963_480_DRIVER
//#define SSD1963_800_DRIVER
//#define SSD1963_800ALT_DRIVER
//#define ILI9225_DRIVER

// Some displays support SPI reads via the MISO pin, other displays have a single
// bi-directional SDA pin and the library will try to read this via the MOSI line.
// To use the SDA line for reading data from the TFT uncomment the following line:

// #define TFT_SDA_READ      // This option is for ESP32 ONLY, tested with ST7789 display only

// For ST7735, ST7789 and ILI9341 ONLY, define the colour order IF the blue and red are swapped on your display
// Try ONE option at a time to find the correct colour order for your display

#define TFT_RGB_ORDER TFT_RGB  // Colour order Red-Green-Blue
//  #define TFT_RGB_ORDER TFT_BGR  // Colour order Blue-Green-Red

// For ST7789, ST7735 and ILI9163 ONLY, define the pixel width and height in portrait orientation
// #define TFT_WIDTH  80
#define TFT_WIDTH  128
// #define TFT_WIDTH  240 // ST7789 240 x 240 and 240 x 320
#define TFT_HEIGHT 160
// #define TFT_HEIGHT 128
// #define TFT_HEIGHT 240 // ST7789 240 x 240
// #define TFT_HEIGHT 320 // ST7789 240 x 320

// For ST7735 ONLY, define the type of display, originally this was based on the
// colour of the tab on the screen protector film but this is not always true, so try
// out the different options below if the screen does not display graphics correctly,
// e.g. colours wrong, mirror images, or tray pixels at the edges.
// Comment out ALL BUT ONE of these options for a ST7735 display driver, save this
// this User_Setup file, then rebuild and upload the sketch to the board again:

//#define ST7735_INITB
#define ST7735_GREENTAB
// #define ST7735_GREENTAB2
// #define ST7735_GREENTAB3
// #define ST7735_GREENTAB128    // For 128 x 128 display
// #define ST7735_GREENTAB160x80 // For 160 x 80 display (BGR, inverted, 26 offset)
// #define ST7735_REDTAB
// #define ST7735_BLACKTAB
// #define ST7735_REDTAB160x80   // For 160 x 80 display with 24 pixel offset

// If colours are inverted (white shows as black) then uncomment one of the next
// 2 lines try both options, one of the options should correct the inversion.

// #define TFT_INVERSION_ON
// #define TFT_INVERSION_OFF


// ##################################################################################
//
// Section 2. Define the pins that are used to interface with the display here
//
// ##################################################################################

// If a backlight control signal is available then define the TFT_BL pin in Section 2
// below. The backlight will be turned ON when tft.begin() is called, but the library
// needs to know if the LEDs are ON with the pin HIGH or LOW. If the LEDs are to be
// driven with a PWM signal or turned OFF/ON then this must be handled by the user
// sketch. e.g. with digitalWrite(TFT_BL, LOW);

// #define TFT_BL   32            // LED back-light control pin
// #define TFT_BACKLIGHT_ON HIGH  // Level to turn ON back-light (HIGH or LOW)

// We must use hardware SPI, a minimum of 3 GPIO pins is needed.
// Typical setup for the RP2040 is :
//
// Display SDO/MISO  to RP2040 pin D0 (or leave disconnected if not reading TFT)
// Display LED       to RP2040 pin 3V3 or 5V
// Display SCK       to RP2040 pin D2
// Display SDI/MOSI  to RP2040 pin D3
// Display DC (RS/AO)to RP2040 pin D18 (can use another pin if desired)
// Display RESET     to RP2040 pin D19 (can use another pin if desired)
// Display CS        to RP2040 pin D20 (can use another pin if desired, or GND, see below)
// Display GND       to RP2040 pin GND (0V)
// Display VCC       to RP2040 5V or 3.3V (5v if display has a 5V to 3.3V regulator fitted)
//
// The DC (Data Command) pin may be labelled AO or RS (Register Select)
//
// With some displays such as the ILI9341 the TFT CS pin can be connected to GND if no more
// SPI devices (e.g. an SD Card) are connected, in this case comment out the #define TFT_CS
// line below so it is NOT defined. Other displays such at the ST7735 require the TFT CS pin
// to be toggled during setup, so in these cases the TFT_CS line must be defined and connected.

// For the Pico use these #define lines
#define TFT_MISO  0
#define TFT_MOSI  3
#define TFT_SCLK  2
#define TFT_CS   20  // Chip select control pin
#define TFT_DC   18  // Data Command control pin
#define TFT_RST  19  // Reset pin (could connect to Arduino RESET pin)
//#define TFT_BL     // LED back-light

//#define TOUCH_CS 21     // Chip select pin (T_CS) of touch screen

// ##################################################################################
//
// Section 3. Define the fonts that are to be used here
//
// ##################################################################################

// Comment out the #defines below with // to stop that font being loaded
// The ESP8366 and ESP32 have plenty of memory so commenting out fonts is not
// normally necessary. If all fonts are loaded the extra FLASH space required is
// about 17Kbytes. To save FLASH space only enable the fonts you need!

#define LOAD_GLCD   // Font 1. Original Adafruit 8 pixel font needs ~1820 bytes in FLASH
#define LOAD_FONT2  // Font 2. Small 16 pixel high font, needs ~3534 bytes in FLASH, 96 characters
#define LOAD_FONT4  // Font 4. Medium 26 pixel high font, needs ~5848 bytes in FLASH, 96 characters
#define LOAD_FONT6  // Font 6. Large 48 pixel font, needs ~2666 bytes in FLASH, only characters 1234567890:-.apm
#define LOAD_FONT7  // Font 7. 7 segment 48 pixel font, needs ~2438 bytes in FLASH, only characters 1234567890:-.
#define LOAD_FONT8  // Font 8. Large 75 pixel font needs ~3256 bytes in FLASH, only characters 1234567890:-.
//#define LOAD_FONT8N // Font 8. Alternative to Font 8 above, slightly narrower, so 3 digits fit a 160 pixel TFT
#define LOAD_GFXFF  // FreeFonts. Include access to the 48 Adafruit_GFX free fonts FF1 to FF48 and custom fonts

// Comment out the #define below to stop the SPIFFS filing system and smooth font code being loaded
// this will save ~20kbytes of FLASH
#define SMOOTH_FONT


// ##################################################################################
//
// Section 4. Other options
//
// ##################################################################################

// Define the SPI clock frequency, this affects the graphics rendering speed. Too
// fast and the TFT driver will not keep up and display corruption appears.
// With an ILI9341 display 40MHz works OK, 80MHz sometimes fails
// With a ST7735 display more than 27MHz may not work (spurious pixels and lines)
// With an ILI9163 display 27 MHz works OK.

// #define SPI_FREQUENCY   1000000
// #define SPI_FREQUENCY   5000000
// #define SPI_FREQUENCY  10000000
// #define SPI_FREQUENCY  20000000
// #define SPI_FREQUENCY  32000000
 #define SPI_FREQUENCY  70000000

// Optional reduced SPI frequency for reading TFT
#define SPI_READ_FREQUENCY  20000000

// The XPT2046 requires a lower SPI clock rate of 2.5MHz so we define that here:
#define SPI_TOUCH_FREQUENCY  2500000


- Edit the User_Setup_Select.h file to point to the custom setup file, Setup60_RP2040_ST7735.h.


//#include <User_Setup.h>           // Default setup is root library folder
#include <../TFT_eSPI_Setups/Setup60_RP2040_ST7735.h>
After then, you can try examples installed with TFT_eSPI, or your own exercises.

My exercise: Pico_ST7735_SPI_128x160_.ino
/*
 * Test 128x160 ST7735 SPI TFT Display,
 * using TFT_eSPI library
 */

#include <TFT_eSPI.h>
#include <SPI.h>

TFT_eSPI tft = TFT_eSPI(); 

void setup() {
    tft.init();
    tft.setRotation(0);
    tft.setTextSize(1);
}

void loop() {
    tft.setRotation(0);
    tft.fillScreen(TFT_BLACK);

    tft.drawPixel(10, 10, TFT_WHITE);
    tft.drawPixel(10, 150, TFT_WHITE);
    tft.drawPixel(118, 150, TFT_WHITE);
    tft.drawPixel(118, 10, TFT_WHITE);
    delay(1000);
    
    int margin = 10;
    for(int x=margin; x<=TFT_WIDTH-margin; x++){
       tft.drawPixel(x, margin, TFT_WHITE);
       delay(10);
    }
    for(int y=margin; y<=TFT_HEIGHT-margin; y++){
       tft.drawPixel(TFT_WIDTH-margin, y, TFT_WHITE);
       delay(10);
    }
    for(int x=TFT_WIDTH-margin; x>=margin; x--){
       tft.drawPixel(x, TFT_HEIGHT-margin, TFT_WHITE);
       delay(10);
    }
    for(int y=TFT_HEIGHT-margin; y>=margin; y--){
       tft.drawPixel(margin, y, TFT_WHITE);
       delay(10);
    }
    delay(500);
    
    tft.setRotation(1);
    //tft.fillScreen(TFT_BLACK);
    tft.setTextColor(TFT_RED, TFT_BLACK);
    tft.drawString("RED", 10, 10, 4);
    delay(1000);

    tft.setRotation(2);
    //tft.fillScreen(TFT_BLACK);
    tft.setTextColor(TFT_GREEN, TFT_BLACK);
    tft.drawString("GREEN", 10, 10, 4);
    delay(1000);

    tft.setRotation(3);
    //tft.fillScreen(TFT_BLACK);
    tft.setTextColor(TFT_BLUE, TFT_BLACK);
    tft.drawString("BLUE", 10, 10, 4);
    delay(1000);


    delay(3000);
}


Install Arduino Mbed OS RP2040 Boards on Arduino IDE, to program Raspberry Pi Pico in Arduino framework.

With ArduinoCore-mbed Release 2.0.0, Arduino now support Raspberry Pi Pico officially. To program Raspberry Pi Pico in Arduino framework, install Arduino Mbed OS RP2040 Boards in Arduino IDE's Library Manager.


The video show the steps:

Tuesday, July 6, 2021

CircuitPython/Raspberry Pi Pico Exercise: get sys info

cpyPico_info.py run on Raspberry Pi Pico/CircuitPython to get system info.

import sys
import os
import microcontroller

print("\nCircuitPython/Raspberry Pi Pico Exercise: get sys info\n")

print('read sys.implementation :-')
print("sys.implementation.name:\t", sys.implementation.name)
print("sys.implementation.version:\t", sys.implementation.version)
print()

# Check if it's 32/64 bits
# ref:
# https://circuitpython.readthedocs.io/en/latest/docs/library/sys.html#sys.maxsize
bits = 0
v = sys.maxsize
while v:
    bits += 1
    v >>= 1
if bits > 32:
    print("It's 64-bit (or more) platform")
else:
    print("It's 32-bit (or less) platform")
    
print('\n======')
print('os.uname() :-')
u = os.uname()
print("type: ", type(u))
print(dir(u))
print(u)

print("sysname:\t", u.sysname)
print("nodename:\t", u.nodename)
print("release:\t", u.release)
print("version:\t", u.version)
print("machine:\t", u.machine)
    
print('\n======')

print()
print('microcontroller.cpus :-')
numOfCpu = len(microcontroller.cpus)
print('Number of CPU: ', numOfCpu)
for i in range(numOfCpu):
    print('CPU[', i, ']:')
    print('\tfrequency:\t', microcontroller.cpus[i].frequency)
    print('\ttemperature:\t', microcontroller.cpus[i].temperature)
    print('\tvoltage:\t', microcontroller.cpus[i].voltage)

print('\n======')


~ more exercises for RPi Pico/CircuitPython

Friday, June 18, 2021

The Moon: Raspberry Pi HQ Camera + Tamron SP 500mm f8 Mirror Lens

This photo and video was token using Raspberry Pi HQ Camera + Tamron Adaptall-2 SP 500mm f8 (55BB).


using Nikon-C adapter


In my usage scenario: The Raspberry Pi 4B/8G is installed with HQ Camera Module (mount with manual focus lens). Remote control with Android with xrdp/Microsoft Remote Desktop. Such that I can control and change setting on remote Android device running Python code, adjust focus/aperture on the lens, and check the effect on local HDMI preview at real-time.

rpiCam_20210619a.py, to capture still photo.
import sys
import picamera
from pkg_resources import require
import time

"""
ref: Picamera
https://picamera.readthedocs.io/en/release-1.13/
"""

#from tkinter import *
#tkinter for Python 3
import tkinter as tk
from tkinter import ttk

def close_window():
    #close tasks
    camera.close()
    print("Camera closed")
    
    print("close_window()")
    print("Window closed")
    root.destroy()

#event callback functions
def evStartPreviewBtnPressed():
    print("Start Preview")
    camera.start_preview()

def evStopPreviewBtnPressed():
    print("Stop Preview")
    camera.stop_preview()

def evCaptureBtnPressed():
    print("Capture")
    timeStamp = time.strftime("%Y%m%d-%H%M%S")
    targetPath="/home/pi/Desktop/img_"+timeStamp+".jpg"
    print(targetPath)
    camera.capture(targetPath)
    
def cmdScaleSharpness(new_value):
    camera.sharpness = scaleSharpness.get()
    print("sharpness: " + str(camera.sharpness))
    
def cmdScaleContrast(new_value):
    camera.contrast = scaleContrast.get()
    print("contrast: " + str(camera.contrast))
    
def cmdScaleBrightness(new_value):
    camera.brightness = scaleBrightness.get()
    print("brightness: " + str(camera.brightness))
    
def cmdScaleSaturation(new_value):
    camera.saturation = scaleSaturation.get()
    print("saturation: " + str(camera.saturation))
    
def cmdScaleExpCompensation(NEW_VALUE):
    camera.exposure_compensation = scaleExpCompensation.get()
    print("exposure_compensation: " + str(camera.exposure_compensation))
    
def cmdRB_Iso():
    camera.iso = varIso.get()
    print("iso: " + str(camera.iso))

print(sys.version)
print(require('picamera'))
strInfo = str(sys.version) + str(require('picamera'))
type(sys.version)
type(require('picamera'))

#Prepare camera
camera = picamera.PiCamera()
#set default
camera.sharpness = +5
camera.contrast = 0
camera.brightness = 50
camera.saturation = 0
camera.iso = 100
camera.video_stabilization = False
camera.exposure_compensation = 0
camera.exposure_mode = 'auto'
camera.meter_mode = 'average'
camera.awb_mode = 'auto'
camera.image_effect = 'none'
camera.color_effects = None
camera.rotation = 0
camera.hflip = False
camera.vflip = False
camera.crop = (0.0, 0.0, 1.0, 1.0)
  
# not work for HQ
#camera.resolution = (4056, 3040)  # HQ
#camera.resolution = (2592, 1944)  # V1
camera.resolution = (3280, 2464)  # V2
#end of set default

SCALE_WIDTH = 940;

#Prepare GUI
root = tk.Tk()
#root.geometry("650x550")
root.geometry("960x800")
root.wm_title("rpiCam (@2021-06-17)")
root.protocol("WM_DELETE_WINDOW", close_window)

labelInfo = tk.Label(root,
                  text=strInfo, fg="gray",
                  font=("Helvetica", 14))
labelInfo.pack()

#Main control
frameMain = tk.Frame(root, bg="lightgray")

btnStartPreview = tk.Button(frameMain, text="Start Preview",
                    command=evStartPreviewBtnPressed)
btnStopPreview = tk.Button(frameMain, text="Stop Preview",
                    command=evStopPreviewBtnPressed)
btnStartPreview.grid(row=2, column=0, sticky=tk.W+tk.E)
btnStopPreview.grid(row=2, column=1, sticky=tk.W+tk.E)

btnCapture = tk.Button(frameMain, text="Capture",
                    command=evCaptureBtnPressed)
btnCapture.grid(row=3, columnspan=2, sticky=tk.W+tk.E)
frameMain.pack(padx=10,pady=10)

#Setting
notebook = ttk.Notebook(root)
frame1 = ttk.Frame(notebook)
frame2 = ttk.Frame(notebook)
frame3 = ttk.Frame(notebook)
notebook.add(frame1, text='Setting 1')
notebook.add(frame2, text='Setting 2')
notebook.add(frame3, text='Setting 3')
notebook.pack()

lfSharpness = ttk.LabelFrame(frame1, text="sharpness")
lfSharpness.pack(fill="x", expand="no", anchor=tk.N)
scaleSharpness = tk.Scale(
    lfSharpness,
    from_=-100, to=100,
    length=SCALE_WIDTH,
    orient=tk.HORIZONTAL,
    command=cmdScaleSharpness)
scaleSharpness.set(camera.sharpness)
scaleSharpness.pack()

lfContrast = ttk.LabelFrame(frame1, text="contrast")
lfContrast.pack(fill="x", expand="no", anchor=tk.N)
scaleContrast = tk.Scale(
    lfContrast,
    from_=-100, to=100,
    length=SCALE_WIDTH,
    orient=tk.HORIZONTAL,
    command=cmdScaleContrast)
scaleContrast.set(camera.contrast)
scaleContrast.pack()

lfBrightness = ttk.LabelFrame(frame1, text="brightness")
lfBrightness.pack(fill="x", expand="no", anchor=tk.N)
scaleBrightness = tk.Scale(
    lfBrightness,
    from_=0, to=100,
    length=SCALE_WIDTH,
    orient=tk.HORIZONTAL,
    command=cmdScaleBrightness)
scaleBrightness.set(camera.brightness)
scaleBrightness.pack()

lfSaturation = ttk.LabelFrame(frame1, text="saturation")
lfSaturation.pack(fill="x", expand="no", anchor=tk.N)
scaleSaturation = tk.Scale(
    lfSaturation,
    from_=-100, to=100,
    length=SCALE_WIDTH,
    orient=tk.HORIZONTAL,
    command=cmdScaleSaturation)
scaleSaturation.set(camera.saturation)
scaleSaturation.pack()

lfExpCompensation = ttk.LabelFrame(frame1, text="exposure_compensation")
lfExpCompensation.pack(fill="x", expand="no", anchor=tk.N)
scaleExpCompensation = tk.Scale(
    lfExpCompensation,
    from_=-25, to=25,
    length=SCALE_WIDTH,
    orient=tk.HORIZONTAL,
    command=cmdScaleExpCompensation)
scaleExpCompensation.set(camera.exposure_compensation)
scaleExpCompensation.pack()

#==========================================================
varIso = tk.IntVar()
varIso.set(camera.iso)
lfIso = ttk.LabelFrame(frame2, text="iso")
lfIso.pack(fill="x", expand="no", anchor=tk.N)
tk.Radiobutton(lfIso, variable=varIso,
        text='0 (auto)',value=0,command=cmdRB_Iso).pack(
            anchor=tk.W, side=tk.LEFT)
tk.Radiobutton(lfIso, variable=varIso,
        text='100',value=100,command=cmdRB_Iso).pack(
            anchor=tk.W, side=tk.LEFT)
tk.Radiobutton(lfIso, variable=varIso,
        text='200',value=200,command=cmdRB_Iso).pack(
            anchor=tk.W, side=tk.LEFT)
tk.Radiobutton(lfIso, variable=varIso,
        text='400',value=400,command=cmdRB_Iso).pack(
            anchor=tk.W, side=tk.LEFT)
tk.Radiobutton(lfIso, variable=varIso,
        text='800',value=800,command=cmdRB_Iso).pack(
            anchor=tk.W, side=tk.LEFT)
tk.Radiobutton(lfIso, variable=varIso,
        text='1600',value=1600,command=cmdRB_Iso).pack(
            anchor=tk.W, side=tk.LEFT)
#==========================================================
#-- meter_mode command
def cmdMeterMode():
    camera.meter_mode = varMeterMode.get()
    print("meter_mode: " + str(camera.meter_mode))
#-- exposure_mode
lfMeterMode = ttk.LabelFrame(frame2, text="meter_mode")
lfMeterMode.pack(fill="x", expand="no", anchor=tk.N)
varMeterMode = tk.StringVar()
varMeterMode.set(camera.meter_mode)

tk.Radiobutton(lfMeterMode, variable=varMeterMode,
        text='average',value='average',command=cmdMeterMode).pack(
            anchor=tk.W, side=tk.LEFT)
tk.Radiobutton(lfMeterMode, variable=varMeterMode,
        text='spot',value='spot',command=cmdMeterMode).pack(
            anchor=tk.W, side=tk.LEFT)
tk.Radiobutton(lfMeterMode, variable=varMeterMode,
        text='backlit',value='backlit',command=cmdMeterMode).pack(
            anchor=tk.W, side=tk.LEFT)
tk.Radiobutton(lfMeterMode, variable=varMeterMode,
        text='matrix',value='matrix',command=cmdMeterMode).pack(
            anchor=tk.W, side=tk.LEFT)


#==========================================================
#-- exposure_mode command
def cmdEposureMode():
    camera.exposure_mode = varExposureMode.get()
    print("exposure_mode: " + str(camera.exposure_mode))
#-- exposure_mode
lfExpMode = ttk.LabelFrame(frame2, text="exposure_mode")
lfExpMode.pack(fill="x", expand="no", anchor=tk.N)
varExposureMode = tk.StringVar()
varExposureMode.set(camera.exposure_mode)
lfExposure_mode1 = ttk.Frame(lfExpMode)
lfExposure_mode1.pack(fill="x", expand="no", anchor=tk.N)
lfExposure_mode2 = ttk.Frame(lfExpMode)
lfExposure_mode2.pack(fill="x", expand="no", anchor=tk.N)

tk.Radiobutton(lfExposure_mode1, variable=varExposureMode,
        text='off',value='off',command=cmdEposureMode).pack(
            anchor=tk.W, side=tk.LEFT)
tk.Radiobutton(lfExposure_mode1, variable=varExposureMode,
        text='auto',value='auto',command=cmdEposureMode).pack(
            anchor=tk.W, side=tk.LEFT)
tk.Radiobutton(lfExposure_mode1, variable=varExposureMode,
        text='night',value='night',command=cmdEposureMode).pack(
            anchor=tk.W, side=tk.LEFT)

tk.Radiobutton(lfExposure_mode1, variable=varExposureMode,
        text='nightpreview',value='nightpreview',command=cmdEposureMode).pack(
            anchor=tk.W, side=tk.LEFT)
tk.Radiobutton(lfExposure_mode1, variable=varExposureMode,
        text='backlight',value='backlight',command=cmdEposureMode).pack(
            anchor=tk.W, side=tk.LEFT)
tk.Radiobutton(lfExposure_mode1, variable=varExposureMode,
        text='spotlight',value='spotlight',command=cmdEposureMode).pack(
            anchor=tk.W, side=tk.LEFT)
tk.Radiobutton(lfExposure_mode1, variable=varExposureMode,
        text='sports',value='sports',command=cmdEposureMode).pack(
            anchor=tk.W, side=tk.LEFT)
tk.Radiobutton(lfExposure_mode1, variable=varExposureMode,
        text='snow',value='snow',command=cmdEposureMode).pack(
            anchor=tk.W, side=tk.LEFT)

tk.Radiobutton(lfExposure_mode2, variable=varExposureMode,
        text='beach',value='beach',command=cmdEposureMode).pack(
            anchor=tk.W, side=tk.LEFT)
tk.Radiobutton(lfExposure_mode2, variable=varExposureMode,
        text='verylong',value='verylong',command=cmdEposureMode).pack(
            anchor=tk.W, side=tk.LEFT)
tk.Radiobutton(lfExposure_mode2, variable=varExposureMode,
        text='fixedfps',value='fixedfps',command=cmdEposureMode).pack(
            anchor=tk.W, side=tk.LEFT)
tk.Radiobutton(lfExposure_mode2, variable=varExposureMode,
        text='antishake',value='antishake',command=cmdEposureMode).pack(
            anchor=tk.W, side=tk.LEFT)
tk.Radiobutton(lfExposure_mode2, variable=varExposureMode,
        text='fireworks',value='fireworks',command=cmdEposureMode).pack(
            anchor=tk.W, side=tk.LEFT)
#==========================================================
#common button handler for ImageEffect without parameter setting,
#simple set camera.image_effect
def butComImageEffect():
    camera.image_effect=varImageEffect.get()
    labelImageEffectVar.set(camera.image_effect)

#----- ImageEffect 'solarise' ui event
def butImageEffect_solarize():
    camera.image_effect=varImageEffect.get()
    if cbSolarize_yuv_Var.get():
        yuv = 1
    else:
        yuv = 0
    solarize_para = (yuv,
                     scSolarize_x0_Var.get(),
                     scSolarize_y0_Var.get(),
                     scSolarize_y1_Var.get(),
                     scSolarize_y2_Var.get())
    camera.image_effect_params = solarize_para
    labelImageEffectVar.set(camera.image_effect +
                            " " + str(camera.image_effect_params))
    
def ev_solarizePara(new_value=None):
    varImageEffect.set("solarize")
    butImageEffect_solarize()

#----- ImageEffect 'watercolor' ui event ---
def butImageEffect_watercolor():
    camera.image_effect=varImageEffect.get()
    
    if cbWatercolor_uv_Var.get():
        watercolor_para = (scWatercolor_u_Var.get(),
                           scWatercolor_v_Var.get())
        camera.image_effect_params = watercolor_para
    else:
        watercolor_para = ()
        camera.image_effect_params = watercolor_para
    
    labelImageEffectVar.set(camera.image_effect +
                            " " + str(camera.image_effect_params))
    
def ev_watercolorPara(new_value=None):
    varImageEffect.set("watercolor")
    butImageEffect_watercolor()
    
#----- ImageEffect 'film' ui event ---
def butImageEffect_film():
    camera.image_effect=varImageEffect.get()
    
    film_para = (scFilm_strength_Var.get(),
                 scFilm_u_Var.get(),
                 scFilm_v_Var.get())
    camera.image_effect_params = film_para
    
    labelImageEffectVar.set(camera.image_effect +
                            " " + str(camera.image_effect_params))
    
def ev_filmPara(new_value=None):
    varImageEffect.set("film")
    butImageEffect_film()
    
#----- ImageEffect 'blur' ui event ---
def butImageEffect_blur():
    camera.image_effect=varImageEffect.get()
    
    camera.image_effect_params = scBlur_size_Var.get()
    
    labelImageEffectVar.set(camera.image_effect +
                            " " + str(camera.image_effect_params))
    
def ev_blurPara(new_value=None):
    varImageEffect.set("blur")
    butImageEffect_blur()
    
#----- ImageEffect 'colorswap' ui event ---
def butImageEffect_colorswap():
    camera.image_effect=varImageEffect.get()
    
    camera.image_effect_params = cbColorswap_dir_Var.get()
    
    labelImageEffectVar.set(camera.image_effect +
                            " " + str(camera.image_effect_params))
    
def ev_colorswapPara(new_value=None):
    varImageEffect.set("colorswap")
    butImageEffect_colorswap()

#----- ImageEffect 'posterise' ui event ---
def butImageEffect_posterise():
    camera.image_effect=varImageEffect.get()

    camera.image_effect_params = scPosterise_steps_Var.get()

    labelImageEffectVar.set(camera.image_effect +
                            " " + str(camera.image_effect_params))
    
def ev_posterisePara(new_value=None):
    varImageEffect.set("posterise")
    butImageEffect_posterise()

#----- ImageEffect 'colorpoint' ui event ---
def butImageEffect_colorpoint():
    camera.image_effect=varImageEffect.get()

    camera.image_effect_params = quadrantVar.get()
    
    labelImageEffectVar.set(camera.image_effect +
                            " " + str(camera.image_effect_params))
    
def ev_colorpointPara(new_value=None):
    varImageEffect.set("colorpoint")
    butImageEffect_colorpoint()

#----- ImageEffect 'colorbalance' ui event ---
def butImageEffect_colorbalance():
    camera.image_effect=varImageEffect.get()

    colorbalance_para = (scColorbalance_lens_Var.get(),
                         scColorbalance_r_Var.get(),
                         scColorbalance_g_Var.get(),
                         scColorbalance_b_Var.get(),
                         scColorbalance_u_Var.get(),
                         scColorbalance_v_Var.get())
    camera.image_effect_params = colorbalance_para
    
    labelImageEffectVar.set(camera.image_effect +
                            " " + str(camera.image_effect_params))
    
def ev_colorbalancePara(new_value=None):
    varImageEffect.set("colorbalance")
    butImageEffect_colorbalance()
#-----------------------------------------------------
#-----------------------------------------------------
    
# Tab Image Effect
varImageEffect = tk.StringVar()
labelImageEffectVar = tk.StringVar()
image_effect_setting = camera.image_effect
varImageEffect.set(image_effect_setting)
labelImageEffectVar.set(image_effect_setting)
tk.Label(frame3, textvariable=labelImageEffectVar).pack(anchor=tk.N)

#-- image_effect

lfNoParaOpts1 = ttk.Frame(frame3)
lfNoParaOpts1.pack(fill="x", expand="yes", anchor=tk.N)

tk.Radiobutton(lfNoParaOpts1, variable=varImageEffect,
        text='none',value='none',command=butComImageEffect).pack(
            anchor=tk.W, side=tk.LEFT)
tk.Radiobutton(lfNoParaOpts1, variable=varImageEffect,
        text='negative',value='negative',command=butComImageEffect).pack(
            anchor=tk.W, side=tk.LEFT)
tk.Radiobutton(lfNoParaOpts1, variable=varImageEffect,
        text='sketch',value='sketch',command=butComImageEffect).pack(
            anchor=tk.W, side=tk.LEFT)
tk.Radiobutton(lfNoParaOpts1, variable=varImageEffect,
        text='denoise',value='denoise',command=butComImageEffect).pack(
            anchor=tk.W, side=tk.LEFT)
tk.Radiobutton(lfNoParaOpts1, variable=varImageEffect,
        text='emboss',value='emboss',command=butComImageEffect).pack(
            anchor=tk.W, side=tk.LEFT)
tk.Radiobutton(lfNoParaOpts1, variable=varImageEffect,
        text='oilpaint',value='oilpaint',command=butComImageEffect).pack(
            anchor=tk.W, side=tk.LEFT)
tk.Radiobutton(lfNoParaOpts1, variable=varImageEffect,
        text='hatch',value='hatch',command=butComImageEffect).pack(
            anchor=tk.W, side=tk.LEFT)
tk.Radiobutton(lfNoParaOpts1, variable=varImageEffect,
        text='gpen',value='gpen',command=butComImageEffect).pack(
            anchor=tk.W, side=tk.LEFT)

lfNoParaOpts2 = ttk.Frame(frame3)
lfNoParaOpts2.pack(fill="x", expand="yes", anchor=tk.N)
tk.Radiobutton(lfNoParaOpts2, variable=varImageEffect,
        text='pastel',value='pastel',command=butComImageEffect).pack(
            anchor=tk.W, side=tk.LEFT)
tk.Radiobutton(lfNoParaOpts2, variable=varImageEffect,
        text='saturation',value='saturation',command=butComImageEffect).pack(
            anchor=tk.W, side=tk.LEFT)
tk.Radiobutton(lfNoParaOpts2, variable=varImageEffect,
        text='washedout',value='washedout',command=butComImageEffect).pack(
            anchor=tk.W, side=tk.LEFT)
tk.Radiobutton(lfNoParaOpts2, variable=varImageEffect,
        text='cartoon',value='cartoon',command=butComImageEffect).pack(
            anchor=tk.W, side=tk.LEFT)
tk.Radiobutton(lfNoParaOpts2, variable=varImageEffect,
        text='deinterlace1',value='deinterlace1',command=butComImageEffect).pack(
            anchor=tk.W, side=tk.LEFT)
tk.Radiobutton(lfNoParaOpts2, variable=varImageEffect,
        text='deinterlace2',value='deinterlace2',command=butComImageEffect).pack(
            anchor=tk.W, side=tk.LEFT)

lfSolarize = ttk.LabelFrame(frame3, text="solarize")
lfSolarize.pack(fill="x", expand="yes", anchor=tk.N)

tk.Radiobutton(lfSolarize, variable=varImageEffect,
        text='solarize',value='solarize',command=butImageEffect_solarize).pack(
            anchor=tk.W, side=tk.LEFT)

cbSolarize_yuv_Var = tk.BooleanVar()
tk.Checkbutton(lfSolarize, text="yuv",
    variable=cbSolarize_yuv_Var, command=ev_solarizePara).pack(
        anchor=tk.W, side=tk.LEFT)

scSolarize_x0_Var = tk.IntVar()
scSolarize_x0_Var.set(128)
tk.Scale(lfSolarize, from_=0, to=255,
    orient=tk.HORIZONTAL, length=200, label="x0",
    variable=scSolarize_x0_Var, command=ev_solarizePara).pack(
        anchor=tk.W, side=tk.LEFT)

scSolarize_y0_Var = tk.IntVar()
scSolarize_y0_Var.set(128)
tk.Scale(lfSolarize, from_=0, to=255,
    orient=tk.HORIZONTAL, length=200, label="y0",
    variable=scSolarize_y0_Var, command=ev_solarizePara).pack(
        anchor=tk.W, side=tk.LEFT)

scSolarize_y1_Var = tk.IntVar()
scSolarize_y1_Var.set(128)
tk.Scale(lfSolarize, from_=0, to=255,
    orient=tk.HORIZONTAL, length=200, label="y1",
    variable=scSolarize_y1_Var, command=ev_solarizePara).pack(
        anchor=tk.W, side=tk.LEFT)

scSolarize_y2_Var = tk.IntVar()
scSolarize_y2_Var.set(0)
tk.Scale(lfSolarize, from_=0, to=255,
    orient=tk.HORIZONTAL, length=200, label="y2",
    variable=scSolarize_y2_Var, command=ev_solarizePara).pack(
        anchor=tk.W, side=tk.LEFT)

lfwatercolor = ttk.LabelFrame(frame3, text="watercolor")
lfwatercolor.pack(fill="x", expand="yes", anchor=tk.N)
tk.Radiobutton(lfwatercolor, variable=varImageEffect,
        text='watercolor',value='watercolor',command=butImageEffect_watercolor
               ).pack(anchor=tk.W, side=tk.LEFT)

cbWatercolor_uv_Var = tk.BooleanVar()
cbWatercolor_uv_Var.set(False)
tk.Checkbutton(lfwatercolor, text="uv",
    variable=cbWatercolor_uv_Var, command=ev_watercolorPara).pack(
        anchor=tk.W, side=tk.LEFT)

scWatercolor_u_Var = tk.IntVar()
scWatercolor_u_Var.set(0)
tk.Scale(lfwatercolor, from_=0, to=255,
    orient=tk.HORIZONTAL, length=200, label="u",
    variable=scWatercolor_u_Var, command=ev_watercolorPara).pack(
        anchor=tk.W, side=tk.LEFT)
scWatercolor_v_Var = tk.IntVar()
scWatercolor_v_Var.set(0)
tk.Scale(lfwatercolor, from_=0, to=255,
    orient=tk.HORIZONTAL, length=200, label="v",
    variable=scWatercolor_v_Var, command=ev_watercolorPara).pack(
        anchor=tk.W, side=tk.LEFT)

lffilm = ttk.LabelFrame(frame3, text="film")
lffilm.pack(fill="x", expand="yes", anchor=tk.N)
tk.Radiobutton(lffilm, variable=varImageEffect,
        text='film',value='film',command=butImageEffect_film).pack(
            anchor=tk.W, side=tk.LEFT)

scFilm_strength_Var = tk.IntVar()
scFilm_strength_Var.set(0)
tk.Scale(lffilm, from_=0, to=255,
    orient=tk.HORIZONTAL, length=200, label="strength",
    variable=scFilm_strength_Var, command=ev_filmPara).pack(
        anchor=tk.W, side=tk.LEFT)
scFilm_u_Var = tk.IntVar()
scFilm_u_Var.set(0)
tk.Scale(lffilm, from_=0, to=255,
    orient=tk.HORIZONTAL, length=200, label="u",
    variable=scFilm_u_Var, command=ev_filmPara).pack(anchor=tk.W, side=tk.LEFT)
scFilm_v_Var = tk.IntVar()
scFilm_v_Var.set(0)
tk.Scale(lffilm, from_=0, to=255,
    orient=tk.HORIZONTAL, length=200, label="v",
    variable=scFilm_v_Var, command=ev_filmPara).pack(anchor=tk.W, side=tk.LEFT)

lfblur = ttk.LabelFrame(frame3, text="blur")
lfblur.pack(fill="x", expand="yes", anchor=tk.N)
tk.Radiobutton(lfblur, variable=varImageEffect,
        text='blur',value='blur',command=butImageEffect_blur).pack(
            anchor=tk.W, side=tk.LEFT)
scBlur_size_Var = tk.IntVar()
scBlur_size_Var.set(1)
tk.Scale(lfblur, from_=1, to=2,
    orient=tk.HORIZONTAL, length=100, label="size",
    variable=scBlur_size_Var, command=ev_blurPara).pack(anchor=tk.W, side=tk.LEFT)

lfcolorswap = ttk.LabelFrame(frame3, text="colorswap")
lfcolorswap.pack(fill="x", expand="yes", anchor=tk.N)
tk.Radiobutton(lfcolorswap, variable=varImageEffect,
        text='colorswap',value='colorswap',command=butImageEffect_colorswap).pack(
            anchor=tk.W, side=tk.LEFT)
cbColorswap_dir_Var = tk.BooleanVar()
cbColorswap_dir_Var.set(False)
tk.Checkbutton(lfcolorswap, text="dir - 0:RGB to BGR/1:RGB to BRG",
    variable=cbColorswap_dir_Var, command=ev_colorswapPara).pack(
        anchor=tk.W, side=tk.LEFT)

lfposterise = ttk.LabelFrame(frame3, text="posterise")
lfposterise.pack(fill="x", expand="yes", anchor=tk.N)
tk.Radiobutton(lfposterise, variable=varImageEffect,
        text='posterise',value='posterise',command=butImageEffect_posterise).pack(
            anchor=tk.W, side=tk.LEFT)
scPosterise_steps_Var = tk.IntVar()
scPosterise_steps_Var.set(4)
tk.Scale(lfposterise, from_=2, to=32,
    orient=tk.HORIZONTAL, length=200, label="steps",
    variable=scPosterise_steps_Var, command=ev_posterisePara).pack(
        anchor=tk.W, side=tk.LEFT)

lfcolorpoint = ttk.LabelFrame(frame3, text="colorpoint")
lfcolorpoint.pack(fill="x", expand="yes", anchor=tk.N)
tk.Radiobutton(lfcolorpoint, variable=varImageEffect,
        text='colorpoint',value='colorpoint',command=butImageEffect_colorpoint).pack(
            anchor=tk.W, side=tk.LEFT)
quadrantVar = tk.IntVar()
quadrantVar.set(0)
tk.Radiobutton(lfcolorpoint, text="green",
    variable=quadrantVar, value=0, command=ev_colorpointPara).pack(
        anchor=tk.W, side=tk.LEFT)
tk.Radiobutton(lfcolorpoint, text="red/yellow",
    variable=quadrantVar, value=1, command=ev_colorpointPara).pack(
        anchor=tk.W, side=tk.LEFT)
tk.Radiobutton(lfcolorpoint, text="blue",
    variable=quadrantVar, value=2, command=ev_colorpointPara).pack(
        anchor=tk.W, side=tk.LEFT)
tk.Radiobutton(lfcolorpoint, text="purple",
    variable=quadrantVar, value=3, command=ev_colorpointPara).pack(
        anchor=tk.W, side=tk.LEFT)

lfcolorbalance = ttk.LabelFrame(frame3, text="colorbalance: I can't see any effect!")
lfcolorbalance.pack(fill="x", expand="yes", anchor=tk.N)
tk.Radiobutton(lfcolorbalance, variable=varImageEffect,
        text='colorbalance',value='colorbalance',command=butImageEffect_colorbalance).pack(
            anchor=tk.W, side=tk.LEFT)

scColorbalance_lens_Var = tk.DoubleVar()
scColorbalance_lens_Var.set(0)
tk.Scale(lfcolorbalance, from_=0, to=256,
    orient=tk.HORIZONTAL, length=140, label="lens",
    variable=scColorbalance_lens_Var, command=ev_colorbalancePara).pack(
        anchor=tk.W, side=tk.LEFT)

scColorbalance_r_Var = tk.DoubleVar()
scColorbalance_r_Var.set(1)
tk.Scale(lfcolorbalance, from_=0, to=256,
    orient=tk.HORIZONTAL, length=140, label="r",
    variable=scColorbalance_r_Var, command=ev_colorbalancePara).pack(
        anchor=tk.W, side=tk.LEFT)

scColorbalance_g_Var = tk.DoubleVar()
scColorbalance_g_Var.set(1)
tk.Scale(lfcolorbalance, from_=0, to=256,
    orient=tk.HORIZONTAL, length=140, label="g",
    variable=scColorbalance_g_Var, command=ev_colorbalancePara).pack(
        anchor=tk.W, side=tk.LEFT)

scColorbalance_b_Var = tk.DoubleVar()
scColorbalance_b_Var.set(1)
tk.Scale(lfcolorbalance, from_=0, to=256,
    orient=tk.HORIZONTAL, length=140, label="b",
    variable=scColorbalance_b_Var, command=ev_colorbalancePara).pack(
        anchor=tk.W, side=tk.LEFT)

scColorbalance_u_Var = tk.IntVar()
scColorbalance_u_Var.set(0)
tk.Scale(lfcolorbalance, from_=0, to=255,
    orient=tk.HORIZONTAL, length=140, label="u",
    variable=scColorbalance_u_Var, command=ev_colorbalancePara).pack(
        anchor=tk.W, side=tk.LEFT)

scColorbalance_v_Var = tk.IntVar()
scColorbalance_v_Var.set(0)
tk.Scale(lfcolorbalance, from_=0, to=255,
    orient=tk.HORIZONTAL, length=140, label="v",
    variable=scColorbalance_v_Var, command=ev_colorbalancePara).pack(
        anchor=tk.W, side=tk.LEFT)

#==========================================================
root.mainloop()

print("- bye -")


rpiVid_20210619a.py, modified to capture video.
import sys
import picamera
from pkg_resources import require
import time

"""
ref: Picamera
https://picamera.readthedocs.io/en/release-1.13/
"""

#from tkinter import *
#tkinter for Python 3
import tkinter as tk
from tkinter import ttk

def close_window():
    #close tasks
    camera.close()
    print("Camera closed")
    
    print("close_window()")
    print("Window closed")
    root.destroy()

#event callback functions
def evStartPreviewBtnPressed():
    print("Start Preview")
    camera.start_preview()

def evStopPreviewBtnPressed():
    print("Stop Preview")
    camera.stop_preview()
"""
def evCaptureBtnPressed():
    print("Capture")
    timeStamp = time.strftime("%Y%m%d-%H%M%S")
    targetPath="/home/pi/Desktop/img_"+timeStamp+".jpg"
    print(targetPath)
    camera.capture(targetPath)
"""
    
def evCaptureVideoBtnPressed():
    if btnCapture.config('relief')[-1] == 'sunken':
        btnCapture.config(relief="raised")
        btnCapture['text'] = 'Start Capture Video'
        print("Stop Capture Video")
        camera.stop_recording()
    else:
        btnCapture.config(relief="sunken")
        btnCapture['text'] = 'Stop Capture Video'
        print("Start Capture Video")
        
        timeStamp = time.strftime("%Y%m%d-%H%M%S")
        targetPath="/home/pi/Desktop/vid_"+timeStamp+".h264"
        print(targetPath)
        camera.start_recording(targetPath, format='h264');
    
def cmdScaleSharpness(new_value):
    camera.sharpness = scaleSharpness.get()
    print("sharpness: " + str(camera.sharpness))
    
def cmdScaleContrast(new_value):
    camera.contrast = scaleContrast.get()
    print("contrast: " + str(camera.contrast))
    
def cmdScaleBrightness(new_value):
    camera.brightness = scaleBrightness.get()
    print("brightness: " + str(camera.brightness))
    
def cmdScaleSaturation(new_value):
    camera.saturation = scaleSaturation.get()
    print("saturation: " + str(camera.saturation))
    
def cmdScaleExpCompensation(NEW_VALUE):
    camera.exposure_compensation = scaleExpCompensation.get()
    print("exposure_compensation: " + str(camera.exposure_compensation))
    
def cmdRB_Iso():
    camera.iso = varIso.get()
    print("iso: " + str(camera.iso))

print(sys.version)
print(require('picamera'))
strInfo = str(sys.version) + str(require('picamera'))
type(sys.version)
type(require('picamera'))

#Prepare camera
camera = picamera.PiCamera()
#set default
camera.sharpness = +5
camera.contrast = 0
camera.brightness = 50
camera.saturation = 0
camera.iso = 100
camera.video_stabilization = False
camera.exposure_compensation = 0
camera.exposure_mode = 'auto'
camera.meter_mode = 'average'
camera.awb_mode = 'auto'
camera.image_effect = 'none'
camera.color_effects = None
camera.rotation = 0
camera.hflip = False
camera.vflip = False
camera.crop = (0.0, 0.0, 1.0, 1.0)
  
# not work for HQ
#camera.resolution = (4056, 3040)  # HQ
#camera.resolution = (2592, 1944)  # V1
#camera.resolution = (3280, 2464)  # V2
camera.resolution = (1920, 1080)  # Video
#end of set default

SCALE_WIDTH = 940;

#Prepare GUI
root = tk.Tk()
#root.geometry("650x550")
root.geometry("960x800")
root.wm_title("rpiVid (@2021-06-17)")
root.protocol("WM_DELETE_WINDOW", close_window)

labelInfo = tk.Label(root,
                  text=strInfo, fg="gray",
                  font=("Helvetica", 14))
labelInfo.pack()

#Main control
frameMain = tk.Frame(root, bg="lightgray")

btnStartPreview = tk.Button(frameMain, text="Start Preview",
                    command=evStartPreviewBtnPressed)
btnStopPreview = tk.Button(frameMain, text="Stop Preview",
                    command=evStopPreviewBtnPressed)
btnStartPreview.grid(row=2, column=0, sticky=tk.W+tk.E)
btnStopPreview.grid(row=2, column=1, sticky=tk.W+tk.E)
"""
btnCapture = tk.Button(frameMain, text="Capture",
                    command=evCaptureBtnPressed)
"""
btnCapture = tk.Button(frameMain, text="Start Capture Video",
                       relief="raised",
                       command=evCaptureVideoBtnPressed)

btnCapture.grid(row=3, columnspan=2, sticky=tk.W+tk.E)
frameMain.pack(padx=10,pady=10)

#Setting
notebook = ttk.Notebook(root)
frame1 = ttk.Frame(notebook)
frame2 = ttk.Frame(notebook)
frame3 = ttk.Frame(notebook)
notebook.add(frame1, text='Setting 1')
notebook.add(frame2, text='Setting 2')
notebook.add(frame3, text='Setting 3')
notebook.pack()

lfSharpness = ttk.LabelFrame(frame1, text="sharpness")
lfSharpness.pack(fill="x", expand="no", anchor=tk.N)
scaleSharpness = tk.Scale(
    lfSharpness,
    from_=-100, to=100,
    length=SCALE_WIDTH,
    orient=tk.HORIZONTAL,
    command=cmdScaleSharpness)
scaleSharpness.set(camera.sharpness)
scaleSharpness.pack()

lfContrast = ttk.LabelFrame(frame1, text="contrast")
lfContrast.pack(fill="x", expand="no", anchor=tk.N)
scaleContrast = tk.Scale(
    lfContrast,
    from_=-100, to=100,
    length=SCALE_WIDTH,
    orient=tk.HORIZONTAL,
    command=cmdScaleContrast)
scaleContrast.set(camera.contrast)
scaleContrast.pack()

lfBrightness = ttk.LabelFrame(frame1, text="brightness")
lfBrightness.pack(fill="x", expand="no", anchor=tk.N)
scaleBrightness = tk.Scale(
    lfBrightness,
    from_=0, to=100,
    length=SCALE_WIDTH,
    orient=tk.HORIZONTAL,
    command=cmdScaleBrightness)
scaleBrightness.set(camera.brightness)
scaleBrightness.pack()

lfSaturation = ttk.LabelFrame(frame1, text="saturation")
lfSaturation.pack(fill="x", expand="no", anchor=tk.N)
scaleSaturation = tk.Scale(
    lfSaturation,
    from_=-100, to=100,
    length=SCALE_WIDTH,
    orient=tk.HORIZONTAL,
    command=cmdScaleSaturation)
scaleSaturation.set(camera.saturation)
scaleSaturation.pack()

lfExpCompensation = ttk.LabelFrame(frame1, text="exposure_compensation")
lfExpCompensation.pack(fill="x", expand="no", anchor=tk.N)
scaleExpCompensation = tk.Scale(
    lfExpCompensation,
    from_=-25, to=25,
    length=SCALE_WIDTH,
    orient=tk.HORIZONTAL,
    command=cmdScaleExpCompensation)
scaleExpCompensation.set(camera.exposure_compensation)
scaleExpCompensation.pack()

#==========================================================
varIso = tk.IntVar()
varIso.set(camera.iso)
lfIso = ttk.LabelFrame(frame2, text="iso")
lfIso.pack(fill="x", expand="no", anchor=tk.N)
tk.Radiobutton(lfIso, variable=varIso,
        text='0 (auto)',value=0,command=cmdRB_Iso).pack(
            anchor=tk.W, side=tk.LEFT)
tk.Radiobutton(lfIso, variable=varIso,
        text='100',value=100,command=cmdRB_Iso).pack(
            anchor=tk.W, side=tk.LEFT)
tk.Radiobutton(lfIso, variable=varIso,
        text='200',value=200,command=cmdRB_Iso).pack(
            anchor=tk.W, side=tk.LEFT)
tk.Radiobutton(lfIso, variable=varIso,
        text='400',value=400,command=cmdRB_Iso).pack(
            anchor=tk.W, side=tk.LEFT)
tk.Radiobutton(lfIso, variable=varIso,
        text='800',value=800,command=cmdRB_Iso).pack(
            anchor=tk.W, side=tk.LEFT)
tk.Radiobutton(lfIso, variable=varIso,
        text='1600',value=1600,command=cmdRB_Iso).pack(
            anchor=tk.W, side=tk.LEFT)
#==========================================================
#-- meter_mode command
def cmdMeterMode():
    camera.meter_mode = varMeterMode.get()
    print("meter_mode: " + str(camera.meter_mode))
#-- exposure_mode
lfMeterMode = ttk.LabelFrame(frame2, text="meter_mode")
lfMeterMode.pack(fill="x", expand="no", anchor=tk.N)
varMeterMode = tk.StringVar()
varMeterMode.set(camera.meter_mode)

tk.Radiobutton(lfMeterMode, variable=varMeterMode,
        text='average',value='average',command=cmdMeterMode).pack(
            anchor=tk.W, side=tk.LEFT)
tk.Radiobutton(lfMeterMode, variable=varMeterMode,
        text='spot',value='spot',command=cmdMeterMode).pack(
            anchor=tk.W, side=tk.LEFT)
tk.Radiobutton(lfMeterMode, variable=varMeterMode,
        text='backlit',value='backlit',command=cmdMeterMode).pack(
            anchor=tk.W, side=tk.LEFT)
tk.Radiobutton(lfMeterMode, variable=varMeterMode,
        text='matrix',value='matrix',command=cmdMeterMode).pack(
            anchor=tk.W, side=tk.LEFT)


#==========================================================
#-- exposure_mode command
def cmdEposureMode():
    camera.exposure_mode = varExposureMode.get()
    print("exposure_mode: " + str(camera.exposure_mode))
#-- exposure_mode
lfExpMode = ttk.LabelFrame(frame2, text="exposure_mode")
lfExpMode.pack(fill="x", expand="no", anchor=tk.N)
varExposureMode = tk.StringVar()
varExposureMode.set(camera.exposure_mode)
lfExposure_mode1 = ttk.Frame(lfExpMode)
lfExposure_mode1.pack(fill="x", expand="no", anchor=tk.N)
lfExposure_mode2 = ttk.Frame(lfExpMode)
lfExposure_mode2.pack(fill="x", expand="no", anchor=tk.N)

tk.Radiobutton(lfExposure_mode1, variable=varExposureMode,
        text='off',value='off',command=cmdEposureMode).pack(
            anchor=tk.W, side=tk.LEFT)
tk.Radiobutton(lfExposure_mode1, variable=varExposureMode,
        text='auto',value='auto',command=cmdEposureMode).pack(
            anchor=tk.W, side=tk.LEFT)
tk.Radiobutton(lfExposure_mode1, variable=varExposureMode,
        text='night',value='night',command=cmdEposureMode).pack(
            anchor=tk.W, side=tk.LEFT)

tk.Radiobutton(lfExposure_mode1, variable=varExposureMode,
        text='nightpreview',value='nightpreview',command=cmdEposureMode).pack(
            anchor=tk.W, side=tk.LEFT)
tk.Radiobutton(lfExposure_mode1, variable=varExposureMode,
        text='backlight',value='backlight',command=cmdEposureMode).pack(
            anchor=tk.W, side=tk.LEFT)
tk.Radiobutton(lfExposure_mode1, variable=varExposureMode,
        text='spotlight',value='spotlight',command=cmdEposureMode).pack(
            anchor=tk.W, side=tk.LEFT)
tk.Radiobutton(lfExposure_mode1, variable=varExposureMode,
        text='sports',value='sports',command=cmdEposureMode).pack(
            anchor=tk.W, side=tk.LEFT)
tk.Radiobutton(lfExposure_mode1, variable=varExposureMode,
        text='snow',value='snow',command=cmdEposureMode).pack(
            anchor=tk.W, side=tk.LEFT)

tk.Radiobutton(lfExposure_mode2, variable=varExposureMode,
        text='beach',value='beach',command=cmdEposureMode).pack(
            anchor=tk.W, side=tk.LEFT)
tk.Radiobutton(lfExposure_mode2, variable=varExposureMode,
        text='verylong',value='verylong',command=cmdEposureMode).pack(
            anchor=tk.W, side=tk.LEFT)
tk.Radiobutton(lfExposure_mode2, variable=varExposureMode,
        text='fixedfps',value='fixedfps',command=cmdEposureMode).pack(
            anchor=tk.W, side=tk.LEFT)
tk.Radiobutton(lfExposure_mode2, variable=varExposureMode,
        text='antishake',value='antishake',command=cmdEposureMode).pack(
            anchor=tk.W, side=tk.LEFT)
tk.Radiobutton(lfExposure_mode2, variable=varExposureMode,
        text='fireworks',value='fireworks',command=cmdEposureMode).pack(
            anchor=tk.W, side=tk.LEFT)
#==========================================================
#common button handler for ImageEffect without parameter setting,
#simple set camera.image_effect
def butComImageEffect():
    camera.image_effect=varImageEffect.get()
    labelImageEffectVar.set(camera.image_effect)

#----- ImageEffect 'solarise' ui event
def butImageEffect_solarize():
    camera.image_effect=varImageEffect.get()
    if cbSolarize_yuv_Var.get():
        yuv = 1
    else:
        yuv = 0
    solarize_para = (yuv,
                     scSolarize_x0_Var.get(),
                     scSolarize_y0_Var.get(),
                     scSolarize_y1_Var.get(),
                     scSolarize_y2_Var.get())
    camera.image_effect_params = solarize_para
    labelImageEffectVar.set(camera.image_effect +
                            " " + str(camera.image_effect_params))
    
def ev_solarizePara(new_value=None):
    varImageEffect.set("solarize")
    butImageEffect_solarize()

#----- ImageEffect 'watercolor' ui event ---
def butImageEffect_watercolor():
    camera.image_effect=varImageEffect.get()
    
    if cbWatercolor_uv_Var.get():
        watercolor_para = (scWatercolor_u_Var.get(),
                           scWatercolor_v_Var.get())
        camera.image_effect_params = watercolor_para
    else:
        watercolor_para = ()
        camera.image_effect_params = watercolor_para
    
    labelImageEffectVar.set(camera.image_effect +
                            " " + str(camera.image_effect_params))
    
def ev_watercolorPara(new_value=None):
    varImageEffect.set("watercolor")
    butImageEffect_watercolor()
    
#----- ImageEffect 'film' ui event ---
def butImageEffect_film():
    camera.image_effect=varImageEffect.get()
    
    film_para = (scFilm_strength_Var.get(),
                 scFilm_u_Var.get(),
                 scFilm_v_Var.get())
    camera.image_effect_params = film_para
    
    labelImageEffectVar.set(camera.image_effect +
                            " " + str(camera.image_effect_params))
    
def ev_filmPara(new_value=None):
    varImageEffect.set("film")
    butImageEffect_film()
    
#----- ImageEffect 'blur' ui event ---
def butImageEffect_blur():
    camera.image_effect=varImageEffect.get()
    
    camera.image_effect_params = scBlur_size_Var.get()
    
    labelImageEffectVar.set(camera.image_effect +
                            " " + str(camera.image_effect_params))
    
def ev_blurPara(new_value=None):
    varImageEffect.set("blur")
    butImageEffect_blur()
    
#----- ImageEffect 'colorswap' ui event ---
def butImageEffect_colorswap():
    camera.image_effect=varImageEffect.get()
    
    camera.image_effect_params = cbColorswap_dir_Var.get()
    
    labelImageEffectVar.set(camera.image_effect +
                            " " + str(camera.image_effect_params))
    
def ev_colorswapPara(new_value=None):
    varImageEffect.set("colorswap")
    butImageEffect_colorswap()

#----- ImageEffect 'posterise' ui event ---
def butImageEffect_posterise():
    camera.image_effect=varImageEffect.get()

    camera.image_effect_params = scPosterise_steps_Var.get()

    labelImageEffectVar.set(camera.image_effect +
                            " " + str(camera.image_effect_params))
    
def ev_posterisePara(new_value=None):
    varImageEffect.set("posterise")
    butImageEffect_posterise()

#----- ImageEffect 'colorpoint' ui event ---
def butImageEffect_colorpoint():
    camera.image_effect=varImageEffect.get()

    camera.image_effect_params = quadrantVar.get()
    
    labelImageEffectVar.set(camera.image_effect +
                            " " + str(camera.image_effect_params))
    
def ev_colorpointPara(new_value=None):
    varImageEffect.set("colorpoint")
    butImageEffect_colorpoint()

#----- ImageEffect 'colorbalance' ui event ---
def butImageEffect_colorbalance():
    camera.image_effect=varImageEffect.get()

    colorbalance_para = (scColorbalance_lens_Var.get(),
                         scColorbalance_r_Var.get(),
                         scColorbalance_g_Var.get(),
                         scColorbalance_b_Var.get(),
                         scColorbalance_u_Var.get(),
                         scColorbalance_v_Var.get())
    camera.image_effect_params = colorbalance_para
    
    labelImageEffectVar.set(camera.image_effect +
                            " " + str(camera.image_effect_params))
    
def ev_colorbalancePara(new_value=None):
    varImageEffect.set("colorbalance")
    butImageEffect_colorbalance()
#-----------------------------------------------------
#-----------------------------------------------------
    
# Tab Image Effect
varImageEffect = tk.StringVar()
labelImageEffectVar = tk.StringVar()
image_effect_setting = camera.image_effect
varImageEffect.set(image_effect_setting)
labelImageEffectVar.set(image_effect_setting)
tk.Label(frame3, textvariable=labelImageEffectVar).pack(anchor=tk.N)

#-- image_effect

lfNoParaOpts1 = ttk.Frame(frame3)
lfNoParaOpts1.pack(fill="x", expand="yes", anchor=tk.N)

tk.Radiobutton(lfNoParaOpts1, variable=varImageEffect,
        text='none',value='none',command=butComImageEffect).pack(
            anchor=tk.W, side=tk.LEFT)
tk.Radiobutton(lfNoParaOpts1, variable=varImageEffect,
        text='negative',value='negative',command=butComImageEffect).pack(
            anchor=tk.W, side=tk.LEFT)
tk.Radiobutton(lfNoParaOpts1, variable=varImageEffect,
        text='sketch',value='sketch',command=butComImageEffect).pack(
            anchor=tk.W, side=tk.LEFT)
tk.Radiobutton(lfNoParaOpts1, variable=varImageEffect,
        text='denoise',value='denoise',command=butComImageEffect).pack(
            anchor=tk.W, side=tk.LEFT)
tk.Radiobutton(lfNoParaOpts1, variable=varImageEffect,
        text='emboss',value='emboss',command=butComImageEffect).pack(
            anchor=tk.W, side=tk.LEFT)
tk.Radiobutton(lfNoParaOpts1, variable=varImageEffect,
        text='oilpaint',value='oilpaint',command=butComImageEffect).pack(
            anchor=tk.W, side=tk.LEFT)
tk.Radiobutton(lfNoParaOpts1, variable=varImageEffect,
        text='hatch',value='hatch',command=butComImageEffect).pack(
            anchor=tk.W, side=tk.LEFT)
tk.Radiobutton(lfNoParaOpts1, variable=varImageEffect,
        text='gpen',value='gpen',command=butComImageEffect).pack(
            anchor=tk.W, side=tk.LEFT)

lfNoParaOpts2 = ttk.Frame(frame3)
lfNoParaOpts2.pack(fill="x", expand="yes", anchor=tk.N)
tk.Radiobutton(lfNoParaOpts2, variable=varImageEffect,
        text='pastel',value='pastel',command=butComImageEffect).pack(
            anchor=tk.W, side=tk.LEFT)
tk.Radiobutton(lfNoParaOpts2, variable=varImageEffect,
        text='saturation',value='saturation',command=butComImageEffect).pack(
            anchor=tk.W, side=tk.LEFT)
tk.Radiobutton(lfNoParaOpts2, variable=varImageEffect,
        text='washedout',value='washedout',command=butComImageEffect).pack(
            anchor=tk.W, side=tk.LEFT)
tk.Radiobutton(lfNoParaOpts2, variable=varImageEffect,
        text='cartoon',value='cartoon',command=butComImageEffect).pack(
            anchor=tk.W, side=tk.LEFT)
tk.Radiobutton(lfNoParaOpts2, variable=varImageEffect,
        text='deinterlace1',value='deinterlace1',command=butComImageEffect).pack(
            anchor=tk.W, side=tk.LEFT)
tk.Radiobutton(lfNoParaOpts2, variable=varImageEffect,
        text='deinterlace2',value='deinterlace2',command=butComImageEffect).pack(
            anchor=tk.W, side=tk.LEFT)

lfSolarize = ttk.LabelFrame(frame3, text="solarize")
lfSolarize.pack(fill="x", expand="yes", anchor=tk.N)

tk.Radiobutton(lfSolarize, variable=varImageEffect,
        text='solarize',value='solarize',command=butImageEffect_solarize).pack(
            anchor=tk.W, side=tk.LEFT)

cbSolarize_yuv_Var = tk.BooleanVar()
tk.Checkbutton(lfSolarize, text="yuv",
    variable=cbSolarize_yuv_Var, command=ev_solarizePara).pack(
        anchor=tk.W, side=tk.LEFT)

scSolarize_x0_Var = tk.IntVar()
scSolarize_x0_Var.set(128)
tk.Scale(lfSolarize, from_=0, to=255,
    orient=tk.HORIZONTAL, length=200, label="x0",
    variable=scSolarize_x0_Var, command=ev_solarizePara).pack(
        anchor=tk.W, side=tk.LEFT)

scSolarize_y0_Var = tk.IntVar()
scSolarize_y0_Var.set(128)
tk.Scale(lfSolarize, from_=0, to=255,
    orient=tk.HORIZONTAL, length=200, label="y0",
    variable=scSolarize_y0_Var, command=ev_solarizePara).pack(
        anchor=tk.W, side=tk.LEFT)

scSolarize_y1_Var = tk.IntVar()
scSolarize_y1_Var.set(128)
tk.Scale(lfSolarize, from_=0, to=255,
    orient=tk.HORIZONTAL, length=200, label="y1",
    variable=scSolarize_y1_Var, command=ev_solarizePara).pack(
        anchor=tk.W, side=tk.LEFT)

scSolarize_y2_Var = tk.IntVar()
scSolarize_y2_Var.set(0)
tk.Scale(lfSolarize, from_=0, to=255,
    orient=tk.HORIZONTAL, length=200, label="y2",
    variable=scSolarize_y2_Var, command=ev_solarizePara).pack(
        anchor=tk.W, side=tk.LEFT)

lfwatercolor = ttk.LabelFrame(frame3, text="watercolor")
lfwatercolor.pack(fill="x", expand="yes", anchor=tk.N)
tk.Radiobutton(lfwatercolor, variable=varImageEffect,
        text='watercolor',value='watercolor',command=butImageEffect_watercolor
               ).pack(anchor=tk.W, side=tk.LEFT)

cbWatercolor_uv_Var = tk.BooleanVar()
cbWatercolor_uv_Var.set(False)
tk.Checkbutton(lfwatercolor, text="uv",
    variable=cbWatercolor_uv_Var, command=ev_watercolorPara).pack(
        anchor=tk.W, side=tk.LEFT)

scWatercolor_u_Var = tk.IntVar()
scWatercolor_u_Var.set(0)
tk.Scale(lfwatercolor, from_=0, to=255,
    orient=tk.HORIZONTAL, length=200, label="u",
    variable=scWatercolor_u_Var, command=ev_watercolorPara).pack(
        anchor=tk.W, side=tk.LEFT)
scWatercolor_v_Var = tk.IntVar()
scWatercolor_v_Var.set(0)
tk.Scale(lfwatercolor, from_=0, to=255,
    orient=tk.HORIZONTAL, length=200, label="v",
    variable=scWatercolor_v_Var, command=ev_watercolorPara).pack(
        anchor=tk.W, side=tk.LEFT)

lffilm = ttk.LabelFrame(frame3, text="film")
lffilm.pack(fill="x", expand="yes", anchor=tk.N)
tk.Radiobutton(lffilm, variable=varImageEffect,
        text='film',value='film',command=butImageEffect_film).pack(
            anchor=tk.W, side=tk.LEFT)

scFilm_strength_Var = tk.IntVar()
scFilm_strength_Var.set(0)
tk.Scale(lffilm, from_=0, to=255,
    orient=tk.HORIZONTAL, length=200, label="strength",
    variable=scFilm_strength_Var, command=ev_filmPara).pack(
        anchor=tk.W, side=tk.LEFT)
scFilm_u_Var = tk.IntVar()
scFilm_u_Var.set(0)
tk.Scale(lffilm, from_=0, to=255,
    orient=tk.HORIZONTAL, length=200, label="u",
    variable=scFilm_u_Var, command=ev_filmPara).pack(anchor=tk.W, side=tk.LEFT)
scFilm_v_Var = tk.IntVar()
scFilm_v_Var.set(0)
tk.Scale(lffilm, from_=0, to=255,
    orient=tk.HORIZONTAL, length=200, label="v",
    variable=scFilm_v_Var, command=ev_filmPara).pack(anchor=tk.W, side=tk.LEFT)

lfblur = ttk.LabelFrame(frame3, text="blur")
lfblur.pack(fill="x", expand="yes", anchor=tk.N)
tk.Radiobutton(lfblur, variable=varImageEffect,
        text='blur',value='blur',command=butImageEffect_blur).pack(
            anchor=tk.W, side=tk.LEFT)
scBlur_size_Var = tk.IntVar()
scBlur_size_Var.set(1)
tk.Scale(lfblur, from_=1, to=2,
    orient=tk.HORIZONTAL, length=100, label="size",
    variable=scBlur_size_Var, command=ev_blurPara).pack(anchor=tk.W, side=tk.LEFT)

lfcolorswap = ttk.LabelFrame(frame3, text="colorswap")
lfcolorswap.pack(fill="x", expand="yes", anchor=tk.N)
tk.Radiobutton(lfcolorswap, variable=varImageEffect,
        text='colorswap',value='colorswap',command=butImageEffect_colorswap).pack(
            anchor=tk.W, side=tk.LEFT)
cbColorswap_dir_Var = tk.BooleanVar()
cbColorswap_dir_Var.set(False)
tk.Checkbutton(lfcolorswap, text="dir - 0:RGB to BGR/1:RGB to BRG",
    variable=cbColorswap_dir_Var, command=ev_colorswapPara).pack(
        anchor=tk.W, side=tk.LEFT)

lfposterise = ttk.LabelFrame(frame3, text="posterise")
lfposterise.pack(fill="x", expand="yes", anchor=tk.N)
tk.Radiobutton(lfposterise, variable=varImageEffect,
        text='posterise',value='posterise',command=butImageEffect_posterise).pack(
            anchor=tk.W, side=tk.LEFT)
scPosterise_steps_Var = tk.IntVar()
scPosterise_steps_Var.set(4)
tk.Scale(lfposterise, from_=2, to=32,
    orient=tk.HORIZONTAL, length=200, label="steps",
    variable=scPosterise_steps_Var, command=ev_posterisePara).pack(
        anchor=tk.W, side=tk.LEFT)

lfcolorpoint = ttk.LabelFrame(frame3, text="colorpoint")
lfcolorpoint.pack(fill="x", expand="yes", anchor=tk.N)
tk.Radiobutton(lfcolorpoint, variable=varImageEffect,
        text='colorpoint',value='colorpoint',command=butImageEffect_colorpoint).pack(
            anchor=tk.W, side=tk.LEFT)
quadrantVar = tk.IntVar()
quadrantVar.set(0)
tk.Radiobutton(lfcolorpoint, text="green",
    variable=quadrantVar, value=0, command=ev_colorpointPara).pack(
        anchor=tk.W, side=tk.LEFT)
tk.Radiobutton(lfcolorpoint, text="red/yellow",
    variable=quadrantVar, value=1, command=ev_colorpointPara).pack(
        anchor=tk.W, side=tk.LEFT)
tk.Radiobutton(lfcolorpoint, text="blue",
    variable=quadrantVar, value=2, command=ev_colorpointPara).pack(
        anchor=tk.W, side=tk.LEFT)
tk.Radiobutton(lfcolorpoint, text="purple",
    variable=quadrantVar, value=3, command=ev_colorpointPara).pack(
        anchor=tk.W, side=tk.LEFT)

lfcolorbalance = ttk.LabelFrame(frame3, text="colorbalance: I can't see any effect!")
lfcolorbalance.pack(fill="x", expand="yes", anchor=tk.N)
tk.Radiobutton(lfcolorbalance, variable=varImageEffect,
        text='colorbalance',value='colorbalance',command=butImageEffect_colorbalance).pack(
            anchor=tk.W, side=tk.LEFT)

scColorbalance_lens_Var = tk.DoubleVar()
scColorbalance_lens_Var.set(0)
tk.Scale(lfcolorbalance, from_=0, to=256,
    orient=tk.HORIZONTAL, length=140, label="lens",
    variable=scColorbalance_lens_Var, command=ev_colorbalancePara).pack(
        anchor=tk.W, side=tk.LEFT)

scColorbalance_r_Var = tk.DoubleVar()
scColorbalance_r_Var.set(1)
tk.Scale(lfcolorbalance, from_=0, to=256,
    orient=tk.HORIZONTAL, length=140, label="r",
    variable=scColorbalance_r_Var, command=ev_colorbalancePara).pack(
        anchor=tk.W, side=tk.LEFT)

scColorbalance_g_Var = tk.DoubleVar()
scColorbalance_g_Var.set(1)
tk.Scale(lfcolorbalance, from_=0, to=256,
    orient=tk.HORIZONTAL, length=140, label="g",
    variable=scColorbalance_g_Var, command=ev_colorbalancePara).pack(
        anchor=tk.W, side=tk.LEFT)

scColorbalance_b_Var = tk.DoubleVar()
scColorbalance_b_Var.set(1)
tk.Scale(lfcolorbalance, from_=0, to=256,
    orient=tk.HORIZONTAL, length=140, label="b",
    variable=scColorbalance_b_Var, command=ev_colorbalancePara).pack(
        anchor=tk.W, side=tk.LEFT)

scColorbalance_u_Var = tk.IntVar()
scColorbalance_u_Var.set(0)
tk.Scale(lfcolorbalance, from_=0, to=255,
    orient=tk.HORIZONTAL, length=140, label="u",
    variable=scColorbalance_u_Var, command=ev_colorbalancePara).pack(
        anchor=tk.W, side=tk.LEFT)

scColorbalance_v_Var = tk.IntVar()
scColorbalance_v_Var.set(0)
tk.Scale(lfcolorbalance, from_=0, to=255,
    orient=tk.HORIZONTAL, length=140, label="v",
    variable=scColorbalance_v_Var, command=ev_colorbalancePara).pack(
        anchor=tk.W, side=tk.LEFT)

#==========================================================
root.mainloop()

print("- bye -")