
Tuesday, August 22, 2017
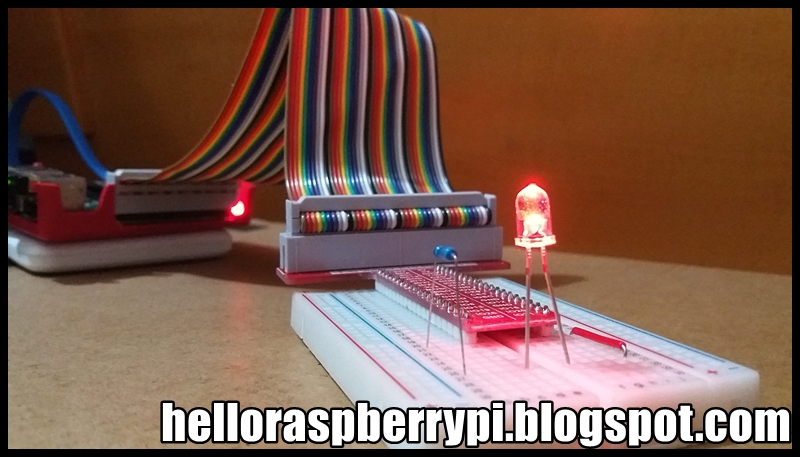
How to Stream Live Video With Raspberry Pi
A quick tutorial for makers who want to stream live video for Raspberry Pi projects - How to Stream Live Video With Raspberry Pi.
Wednesday, August 2, 2017
Raspberry Pi 3 Projects for Java Programmers

Raspberry Pi 3 Projects for Java Programmers
About This Book
- Explore the small yet powerful mini computer in order to run java applications
- Leverage Java libraries to build exciting projects on home automation, IoT, and Robotics by leveraging Java libraries
- Get acquainted with connecting electronic sensors to your Raspberry Pi 3 using Java APIs.
The book is aimed at Java programmers who are eager to get their hands-on Raspberry Pi and build interesting projects using java. They have a very basic knowledge of Raspberry Pi.
What You Will Learn
- Use presence detection using the integrated bluetooth chip
- Automatic light switch using presence detection
- Use a centralized IoT service to publish data using RPC
- Control a robot by driving motors using PWM
- Create a small web service capable of performing actions on the Raspberry Pi and supply readings
- Image capture using Java together with the OpenCV framework
Raspberry Pi is a small, low cost and yet very powerful development platform. It is used to interact with attached electronics by the use of it's GPIO pins for multiple use cases, mainly Home Automation and Robotics.
Our book is a project-based guide that will show you how to utilize the Raspberry Pi's GPIO with Java and how you can leverage this utilization with your knowledge of Java. You will start with installing and setting up the necessary hardware to create a seamless development platform. You will then straightaway start by building a project that will utilize light for presence detection. Next, you will program the application, capable of handling real time data using MQTT and utilize RPC to publish data to adafruit.io. Further, you will build a wireless robot on top of the zuma chassis with the Raspberry Pi as the main controller. Lastly, you will end the book with advanced projects that will help you to create a multi-purpose IoT controller along with building a security camera that will perform image capture and recognize faces with the help of notifications.
By the end of the book, you will be able to build your own real world usable projects not limited to Home Automation, IoT and/or Robotics utilizing logic, user and web interfaces.
Style and approach
The book will contain projects that ensure a java programmer gets started with building interesting projects using the small yet powerful Raspberry Pi 3. We will start with brushing up your Raspberry Pi skills followed by building 5-6 projects
Tuesday, June 13, 2017
Download your FREE copy of 'Raspberry Pi Media Center', by Packtpub

~ Download your free eBook right here
Monday, June 12, 2017
What’s New in Google’s IoT Platform/Android Things? at Google I/O '17
What’s New in Google’s IoT Platform? Ubiquitous Computing at Google (Google I/O '17)
Google has a wide range of platforms and tools to support the Internet of Things and to bring about the vision of ubiquitous computing so users can interact with services wherever and whenever it makes sense for them. Come to this talk to learn about all of these initiatives at Google, including the Google Assistant, Android Things, Google Cloud, Android TV, Android Wear, and Android Auto. Learn more about how they all fit together as part of an ecosystem, which one is most appropriate for different types of developers and applications, and which talks you should be attending at Google I/O.
Developing for Android Things Using Android Studio (Google I/O '17)
Using Android Studio to develop apps for embedded devices is one of the strengths of the Android Things platform. In this session, demonstrate how easy it is to use Android Studio to quickly get started developing a new IoT project. You will learn how to build an app that interacts with low-level peripherals, deploy it to a developer board, and use the debugger to trace hardware-related issues.
Bringing Device Production to Everyone With Android Things (Google I/O '17)
Android Things is focused on enabling anyone to build professional, mass-market products on a trusted platform. In this session, you will learn about the steps and tools needed to go from your developer kit prototype to fabricating custom boards for your own product. Explore the costs and timelines involved in producing your designs in small and large quantities, and compare the benefits of working with vendors versus managing the process in-house.
From Prototype to Production Devices with Android Things (Google I/O '17)
Android Things is focused on enabling anyone to build professional, mass-market products on a trusted platform. In this session, you will learn about the steps and tools needed to go from your developer kit prototype to fabricating custom boards for your own product. We will explore the costs and timelines involved in producing your designs in small and large quantities, and compare the benefits of working with vendors versus managing the process in-house.
Developing for Android Things Using Android Studio (Google I/O '17)
Bringing Device Production to Everyone With Android Things (Google I/O '17)
From Prototype to Production Devices with Android Things (Google I/O '17)
Thursday, June 8, 2017
Mount Raspberry Pi Camera Module to telescope (with sample video of the Moon)
This video show how to connect Raspberry Pi NoIR Camera Module V2 to telescope, with sample video of the Moon at the end of the video.
Parts:
- Raspberry Pi Camera Module (NoIR V2 shown in the video), with original lens removed.
Caution, removing the lens will void your warranty of the camera module.
- CCTV M12 (or S-mount) housing.
Plastic type, have to cut a little bit as shown:

Normally, the center-to-center distance of the mounting holes is 20mm or 22mm, it cannot be installed on Raspberry Pi Camera Module directly. I mount it with one screw on one hole, and fix it with cable tie on the another hole.
- M12 adapter for telescope.
May be it's the most difficult find parts. It have to mach with your telescope.
- Telescope
It's a 10+ years old small telescope (Bosma D = 90mm / f = 1200mm f/13.3)


Related:
- Saturn@Raspberry Pi NoIR Camera V2/Nikkor AF 300mm f4
- The Moon and Saturn@RPi NoIR Camera V2/Nikkor AF 300mm f4 - 2017-06-08
Wednesday, June 7, 2017
The Moon and Saturn@RPi NoIR Camera V2/Nikkor AF 300mm f4 - 2017-06-08
Videos of The Moon and Saturn, by Raspberry Pi NoIR Camera V2 with Nikkor AF 300mm f4, at 2017-06-08.
For the setup, refer to the post "Saturn@Raspberry Pi NoIR Camera V2/Nikkor AF 300mm f4".
reminder:
Saturn is approaching opposite the Sun, at 15 Jun 2017.
This optimal positioning occurs when Saturn is almost directly opposite the Sun in the sky. Since the Sun reaches its greatest distance below the horizon at midnight, the point opposite to it is highest in the sky at the same time.
At around the same time that Saturn passes opposition, it also makes its closest approach to the Earth – termed its perigee – making it appear at its brightest and largest.
~ in-the-sky.org - Saturn at opposition
Related:
- Mount Raspberry Pi Camera Module to telescope (with sample video of the Moon)
Saturday, June 3, 2017
Python to get ssid and IP address
Python example to get the ssid of connected network, and my IP address. Work on both Python 2 and 3.
pyWireless.py
remark:
The ssid should have no space, otherwise the parts after space will be missed.
Tested on Raspberry Pi 2 with WiFi dongle.

pyWireless.py
import os

#'\' is used to splite pythone line
ipaddress = os.popen("ifconfig wlan0 \
                     | grep 'inet addr' \
                     | awk -F: '{print $2}' \
                     | awk '{print $1}'").read()
ssid = os.popen("iwconfig wlan0 \
                | grep 'ESSID' \
                | awk '{print $4}' \
                | awk -F\\\" '{print $2}'").read()

print("ssid: " + ssid)
print("ipaddress: " + ipaddress)
remark:
The ssid should have no space, otherwise the parts after space will be missed.
Tested on Raspberry Pi 2 with WiFi dongle.

Monday, May 29, 2017
Python to control RGB LED, with tkinter colorchooser/tkColorChooser
Python example to output PWM on GPIO of Raspberry Pi to control RGB LED, with tkinter GUI. Tkinter colorchooser/tkColorChooser is used to select color. Tested on Raspberry Pi 2 running Raspbian Jessie with PIXEL rel. 2017-04-10, work on both Python 2 and 3.
pyGuiPwm.py
Connection:

pyGuiPwm.py
#for Python 2
#from Tkinter import *   #for Python 2
#from tkColorChooser import askcolor

#for Python 3
from tkinter import *
from tkinter.colorchooser import *

import platform
import RPi.GPIO as GPIO

r = 0;
g = 0;
b = 0;

def on_closing():
    print("Clean up")
    pwmledR.stop()
    pwmledG.stop()
    pwmledB.stop()
    GPIO.cleanup()
    print("bye")
    master.destroy()

def getColor():
    global r, g, b
    color = askcolor(color=(r, g, b))
    print(color)
    rgb = color[0]
    colorVal = color[1]
    if rgb != None:
        r = rgb[0]
        g = rgb[1]
        b = rgb[2]
        print("set RGB LED")
        rVal = r/255.0
        gVal = g/255.0
        bVal = b/255.0
        print((7, gVal, bVal))
        pwmValue.set(colorVal)
        pwmledR.ChangeDutyCycle(rVal)
        pwmledG.ChangeDutyCycle(gVal)
        pwmledB.ChangeDutyCycle(bVal)

#mode = GPIO.BCM
#ledR = 16
#ledG = 20
#ledB = 21

mode = GPIO.BOARD
ledR = 36
ledG = 38
ledB = 40

print("Raspberry Pi board revision: "
      + str(GPIO.RPI_INFO['P1_REVISION']))
print("Machine: "
      + platform.machine())
print("Processor: "
      + platform.processor())
print("System: "
      + platform.system())
print("Version: "
      + platform.version())
print("Uname: "
      + str(platform.uname()))
print("Python version: "
      + platform.python_version())
print("RPi.GPIO version: "
      + str(GPIO.VERSION))

GPIO.setmode(mode)
GPIO.setup(ledR, GPIO.OUT)
GPIO.setup(ledG, GPIO.OUT)
GPIO.setup(ledB, GPIO.OUT)
pwmledR = GPIO.PWM(ledR, 50)
pwmledG = GPIO.PWM(ledG, 50)
pwmledB = GPIO.PWM(ledB, 50)
pwmledR.start(0)
pwmledG.start(0)
pwmledB.start(0)

master = Tk()

pwmValue = StringVar()
label = Label(master, textvariable=pwmValue, relief=RAISED )
label.pack()

Button(text='Select Color', command=getColor).pack()

master.protocol("WM_DELETE_WINDOW", on_closing)
mainloop()
Connection:

Python to output PWM to control LED brightness, with tkinter GUI
Python to generate PWM on GPIO of Raspberry Pi to control brightness of a LED, with tkinter GUI. Tested on Raspberry Pi 2 running Raspbian Jessie with PIXEL rel. 2017-04-10, work on both Python 2 (from Tkinter import *) and 3 (from Tkinter import * ).
pyGuiPwm.py
Next:
- Python to control RGB LED, with tkinter colorchooser/tkColorChooser
pyGuiPwm.py
from Tkinter import *   #for Python 2
#from tkinter import *   #for Python 3

import platform
import RPi.GPIO as GPIO

def setPwm(newvalue):
    pwmValue.set(newvalue)
    pwmled.ChangeDutyCycle(float(newvalue))

def on_closing():
    print("Clean up")
    pwmled.stop()
    GPIO.cleanup()
    print("bye")
    master.destroy()

#mode = GPIO.BCM
#led = 21
mode = GPIO.BOARD
led = 40

print("Raspberry Pi board revision: "
      + str(GPIO.RPI_INFO['P1_REVISION']))
print("Machine: "
      + platform.machine())
print("Processor: "
      + platform.processor())
print("System: "
      + platform.system())
print("Version: "
      + platform.version())
print("Uname: "
      + str(platform.uname()))
print("Python version: "
      + platform.python_version())
print("RPi.GPIO version: "
      + str(GPIO.VERSION))

GPIO.setmode(mode)
GPIO.setup(led, GPIO.OUT)
pwmled = GPIO.PWM(led, 50)
pwmled.start(0)

master = Tk()

pwmValue = StringVar()
label = Label(master, textvariable=pwmValue, relief=RAISED )
label.pack()

slider = Scale(master, from_=0, to=100, orient=HORIZONTAL, command=setPwm)
slider.pack()

master.protocol("WM_DELETE_WINDOW", on_closing)
mainloop()
Next:
- Python to control RGB LED, with tkinter colorchooser/tkColorChooser
Python to generate PWM on GPIO of Raspberry Pi

Python to generate PWM on GPIO of Raspberry Pi to control brightness of a LED. Tested on Raspberry Pi 2 running Raspbian Jessie with PIXEL rel. 2017-04-10, work on both Python 2 and 3.
pyGPIO.py
import RPi.GPIO as GPIO
import time
import platform

print("Raspberry Pi board revision: "
      + str(GPIO.RPI_INFO['P1_REVISION']))
print("Machine: "
      + platform.machine())
print("Processor: "
      + platform.processor())
print("System: "
      + platform.system())
print("Version: "
      + platform.version())
print("Uname: "
      + str(platform.uname()))
print("Python version: "
      + platform.python_version())
print("RPi.GPIO version: "
      + str(GPIO.VERSION))
print("Ctrl-C to terminate and clean up GPIO")

#mode = GPIO.BCM
#led = 21
mode = GPIO.BOARD
led = 40

GPIO.setmode(mode)
GPIO.setup(led, GPIO.OUT)
pwmled = GPIO.PWM(led, 50)
pwmled.start(0)

try:
    while True:
        for dc in range(0, 101, 5):
            pwmled.ChangeDutyCycle(dc)
            time.sleep(0.1)
        for dc in range(100, -1, -5):
            pwmled.ChangeDutyCycle(dc)
            time.sleep(0.1)
finally:
    print("Clean up")
    pwmled.stop()
    GPIO.cleanup()
Reference:
~ raspberry-gpio-python - Using PWM in RPi.GPIO
Connection (same as in the post "Python to control GPIO of Raspberry Pi"):

Next:
- Python to output PWM to control LED brightness, with tkinter GUI
Python to get sys info on Raspberry Pi, using platform library
Python code to get system info using platform library. Work on both Python 2 and 3. Tested on Raspberry Pi 2 running Raspbian Jessie with PIXEL rel. 2017-04-10.


pySysInfo.py
Reference:
~ https://docs.python.org/2/library/platform.html
~ https://docs.python.org/3/library/platform.html


pySysInfo.py
import platform

print("architecture: \t\t\t"
      + str(platform.architecture()))
print("machine: \t\t\t"
      + platform.machine())
print("node: \t\t\t\t"
      + platform.node())
print("platform: \t\t\t"
      + platform.platform())
print("processor: \t\t\t"
      + platform.processor())
print("python_build: \t\t\t"
      + str(platform.python_build()))
print("python_compiler: \t\t"
      + platform.python_compiler())
print("python_branch: \t\t\t"
      + platform.python_branch())
print("python_implementation(): \t"
      + platform.python_implementation())
print("python_revision: \t\t"
      + platform.python_revision())
print("python_version: \t\t"
      + platform.python_version())
print("python_version_tuple: \t\t"
      + str(platform.python_version_tuple()))
print("release: \t\t\t"
      + platform.release())
print("system: \t\t\t"
      + platform.system())
print("version: \t\t\t"
      + platform.version())

print("Uname: \n"
      + str(platform.uname()))
Reference:
~ https://docs.python.org/2/library/platform.html
~ https://docs.python.org/3/library/platform.html
Sunday, May 28, 2017
Python to control GPIO of Raspberry Pi
It's Python example to control GPIO of Raspberry Pi, tested on Raspberry Pi 2 running Raspbian Jessie with PIXEL rel. 2017-04-10, work on both Python 2 and 3.
pyGPIO.py
import RPi.GPIO as GPIO
import time
import platform

print("Raspberry Pi board revision: "
      + str(GPIO.RPI_INFO['P1_REVISION']))
print("Python version: "
      + platform.python_version())
print("RPi.GPIO version: "
      + str(GPIO.VERSION))
print("Ctrl-C to terminate and clean up GPIO")

#mode = GPIO.BCM
#led = 21
mode = GPIO.BOARD
led = 40

GPIO.setmode(mode)
GPIO.setup(led, GPIO.OUT)

try:
    while True:
        GPIO.output(led, True)
        time.sleep(0.5)
        GPIO.output(led, False)
        time.sleep(0.5)
        GPIO.output(led, True)
        time.sleep(0.5)
        GPIO.output(led, False)
        time.sleep(2)
finally:
    print("Clean up")
    GPIO.cleanup()
Connection:

reference:
- raspberry-gpio-python - RPi.GPIO module basics
Next:
- Python to generate PWM on GPIO of Raspberry Pi
Wednesday, May 17, 2017
Scan Raspberry Pi IP address from network neighbor computer, by MAC
Raspberry Pi Foundation has their own range of MAC addresses B8-27-EB-00-00-00 to B8-27-EB-FF-FF-FF. You can check it at http://hwaddress.com/company/raspberry-pi-foundation

Such that we can scan neighbor with MAC address start with B8-27-EB, using arp command.
arp (stands for Address Resolution Protocol) is used to find the address of a network neighbor for a given IPv4 address.
From Linux Terminal:
$ arp -a | grep b8:27:eb
or from Windows DOS prompt (Now you can run most Linux command on Bash on Windows directly)
> arp -a | grep b8-27-eb
In the result, 192.168.1.9 is the IP address of my Raspberry Pi.

Monday, May 15, 2017
Install virtual keyboard on Raspberry Pi/Raspbian Jessie with PIXEL

To install virtual keyboard, matchbox-keyboard, on Raspberry Pi/Raspbian Jessie with PIXEL:
Always update apt-get:
$ sudo apt-get update
Install matchbox-keyboard:
$ sudo apt-get install matchbox-keyboard
Then, you can open the matchbox-keyboard by enter:
$ matchbox-keyboard
This video show how to install matchbox-keyboard on Raspberry Pi 3/Raspbian Jessie with PIXEL (2017-04-10).
Thursday, May 11, 2017
Waveshare 4" 800x480 HDMI IPS Resistive Touch Screen, for Raspberry Pi
It's a 4" 800x480 HDMI IPS display with resistive touch screen, support Raspberry Pi. Product page in Chinese: http://www.waveshare.net/wiki/4inch_HDMI_LCD

It's the Open Box video, with first setup on Raspberry Pi 3/Raspbian Jessie with Pixel release 2017-04-10.
CAUTION: If you have problem on mis-touch detection when using on Raspberry Pi with new Raspbian Jessie after 2017-03-02, most probably you install the old driver come in the bundle CD-ROM. As show in the video below. You are suggested to download the update driver from the product page.
The touch calibration program, xinput_calibrator, can be download from the product page.
- Download Xinput-calibrator_0.7.5-1_armhf
- install:
$ sudo dpkg -i -B xinput-calibrator_0.7.5-1_armhf.deb
Updated@2020-05-24
Found the product page with install guide, refer https://www.waveshare.com/wiki/4inch_HDMI_LCD.
Checked at 2020-05, with updated Raspbian Buster with desktop on Raspberry Pi 3. It's worked.

Related:
~ Python to control Raspberry Pi Camera - run on Raspberry Pi 3 with Waveshare 4" HDMI LCD, run it on Android phone with Remote Desktop app. The local mounted display (4" HDMI LCD) is used as viewfinder.
Sunday, May 7, 2017
Try RASPBIAN JESSIE WITH PIXEL on x86 PC using VirtualBox/Windows 10
This video show how to download RASPBIAN JESSIE WITH PIXEL for x86, and install on Windows 10 with Oracle VirtualBox.
pixel_x86 image iso can be download here:
http://downloads.raspberrypi.org/pixel_x86/images/
Saturday, May 6, 2017
Introducing AIY Projects: DIY AI for Makers (Voice Kit)
AIY Projects is bringing do-it-yourself artificial intelligence to the Maker community. Go behind the scenes with James, AIY Projects engineer, as he assembles the Voice Kit and uses it to control his own model train. We can’t wait to see the awesome and unexpected ways you will use voice in your own projects.
For more info on AIY Projects and the Voice Kit visit https://aiyprojects.withgoogle.com/.
For more info on AIY Projects and the Voice Kit visit https://aiyprojects.withgoogle.com/.
Sunday, April 30, 2017
Android TV Nougat ROM for Raspberry Pi 3
The AOSP Android TV build can be used to turn Raspberry Pi 3 into a media center. The latest of those is the Nougat Android TV build by “tabp0le”.
This Android TV ROM is built from Android 7.1.2 Nougat AOSP (Android Open Source Project) and is most definitely stock Android in features. The design is compatible for the Raspberry Pi 3, and users can get almost the same feel as with the Nexus Player – the banner device for Android TV.
read more: https://androidcommunity.com/android-tv-nougat-rom-now-available-for-raspberry-pi-3-20170425/
Saturday, April 29, 2017
Introduction to the Google Assistant SDK
Bring voice control, natural language understanding, Google’s smarts, and more to your devices. A developer preview of the Google Assistant SDK is available for everyone interested in tinkering with platforms such as the Raspberry Pi 3. Later this year, commercial device makers will also be able to use the SDK across a wide range of hardware.
- Learn More
- Learn More
Thursday, April 20, 2017
Pair Raspberry Pi with Bluetooth keyboard.

The video show how to pair Bluetooth keyboard to Raspberry Pi 3 with Bluetooth (running Raspbian Jessie with Pixel rel. 2017-04-10).
Tested on Raspberry Pi Zero W, work also.
Wednesday, April 19, 2017
My new board: RASPBERRY PI ZERO W
My new board, Raspberry Pi Zero W, just arrived.


The Raspberry Pi Zero W extends the Pi Zero family. Launched at the end of February 2017, the Pi Zero W has all the functionality of the original Pi Zero but with added connectivity, consisting of:
Like the Pi Zero, it also has:
Product page: https://www.raspberrypi.org/products/pi-zero-w/
Related:
- Pair with Bluetooth keyboard.


The Raspberry Pi Zero W extends the Pi Zero family. Launched at the end of February 2017, the Pi Zero W has all the functionality of the original Pi Zero but with added connectivity, consisting of:
- 802.11 b/g/n wireless LAN
- Bluetooth 4.1
- Bluetooth Low Energy (BLE)
Like the Pi Zero, it also has:
- 1GHz, single-core CPU
- 512MB RAM
- Mini HDMI and USB On-The-Go ports
- Micro USB power
- HAT-compatible 40-pin header
- Composite video and reset headers
- CSI camera connector
Product page: https://www.raspberrypi.org/products/pi-zero-w/
Related:
- Pair with Bluetooth keyboard.
Monday, March 27, 2017
ARM University Program launches Embedded Linux Education Kit
ARM University Program announced the launch of the ninth and latest Education Kit: the Embedded Linux Education Kit. This kit provides full courseware on developing embedded Linux products, including Linux kernel configuration and custom peripheral driver development, using low cost yet powerful ARM-based single-board computers.
The courseware is highly modular and includes a rich set of lecture slides with notes, as well as lab manuals with solutions. As with previous Education Kits from the ARM University Program, the courseware covers fundamental theoretical concepts coupled with a hands-on approach that includes real Linux implementations on an ARM Cortex-A9 based i.MX 6Solo SoC, which is available on the low cost UDOO NEO board.
source: https://community.arm.com/iot/embedded/b/embedded-blog/posts/arm-university-program-launches-embedded-linux-education-kit
 |
| UDOO NEO Board |
Tuesday, February 28, 2017
Internet of Things Programming with JavaScript
Internet of Things Programming with JavaScript
About This Book
- This is a practical guide to help you configure and build a complete distributed IoT system from scratch using JavaScript
- Utilize the power of Node and HTML5 to develop web services and a centralized web server, enabling high-level communication between connected devices
- Control all your connected devices from the browser by setting up a common dashboard
This book is for developers who are interested in learning how to communicate with connected devices in JavaScript to set up an IoT system. Some basic knowledge of JavaScript is expected. Hobbyists who want to explore the potential of IoT in JavaScript will also find this book useful.
What You Will Learn
- Develop the skills to connected devices prepared the field to interact with the devices in a network system Internet of Things
- Find out how to connect sensors and actuators to the devices
- Send data to a web server connected devices
- Understand Internet of things using web services and database
- Configure a dashboard using HTML5 and JavaScript
- Control devices connected from a dashboard
- Monitor different devices from the dashboard
- Build an app for a smartphone to control different devices
The Internet of Things (IoT) is an entirely new platform for developers and engineers, but one thing that remains consistent as we move into this new world, are the programming languages. JavaScript is the most widely used language over the Internet, and with IoT gaining momentum, you will learn how to harness the power of JavaScript to interact with connected devices. This book will teach you how to interact with endpoint devices by developing web services in JavaScript and also set up an interface to control all connected devices.
This book begins with setting up a centralized web server that serves as a hub for all connected devices. The book then progresses further towards building web services to facilitate high-level communication between connected devices. Using Arduino and Raspberry Pi Zero as endpoint devices, the book will show you how devices can communicate with each other, perform a wide range of tasks, and also be controlled from a centralized location using JavaScript. The book ends with creating a hybrid app to control the devices that can be run from a browser or installed on a smartphone.
Style and approach
This book offers step-by-step guidance on how to set up a distributed IoT system using JavaScript.
It will teach you how to interact with endpoint devices by developing web services in JavaScript and also set up an interface for controlling all connected devices.
Thursday, February 16, 2017
VNC Connect, a brand-new version of VNC
VNC Connect, a brand-new version of VNC that allows you not only to make direct connections within your own networks, but also to make secure cloud-brokered connections back to your computer from anywhere in the world, with no specialist networking knowledge needed.
The main change in VNC Connect is the ability to connect back to your Raspberry Pi from anywhere in the world, from a wide range of devices, without any complex port forwarding or IP addressing configuration. The cloud service brokers a secure, end-to-end encrypted connection back to your Pi, letting you take control simply and securely from wherever you happen to be.

A guest post at Raspberry Pi blog, GET ‘BACK TO MY PI’ FROM ANYWHERE WITH VNC CONNECT, Andy Clark, Engineering Manager at RealVNC, introduces VNC Connect: a brand-new, and free, version of VNC that makes it simple to connect securely to your Raspberry Pi from anywhere in the world.
The main change in VNC Connect is the ability to connect back to your Raspberry Pi from anywhere in the world, from a wide range of devices, without any complex port forwarding or IP addressing configuration. The cloud service brokers a secure, end-to-end encrypted connection back to your Pi, letting you take control simply and securely from wherever you happen to be.
A guest post at Raspberry Pi blog, GET ‘BACK TO MY PI’ FROM ANYWHERE WITH VNC CONNECT, Andy Clark, Engineering Manager at RealVNC, introduces VNC Connect: a brand-new, and free, version of VNC that makes it simple to connect securely to your Raspberry Pi from anywhere in the world.
Sunday, February 12, 2017
Raspberry Pi official case - How to spot the difference
Raspberry Pi Blog post spot the difference between real official case and fake case. To know more: https://www.raspberrypi.org/blog/fake-cases-raspberry-pi-make-sure-dont-end-one/
 |
| Fake case |
Sunday, February 5, 2017
MotionEyeOS, A Video Surveillance OS For Single-board Computers
motionEyeOS is a Linux distribution that turns a single-board computer (include Raspberry Pi) into a video surveillance system.

To get started:
Check out the list of supported devices and download the OS image file that corresponds to your board.
Then follow the installation instructions to extract and write the image file to the SD card.

To get started:
Check out the list of supported devices and download the OS image file that corresponds to your board.
Then follow the installation instructions to extract and write the image file to the SD card.
Thursday, February 2, 2017
Remote login Raspbian Jessie With Pixel using RealVNC Viewer from Windows
VNC Server is now built-in to Raspberry Pi running RASPBIAN JESSIE WITH PIXEL. Please note that xrdp conflicts with the RealVNC server, so you shouldn’t install both at once. ~ reference link
This post show how to enable VNC Server on Raspberry Pi, download and run RealVNC View on Microsoft Windows 10 to remote login Raspberry Pi.
First of all enable VNC Server on Raspberry Pi:
- Open Raspberry Pi Configuration: Raspberry Pi Menu -> Preferences -> Raspberry Pi Configuration.
- Make sure VNC option is enabled.

You’ll see the VNC menu appear on the taskbar,

- Visit https://www.realvnc.com/download/viewer/ to download VNC Viewer, then run it.
This video show how:
Related:
- VNC Connect, a brand-new version of VNC
Monday, January 16, 2017
Raspberry Pi 3 Compute Module 3 launched
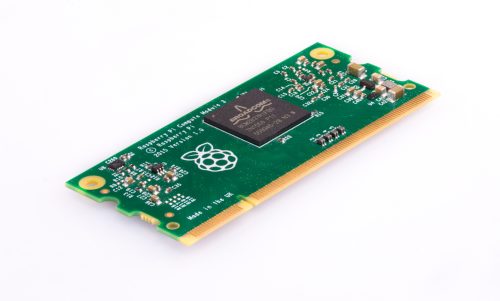
Two versions of Compute Module 3 launched. The first is the ‘standard’ CM3 which has a BCM2837 processor at up to 1.2GHz with 1GByte RAM, the same as Pi3, and 4Gbytes of on-module eMMC flash. The second version, ‘Compute Module 3 Lite’ (CM3L),which still has the same BCM2837 and 1Gbyte of RAM, but brings the SD card interface to the Module pins so a user can wire this up to an eMMC or SD card of their choice.
Know more: https://www.raspberrypi.org/blog/compute-module-3-launch/
Subscribe to:
Posts (Atom)