Saturday, December 19, 2015

BeagleBone Black Cookbook

Over 70 recipes and solutions for inventors, makers, and budding engineers to create projects using the BeagleBone Black

BeagleBone Black Cookbook

About This Book
  • Learn how to develop applications with the BeagleBone Black and open source Linux software
  • Sharpen your expertise in making sophisticated electronic devices
  • Explore the BeagleBone Black with this easy-to-succeed recipe format
Who This Book Is For
If you are a hardware, Linux, and/or microcomputing novice, or someone who wants more power and possibilities with product prototypes, electronic art projects, or embedded computing experiments, then this book is for you. It is for Internet of Things enthusiasts who want to use more sophisticated hardware than the Raspberry Pi or the Arduino can provide.

Whether you are an engineering student, a DIYer, an inventor, or an advanced electronics enthusiast, this book delivers accessible, compelling instructions for using an advanced microcomputing platform.

What You Will Learn
  • Set up and run the BeagleBone Black for the first time
  • Learn the basics of microcomputing and Linux using the command line and easy kernel mods
  • Make introductory projects with Python, JavaScript, BoneScript, and Node.js
  • Explore physical computing and simple circuits using buttons, LEDs, sensors, and motors
  • Discover the unique features of the BeagleBone Black and its real-time computing functions
  • Build intermediate level audio and video applications
  • Assemble draft prototypes for wearable and Internet of Things devices
In Detail
With dozens of how-tos, this book kicks off with the basic steps for setting up and running the BeagleBone Black for the first time, from connecting the necessary hardware and using the command line with Linux commands to installing new software and controlling your system remotely. Following these recipes, more advanced examples take you through scripting, debugging, and working with software source files, eventually working with the Linux kernel. Subsequently, you will learn how to exploit the board's real-time functions. We will then discover exciting methods for using sound and video with the system before marching forward into an exploration of recipes for building Internet of Things projects. Finally, the book finishes with a dramatic arc upward into outer space, when you explore ways to set up test recipes for building a project on board a small satellite's payload.

Style and approach
This comprehensive recipe book deconstructs a complex, often confusing piece of technology, and transforms it to become accessible and fun with snappy, unintimidating prose, and extensive easy-to-succeed instructions.

Python to capture image from Pi Camera Module, with image effects


picamera.camera Module provide function to apply various image effect. This example modified from previous post "Python to capture image from Pi Camera Module, with White Balance setting", to add feature to apply image effect.

reference: API - picamera.camera Module - image_effect


myPiCam.py
import picamera
import Tkinter as tk
import ttk
import time
from PIL import ImageTk, Image
from threading import Thread
import io
import sys
from pkg_resources import require

RQS_0=0
RQS_QUIT=1
RQS_CAPTURE=2
rqs=RQS_0
rqsUpdateSetting=True

def camHandler():
    global rqs
    rqs = RQS_0
    
    camera = picamera.PiCamera()
    #stream = io.BytesIO()

    #set default
    camera.sharpness = 0
    camera.contrast = 0
    camera.brightness = 50
    camera.saturation = 0
    camera.ISO = 0
    camera.video_stabilization = False
    camera.exposure_compensation = 0
    camera.exposure_mode = 'auto'
    camera.meter_mode = 'average'
    camera.awb_mode = 'auto'
    camera.image_effect = 'none'
    camera.color_effects = None
    #camera.rotation = 0
    camera.rotation = 270
    camera.hflip = False
    camera.vflip = False
    camera.crop = (0.0, 0.0, 1.0, 1.0)
    #camera.resolution = (1024, 768)
    camera.resolution = (400, 300)
    #end of set default
    #camera.start_preview()

    while rqs != RQS_QUIT:
        #check if need update setting
        global rqsUpdateSetting
        if rqsUpdateSetting == True:
            rqsUpdateSetting = False
            camera.sharpness = scaleSharpness.get()
            camera.contrast = scaleContrast.get()
            camera.brightness = scaleBrightness.get()
            camera.saturation = scaleSaturation.get()
            camera.exposure_compensation = scaleExpCompensation.get()

            awb_mode_setting = varAwbMode.get()
            labelAwbVar.set(awb_mode_setting)
            camera.awb_mode = awb_mode_setting

            if awb_mode_setting == "off":
                gr = scaleGainRed.get()
                gb = scaleGainBlue.get()
                gAwb = (gr, gb)
                camera.awb_gains = gAwb
                labelAwbVar.set(awb_mode_setting + " : "
                    + str(gAwb))

            image_effect_setting = varImageEffect.get()
            labelImageEffectVar.set(image_effect_setting)
            camera.image_effect = image_effect_setting

            if image_effect_setting == 'solarize':
                if cbSolarize_yuv_Var.get():
                    yuv = 1
                else:
                    yuv = 0
                solarize_para = (
                    yuv,
                    scSolarize_x0_Var.get(),
                    scSolarize_y0_Var.get(),
                    scSolarize_y1_Var.get(),
                    scSolarize_y2_Var.get())
                labelImageEffectVar.set(image_effect_setting + " " + str(solarize_para))
                camera.image_effect_params = solarize_para
            elif image_effect_setting == 'colorpoint':
                camera.image_effect_params = quadrantVar.get()
                labelImageEffectVar.set(image_effect_setting + " " + str(quadrantVar.get()))
            elif image_effect_setting == 'colorbalance':
                colorbalance_para = (
                    scColorbalance_lens_Var.get(),
                    scColorbalance_r_Var.get(),
                    scColorbalance_g_Var.get(),
                    scColorbalance_b_Var.get(),
                    scColorbalance_u_Var.get(),
                    scColorbalance_v_Var.get())
                labelImageEffectVar.set(image_effect_setting + " " + str(colorbalance_para))
                camera.image_effect_params = colorbalance_para
            elif image_effect_setting == 'colorswap':
                labelImageEffectVar.set(image_effect_setting + " " + str(cbColorswap_dir_Var.get()))
                camera.image_effect_params = cbColorswap_dir_Var.get()
            elif image_effect_setting == 'posterise':
                labelImageEffectVar.set(image_effect_setting + " " + str(scPosterise_steps_Var.get()))
                camera.image_effect_params = scPosterise_steps_Var.get()
            elif image_effect_setting == 'blur':
                labelImageEffectVar.set(image_effect_setting + " " + str(scBlur_size_Var.get()))
                camera.image_effect_params = scBlur_size_Var.get()
            elif image_effect_setting == 'film':
                film_para = (
                    scFilm_strength_Var.get(),
                    scFilm_u_Var.get(),
                    scFilm_v_Var.get())
                labelImageEffectVar.set(image_effect_setting + " " + str(film_para))
                camera.image_effect_params = film_para
            elif image_effect_setting == 'watercolor':
                if cbWatercolor_uv_Var.get():
                    watercolor_para = (
                        scWatercolor_u_Var.get(),
                        scWatercolor_v_Var.get())
                    labelImageEffectVar.set(image_effect_setting + " " + str(watercolor_para))
                    camera.image_effect_params = watercolor_para
                else:
                    watercolor_para = ()
                    labelImageEffectVar.set(image_effect_setting + " " + str(watercolor_para))
                    camera.image_effect_params = watercolor_para

        if rqs == RQS_CAPTURE:
            print("Capture")
            rqs=RQS_0
            timeStamp = time.strftime("%Y%m%d-%H%M%S")
            jpgFile='img_'+timeStamp+'.jpg'
            camera.resolution = (2592, 1944)    #set photo size
            camera.capture(jpgFile)
            camera.resolution = (400, 300)      #resume preview size
            labelCapVal.set(jpgFile)
        else:
            stream = io.BytesIO()
            camera.capture(stream, format='jpeg')
            stream.seek(0)
            tmpImage = Image.open(stream)
            tmpImg = ImageTk.PhotoImage(tmpImage)
            previewPanel.configure(image = tmpImg)
            #sleep(0.5)
                
    print("Quit")        
    #camera.stop_preview()
    
def startCamHandler():
    camThread = Thread(target=camHandler)
    camThread.start()

def quit():
    global rqs
    rqs=RQS_QUIT

    global tkTop
    tkTop.destroy()

def capture():
    global rqs
    rqs = RQS_CAPTURE
    labelCapVal.set("capturing")

def cbScaleSetting(new_value):
    global rqsUpdateSetting
    rqsUpdateSetting = True

def cbButtons():
    global rqsUpdateSetting
    rqsUpdateSetting = True

tkTop = tk.Tk()
tkTop.wm_title("helloraspberrypi.blogspot.com")
tkTop.geometry('1000x650')

previewWin = tk.Toplevel(tkTop)
previewWin.title('Preview')
previewWin.geometry('400x300')
previewPanel = tk.Label(previewWin)
previewPanel.pack(side = "bottom", fill = "both", expand = "yes")

#tkButtonQuit = tk.Button(tkTop, text="Quit", command=quit).pack()

tkButtonCapture = tk.Button(
    tkTop, text="Capture", command=capture)
tkButtonCapture.pack()

SCALE_WIDTH = 980;

labelCapVal = tk.StringVar()
tk.Label(tkTop, textvariable=labelCapVal).pack()

notebook = ttk.Notebook(tkTop)
frame1 = ttk.Frame(notebook)
frame2 = ttk.Frame(notebook)
frame3 = ttk.Frame(notebook)
notebook.add(frame1, text='Setting')
notebook.add(frame2, text='White Balance')
notebook.add(frame3, text='Image Effect')
notebook.pack()

# Tab Setting
scaleSharpness = tk.Scale(
    frame1,
    from_=-100, to=100,
    length=SCALE_WIDTH,
    orient=tk.HORIZONTAL,
    label="sharpness",
    command=cbScaleSetting)
scaleSharpness.set(0)
scaleSharpness.pack(anchor=tk.CENTER)

scaleContrast = tk.Scale(
    frame1,
    from_=-100, to=100,
    length=SCALE_WIDTH,
    orient=tk.HORIZONTAL,
    label="contrast",
    command=cbScaleSetting)
scaleContrast.set(0)
scaleContrast.pack(anchor=tk.CENTER)

scaleBrightness = tk.Scale(
    frame1,
    from_=0, to=100,
    length=SCALE_WIDTH,
    orient=tk.HORIZONTAL,
    label="brightness",
    command=cbScaleSetting)
scaleBrightness.set(50)
scaleBrightness.pack(anchor=tk.CENTER)

scaleSaturation = tk.Scale(
    frame1,
    from_=-100, to=100,
    length=SCALE_WIDTH,
    orient=tk.HORIZONTAL,
    label="saturation",
    command=cbScaleSetting)
scaleSaturation.set(0)
scaleSaturation.pack(anchor=tk.CENTER)

scaleExpCompensation = tk.Scale(
    frame1,
    from_=-25, to=25,
    length=SCALE_WIDTH,
    orient=tk.HORIZONTAL,
    label="exposure_compensation",
    command=cbScaleSetting)
scaleExpCompensation.set(0)
scaleExpCompensation.pack(anchor=tk.CENTER)

# Tab White Balance

lfAwbMode = ttk.LabelFrame(frame2, text="awb_mode")
lfAwbMode.pack(fill="x")
lfAwbGains = ttk.LabelFrame(frame2, text="awb_gains")
lfAwbGains.pack(fill="x")

labelAwbVar = tk.StringVar()
tk.Label(lfAwbMode, textvariable=labelAwbVar).pack()

#--
AWB_MODES = [
    ("off", "off"),
    ("auto", "auto"),
    ("sunlight", "sunlight"),
    ("cloudy", "cloudy"),
    ("shade", "shade"),
    ("tungsten", "tungsten"),
    ("fluorescent", "fluorescent"),
    ("incandescent", "incandescent"),
    ("flash", "flash"),
    ("horizon", "horizon"),
    ]

varAwbMode = tk.StringVar()
varAwbMode.set("auto")
for text, awbmode in AWB_MODES:
    awbModeBtns = tk.Radiobutton(
        lfAwbMode,
        text=text,
        variable=varAwbMode,
        value=awbmode,
        command=cbButtons)
    awbModeBtns.pack(anchor=tk.W)
#--
scaleGainRed = tk.Scale(
    lfAwbGains,
    from_=0.0, to=8.0,
    resolution=0.1,
    length=SCALE_WIDTH,
    orient=tk.HORIZONTAL,
    label="Red",
    command=cbScaleSetting)
scaleGainRed.set(0.0)
scaleGainRed.pack(anchor=tk.CENTER)

scaleGainBlue = tk.Scale(
    lfAwbGains,
    from_=0.0, to=8.0,
    resolution=0.1,
    length=SCALE_WIDTH,
    orient=tk.HORIZONTAL,
    label="Blue",
    command=cbScaleSetting)
scaleGainBlue.set(0.0)
scaleGainBlue.pack(anchor=tk.CENTER)

# Tab Image Effect
#For Image effects, ref:
#http://picamera.readthedocs.org/en/latest/api_camera.html?highlight=effect#picamera.camera.PiCamera.image_effect
labelImageEffectVar = tk.StringVar()
tk.Label(frame3, textvariable=labelImageEffectVar).pack()
#-- image_effect

varImageEffect = tk.StringVar()
varImageEffect.set('none')

lfNoParaOpts1 = ttk.Frame(frame3)
lfNoParaOpts1.pack(fill="x", expand="yes")

tk.Radiobutton(lfNoParaOpts1, variable=varImageEffect,
        text='none',value='none',command=cbButtons).pack(anchor=tk.W, side=tk.LEFT)
tk.Radiobutton(lfNoParaOpts1, variable=varImageEffect,
        text='negative',value='negative',command=cbButtons).pack(anchor=tk.W, side=tk.LEFT)
tk.Radiobutton(lfNoParaOpts1, variable=varImageEffect,
        text='sketch',value='sketch',command=cbButtons).pack(anchor=tk.W, side=tk.LEFT)
tk.Radiobutton(lfNoParaOpts1, variable=varImageEffect,
        text='denoise',value='denoise',command=cbButtons).pack(anchor=tk.W, side=tk.LEFT)
tk.Radiobutton(lfNoParaOpts1, variable=varImageEffect,
        text='emboss',value='emboss',command=cbButtons).pack(anchor=tk.W, side=tk.LEFT)
tk.Radiobutton(lfNoParaOpts1, variable=varImageEffect,
        text='oilpaint',value='oilpaint',command=cbButtons).pack(anchor=tk.W, side=tk.LEFT)
tk.Radiobutton(lfNoParaOpts1, variable=varImageEffect,
        text='hatch',value='hatch',command=cbButtons).pack(anchor=tk.W, side=tk.LEFT)
tk.Radiobutton(lfNoParaOpts1, variable=varImageEffect,
        text='gpen',value='gpen',command=cbButtons).pack(anchor=tk.W, side=tk.LEFT)

lfNoParaOpts2 = ttk.Frame(frame3)
lfNoParaOpts2.pack(fill="x", expand="yes")
tk.Radiobutton(lfNoParaOpts2, variable=varImageEffect,
        text='pastel',value='pastel',command=cbButtons).pack(anchor=tk.W, side=tk.LEFT)
tk.Radiobutton(lfNoParaOpts2, variable=varImageEffect,
        text='saturation',value='saturation',command=cbButtons).pack(anchor=tk.W, side=tk.LEFT)
tk.Radiobutton(lfNoParaOpts2, variable=varImageEffect,
        text='washedout',value='washedout',command=cbButtons).pack(anchor=tk.W, side=tk.LEFT)
tk.Radiobutton(lfNoParaOpts2, variable=varImageEffect,
        text='cartoon',value='cartoon',command=cbButtons).pack(anchor=tk.W, side=tk.LEFT)
tk.Radiobutton(lfNoParaOpts2, variable=varImageEffect,
        text='deinterlace1',value='deinterlace1',command=cbButtons).pack(anchor=tk.W, side=tk.LEFT)
tk.Radiobutton(lfNoParaOpts2, variable=varImageEffect,
        text='deinterlace2',value='deinterlace2',command=cbButtons).pack(anchor=tk.W, side=tk.LEFT)

lfSolarize = ttk.LabelFrame(frame3, text="solarize")
lfSolarize.pack(fill="x", expand="yes")

tk.Radiobutton(lfSolarize, variable=varImageEffect,
        text='solarize',value='solarize',command=cbButtons).pack(anchor=tk.W, side=tk.LEFT)

cbSolarize_yuv_Var = tk.BooleanVar()
tk.Checkbutton(lfSolarize, text="yuv",
    variable=cbSolarize_yuv_Var, command=cbButtons).pack(anchor=tk.W, side=tk.LEFT)

scSolarize_x0_Var = tk.IntVar()
scSolarize_x0_Var.set(128)
tk.Scale(lfSolarize, from_=0, to=255,
    orient=tk.HORIZONTAL, length=200, label="x0",
    variable=scSolarize_x0_Var, command=cbScaleSetting).pack(anchor=tk.W, side=tk.LEFT)

scSolarize_y0_Var = tk.IntVar()
scSolarize_y0_Var.set(128)
tk.Scale(lfSolarize, from_=0, to=255,
    orient=tk.HORIZONTAL, length=200, label="y0",
    variable=scSolarize_y0_Var, command=cbScaleSetting).pack(anchor=tk.W, side=tk.LEFT)

scSolarize_y1_Var = tk.IntVar()
scSolarize_y1_Var.set(128)
tk.Scale(lfSolarize, from_=0, to=255,
    orient=tk.HORIZONTAL, length=200, label="y1",
    variable=scSolarize_y1_Var, command=cbScaleSetting).pack(anchor=tk.W, side=tk.LEFT)

scSolarize_y2_Var = tk.IntVar()
scSolarize_y2_Var.set(0)
tk.Scale(lfSolarize, from_=0, to=255,
    orient=tk.HORIZONTAL, length=200, label="y2",
    variable=scSolarize_y2_Var, command=cbScaleSetting).pack(anchor=tk.W, side=tk.LEFT)

lfwatercolor = ttk.LabelFrame(frame3, text="watercolor")
lfwatercolor.pack(fill="x", expand="yes")
tk.Radiobutton(lfwatercolor, variable=varImageEffect,
        text='watercolor',value='watercolor',command=cbButtons).pack(anchor=tk.W, side=tk.LEFT)

cbWatercolor_uv_Var = tk.BooleanVar()
cbWatercolor_uv_Var.set(False)
tk.Checkbutton(lfwatercolor, text="uv",
    variable=cbWatercolor_uv_Var, command=cbButtons).pack(anchor=tk.W, side=tk.LEFT)

scWatercolor_u_Var = tk.IntVar()
scWatercolor_u_Var.set(0)
tk.Scale(lfwatercolor, from_=0, to=255,
    orient=tk.HORIZONTAL, length=200, label="u",
    variable=scWatercolor_u_Var, command=cbScaleSetting).pack(anchor=tk.W, side=tk.LEFT)
scWatercolor_v_Var = tk.IntVar()
scWatercolor_v_Var.set(0)
tk.Scale(lfwatercolor, from_=0, to=255,
    orient=tk.HORIZONTAL, length=200, label="v",
    variable=scWatercolor_v_Var, command=cbScaleSetting).pack(anchor=tk.W, side=tk.LEFT)

lffilm = ttk.LabelFrame(frame3, text="film")
lffilm.pack(fill="x", expand="yes")
tk.Radiobutton(lffilm, variable=varImageEffect,
        text='film',value='film',command=cbButtons).pack(anchor=tk.W, side=tk.LEFT)

scFilm_strength_Var = tk.IntVar()
scFilm_strength_Var.set(0)
tk.Scale(lffilm, from_=0, to=255,
    orient=tk.HORIZONTAL, length=200, label="strength",
    variable=scFilm_strength_Var, command=cbScaleSetting).pack(anchor=tk.W, side=tk.LEFT)
scFilm_u_Var = tk.IntVar()
scFilm_u_Var.set(0)
tk.Scale(lffilm, from_=0, to=255,
    orient=tk.HORIZONTAL, length=200, label="u",
    variable=scFilm_u_Var, command=cbScaleSetting).pack(anchor=tk.W, side=tk.LEFT)
scFilm_v_Var = tk.IntVar()
scFilm_v_Var.set(0)
tk.Scale(lffilm, from_=0, to=255,
    orient=tk.HORIZONTAL, length=200, label="v",
    variable=scFilm_v_Var, command=cbScaleSetting).pack(anchor=tk.W, side=tk.LEFT)

lfblur = ttk.LabelFrame(frame3, text="blur")
lfblur.pack(fill="x", expand="yes")
tk.Radiobutton(lfblur, variable=varImageEffect,
        text='blur',value='blur',command=cbButtons).pack(anchor=tk.W, side=tk.LEFT)
scBlur_size_Var = tk.IntVar()
scBlur_size_Var.set(1)
tk.Scale(lfblur, from_=1, to=2,
    orient=tk.HORIZONTAL, length=100, label="size",
    variable=scBlur_size_Var, command=cbScaleSetting).pack(anchor=tk.W, side=tk.LEFT)

lfcolorswap = ttk.LabelFrame(frame3, text="colorswap")
lfcolorswap.pack(fill="x", expand="yes")
tk.Radiobutton(lfcolorswap, variable=varImageEffect,
        text='colorswap',value='colorswap',command=cbButtons).pack(anchor=tk.W, side=tk.LEFT)
cbColorswap_dir_Var = tk.BooleanVar()
cbColorswap_dir_Var.set(False)
tk.Checkbutton(lfcolorswap, text="dir - 0:RGB to BGR/1:RGB to BRG",
    variable=cbColorswap_dir_Var, command=cbButtons).pack(anchor=tk.W, side=tk.LEFT)

lfposterise = ttk.LabelFrame(frame3, text="posterise")
lfposterise.pack(fill="x", expand="yes")
tk.Radiobutton(lfposterise, variable=varImageEffect,
        text='posterise',value='posterise',command=cbButtons).pack(anchor=tk.W, side=tk.LEFT)
scPosterise_steps_Var = tk.IntVar()
scPosterise_steps_Var.set(4)
tk.Scale(lfposterise, from_=2, to=32,
    orient=tk.HORIZONTAL, length=200, label="steps",
    variable=scPosterise_steps_Var, command=cbScaleSetting).pack(anchor=tk.W, side=tk.LEFT)

lfcolorpoint = ttk.LabelFrame(frame3, text="colorpoint")
lfcolorpoint.pack(fill="x", expand="yes")
tk.Radiobutton(lfcolorpoint, variable=varImageEffect,
        text='colorpoint',value='colorpoint',command=cbButtons).pack(anchor=tk.W, side=tk.LEFT)
quadrantVar = tk.IntVar()
quadrantVar.set(0)
tk.Radiobutton(lfcolorpoint, text="green",
    variable=quadrantVar, value=0, command=cbButtons).pack(anchor=tk.W, side=tk.LEFT)
tk.Radiobutton(lfcolorpoint, text="red/yellow",
    variable=quadrantVar, value=1, command=cbButtons).pack(anchor=tk.W, side=tk.LEFT)
tk.Radiobutton(lfcolorpoint, text="blue",
    variable=quadrantVar, value=2, command=cbButtons).pack(anchor=tk.W, side=tk.LEFT)
tk.Radiobutton(lfcolorpoint, text="purple",
    variable=quadrantVar, value=3, command=cbButtons).pack(anchor=tk.W, side=tk.LEFT)

lfcolorbalance = ttk.LabelFrame(frame3, text="colorbalance: I can't see the effect!")
lfcolorbalance.pack(fill="x", expand="yes")
tk.Radiobutton(lfcolorbalance, variable=varImageEffect,
        text='colorbalance',value='colorbalance',command=cbButtons).pack(anchor=tk.W, side=tk.LEFT)

scColorbalance_lens_Var = tk.DoubleVar()
scColorbalance_lens_Var.set(0)
tk.Scale(lfcolorbalance, from_=0, to=256,
    orient=tk.HORIZONTAL, length=140, label="lens",
    variable=scColorbalance_lens_Var, command=cbScaleSetting).pack(anchor=tk.W, side=tk.LEFT)

scColorbalance_r_Var = tk.DoubleVar()
scColorbalance_r_Var.set(1)
tk.Scale(lfcolorbalance, from_=0, to=256,
    orient=tk.HORIZONTAL, length=140, label="r",
    variable=scColorbalance_r_Var, command=cbScaleSetting).pack(anchor=tk.W, side=tk.LEFT)

scColorbalance_g_Var = tk.DoubleVar()
scColorbalance_g_Var.set(1)
tk.Scale(lfcolorbalance, from_=0, to=256,
    orient=tk.HORIZONTAL, length=140, label="g",
    variable=scColorbalance_g_Var, command=cbScaleSetting).pack(anchor=tk.W, side=tk.LEFT)

scColorbalance_b_Var = tk.DoubleVar()
scColorbalance_b_Var.set(1)
tk.Scale(lfcolorbalance, from_=0, to=256,
    orient=tk.HORIZONTAL, length=140, label="b",
    variable=scColorbalance_b_Var, command=cbScaleSetting).pack(anchor=tk.W, side=tk.LEFT)

scColorbalance_u_Var = tk.IntVar()
scColorbalance_u_Var.set(0)
tk.Scale(lfcolorbalance, from_=0, to=255,
    orient=tk.HORIZONTAL, length=140, label="u",
    variable=scColorbalance_u_Var, command=cbScaleSetting).pack(anchor=tk.W, side=tk.LEFT)

scColorbalance_v_Var = tk.IntVar()
scColorbalance_v_Var.set(0)
tk.Scale(lfcolorbalance, from_=0, to=255,
    orient=tk.HORIZONTAL, length=140, label="v",
    variable=scColorbalance_v_Var, command=cbScaleSetting).pack(anchor=tk.W, side=tk.LEFT)

#=======================================
print("start")
startCamHandler()

tk.mainloop()


updated@2016-04-15:
Current Raspbian Jessie come with PIL installed by default, but no ImageTk. If you run Python script reported with error:
ImportError: cannot import name ImageTk

Install python-imaging-tk
$ sudo apt-get install python-imaging-tk


Updated@2021-03-09:


Friday, December 18, 2015

Python to capture image from Pi Camera Module, with White Balance setting


Further works on previous post of "Python to capture image from Pi Camera Module, with preview", add feature of White Balance setting.


myPiCam.py
import picamera
import Tkinter as tk
import ttk
import time
from PIL import ImageTk, Image
from threading import Thread
import io
import sys
from pkg_resources import require

RQS_0=0
RQS_QUIT=1
RQS_CAPTURE=2
rqs=RQS_0
rqsUpdateSetting=True

def camHandler():
    global rqs
    rqs = RQS_0
    
    camera = picamera.PiCamera()
    #stream = io.BytesIO()

    #set default
    camera.sharpness = 0
    camera.contrast = 0
    camera.brightness = 50
    camera.saturation = 0
    camera.ISO = 0
    camera.video_stabilization = False
    camera.exposure_compensation = 0
    camera.exposure_mode = 'auto'
    camera.meter_mode = 'average'
    camera.awb_mode = 'auto'
    camera.image_effect = 'none'
    camera.color_effects = None
    #camera.rotation = 0
    camera.rotation = 270
    camera.hflip = False
    camera.vflip = False
    camera.crop = (0.0, 0.0, 1.0, 1.0)
    #camera.resolution = (1024, 768)
    camera.resolution = (400, 300)
    #end of set default
    #camera.start_preview()

    while rqs != RQS_QUIT:
        #check if need update setting
        global rqsUpdateSetting
        if rqsUpdateSetting == True:
            rqsUpdateSetting = False
            camera.sharpness = scaleSharpness.get()
            camera.contrast = scaleContrast.get()
            camera.brightness = scaleBrightness.get()
            camera.saturation = scaleSaturation.get()
            camera.exposure_compensation = scaleExpCompensation.get()

            awb_mode_setting = varAwbMode.get()
            labelAwbVar.set(awb_mode_setting)
            camera.awb_mode = awb_mode_setting

            if awb_mode_setting == "off":
                gr = scaleGainRed.get()
                gb = scaleGainBlue.get()
                gAwb = (gr, gb)
                camera.awb_gains = gAwb
                labelAwbVar.set(awb_mode_setting + " : "
                    + str(gAwb))
        
        if rqs == RQS_CAPTURE:
            print("Capture")
            rqs=RQS_0
            timeStamp = time.strftime("%Y%m%d-%H%M%S")
            jpgFile='img_'+timeStamp+'.jpg'
            camera.resolution = (2592, 1944)    #set photo size
            camera.capture(jpgFile)
            camera.resolution = (400, 300)      #resume preview size
            labelCapVal.set(jpgFile)
        else:
            stream = io.BytesIO()
            camera.capture(stream, format='jpeg')
            stream.seek(0)
            tmpImage = Image.open(stream)
            tmpImg = ImageTk.PhotoImage(tmpImage)
            previewPanel.configure(image = tmpImg)
            #sleep(0.5)
                
    print("Quit")        
    #camera.stop_preview()
    
def startCamHandler():
    camThread = Thread(target=camHandler)
    camThread.start()

def quit():
    global rqs
    rqs=RQS_QUIT

    global tkTop
    tkTop.destroy()

def capture():
    global rqs
    rqs = RQS_CAPTURE
    labelCapVal.set("capturing")

def cbScaleSetting(new_value):
    global rqsUpdateSetting
    rqsUpdateSetting = True

def cbButtons():
    global rqsUpdateSetting
    rqsUpdateSetting = True

tkTop = tk.Tk()
tkTop.wm_title("Raspberry Pi Camera")
tkTop.geometry('800x500')

previewWin = tk.Toplevel(tkTop)
previewWin.title('Preview')
previewWin.geometry('400x300')
previewPanel = tk.Label(previewWin)
previewPanel.pack(side = "bottom", fill = "both", expand = "yes")

tk.Label(tkTop, text="http://helloraspberrypi.blogspot.com/").pack()
tk.Label(tkTop, text=require('picamera')).pack()

tkButtonQuit = tk.Button(
    tkTop, text="Quit", command=quit)
tkButtonQuit.pack()

tkButtonCapture = tk.Button(
    tkTop, text="Capture", command=capture)
tkButtonCapture.pack()

SCALE_WIDTH = 780;

labelCapVal = tk.StringVar()
tk.Label(tkTop, textvariable=labelCapVal).pack()

notebook = ttk.Notebook(tkTop)
frame1 = ttk.Frame(notebook)
frame2 = ttk.Frame(notebook)
notebook.add(frame1, text='Setting')
notebook.add(frame2, text='White Balance')
notebook.pack()

# Tab Setting
scaleSharpness = tk.Scale(
    frame1,
    from_=-100, to=100,
    length=SCALE_WIDTH,
    orient=tk.HORIZONTAL,
    label="sharpness",
    command=cbScaleSetting)
scaleSharpness.set(0)
scaleSharpness.pack(anchor=tk.CENTER)

scaleContrast = tk.Scale(
    frame1,
    from_=-100, to=100,
    length=SCALE_WIDTH,
    orient=tk.HORIZONTAL,
    label="contrast",
    command=cbScaleSetting)
scaleContrast.set(0)
scaleContrast.pack(anchor=tk.CENTER)

scaleBrightness = tk.Scale(
    frame1,
    from_=0, to=100,
    length=SCALE_WIDTH,
    orient=tk.HORIZONTAL,
    label="brightness",
    command=cbScaleSetting)
scaleBrightness.set(50)
scaleBrightness.pack(anchor=tk.CENTER)

scaleSaturation = tk.Scale(
    frame1,
    from_=-100, to=100,
    length=SCALE_WIDTH,
    orient=tk.HORIZONTAL,
    label="saturation",
    command=cbScaleSetting)
scaleSaturation.set(0)
scaleSaturation.pack(anchor=tk.CENTER)

scaleExpCompensation = tk.Scale(
    frame1,
    from_=-25, to=25,
    length=SCALE_WIDTH,
    orient=tk.HORIZONTAL,
    label="exposure_compensation",
    command=cbScaleSetting)
scaleExpCompensation.set(0)
scaleExpCompensation.pack(anchor=tk.CENTER)

# Tab White Balance

lfAwbMode = ttk.LabelFrame(frame2, text="awb_mode")
lfAwbMode.pack(fill="x", expand="yes")
lfAwbGains = ttk.LabelFrame(frame2, text="awb_gains")
lfAwbGains.pack(fill="x", expand="yes")

labelAwbVar = tk.StringVar()
tk.Label(lfAwbMode, textvariable=labelAwbVar).pack()

#--
AWB_MODES = [
    ("off", "off"),
    ("auto", "auto"),
    ("sunlight", "sunlight"),
    ("cloudy", "cloudy"),
    ("shade", "shade"),
    ("tungsten", "tungsten"),
    ("fluorescent", "fluorescent"),
    ("incandescent", "incandescent"),
    ("flash", "flash"),
    ("horizon", "horizon"),
    ]

varAwbMode = tk.StringVar()
varAwbMode.set("auto")
for text, awbmode in AWB_MODES:
    awbModeBtns = tk.Radiobutton(
        lfAwbMode,
        text=text,
        variable=varAwbMode,
        value=awbmode,
        command=cbButtons)
    awbModeBtns.pack(anchor=tk.W)
#--
scaleGainRed = tk.Scale(
    lfAwbGains,
    from_=0.0, to=8.0,
    resolution=0.1,
    length=SCALE_WIDTH,
    orient=tk.HORIZONTAL,
    label="Red",
    command=cbScaleSetting)
scaleGainRed.set(0.0)
scaleGainRed.pack(anchor=tk.CENTER)

scaleGainBlue = tk.Scale(
    lfAwbGains,
    from_=0.0, to=8.0,
    resolution=0.1,
    length=SCALE_WIDTH,
    orient=tk.HORIZONTAL,
    label="Blue",
    command=cbScaleSetting)
scaleGainBlue.set(0.0)
scaleGainBlue.pack(anchor=tk.CENTER)
#
print("start")
startCamHandler()

tk.mainloop()


Next:
- Python to capture image from Pi Camera Module, with image effects

Thursday, December 17, 2015

Python to capture image from Pi Camera Module, with preview


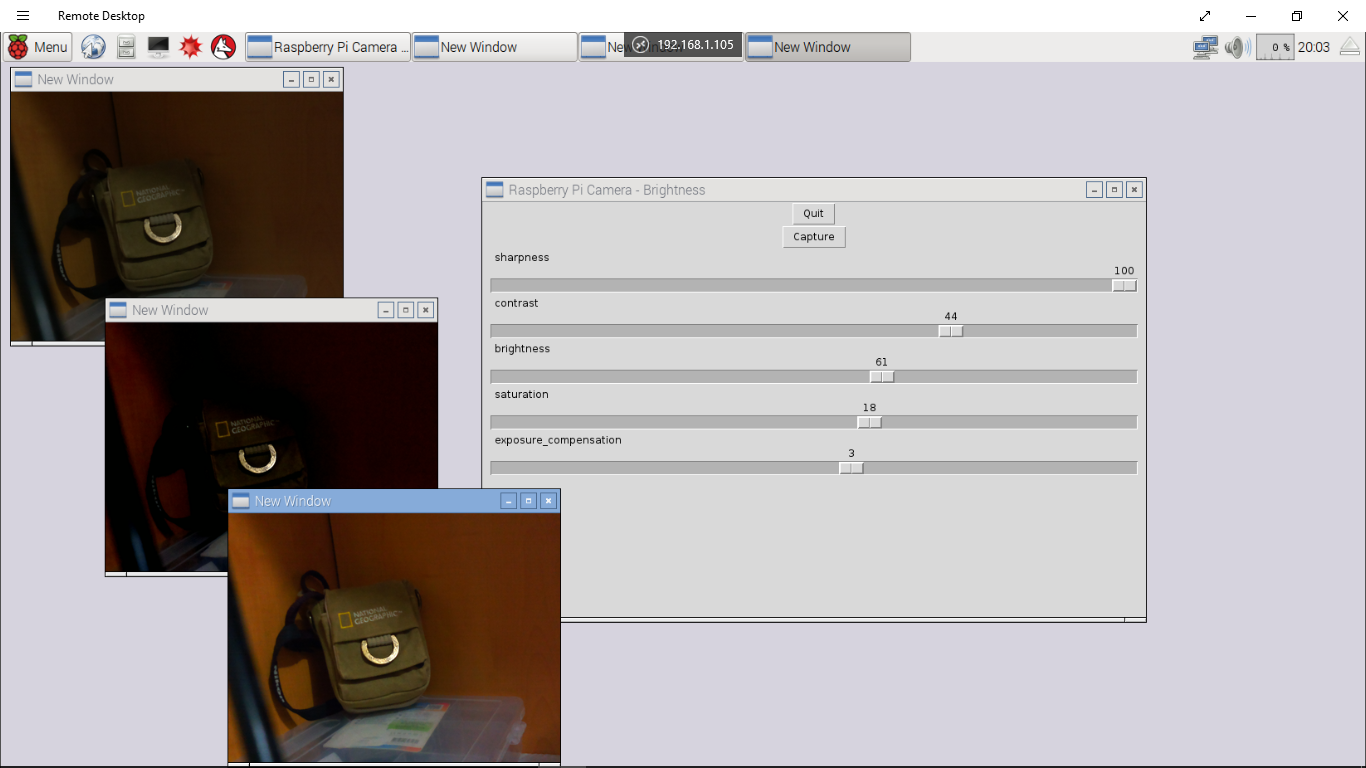
The previous post show a exercise of "Python to capture image from Pi Camera Module", blind shot without preview. It's modify to show preview continually, to framing before clicking capture button.

- To make the GUI and Camera preview run simultaneously, code for camera are moved to run in background thread, in camHandler().
- My target is to take the RPi/Camera Module outdoor, without display. So I remove camera.start_preview() and stop_preview(). By removing preview, the GUI response improved very much.
- The preview window update frame-by-frame, may be not so smooth! Anyway, better than nothing:(
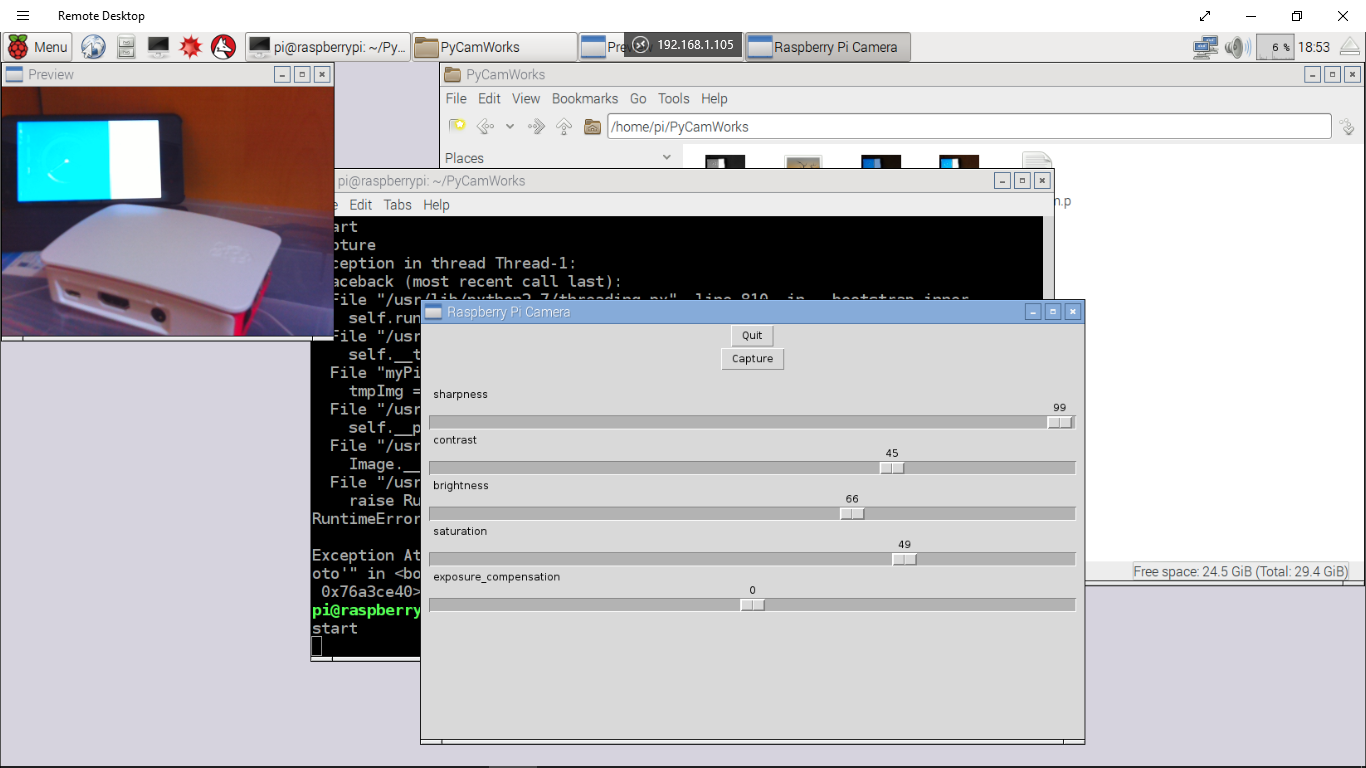
- When click the Quit button, may be the Tkinter GUI closed before the background thread terminated, so may be have the error of "RuntimeError: Too early to create image" and 'Exception AttributeError:...". Just ignore for now.


myPiCam.py
import picamera
import Tkinter
import time
from PIL import ImageTk, Image
from threading import Thread
import io
import sys

RQS_0=0
RQS_QUIT=1
RQS_CAPTURE=2
rqs=RQS_0

def camHandler():
    global rqs
    rqs = RQS_0
    
    camera = picamera.PiCamera()
    #stream = io.BytesIO()

    #set default
    camera.sharpness = 0
    camera.contrast = 0
    camera.brightness = 50
    camera.saturation = 0
    camera.ISO = 0
    camera.video_stabilization = False
    camera.exposure_compensation = 0
    camera.exposure_mode = 'auto'
    camera.meter_mode = 'average'
    camera.awb_mode = 'auto'
    camera.image_effect = 'none'
    camera.color_effects = None
    #camera.rotation = 0
    camera.rotation = 270
    camera.hflip = False
    camera.vflip = False
    camera.crop = (0.0, 0.0, 1.0, 1.0)
    #camera.resolution = (1024, 768)
    camera.resolution = (400, 300)
    #end of set default
    #camera.start_preview()

    while rqs != RQS_QUIT:
        if rqs == RQS_CAPTURE:
            print("Capture")
            rqs=RQS_0
            timeStamp = time.strftime("%Y%m%d-%H%M%S")
            jpgFile='img_'+timeStamp+'.jpg'
            camera.resolution = (2592, 1944)    #set photo size
            camera.capture(jpgFile)
            camera.resolution = (400, 300)      #resume preview size
            labelCapVal.set(jpgFile)
        else:
            #set parameter
            camera.sharpness = scaleSharpness.get()
            camera.contrast = scaleContrast.get()
            camera.brightness = scaleBrightness.get()
            camera.saturation = scaleSaturation.get()
            camera.exposure_compensation = scaleExpCompensation.get()

            stream = io.BytesIO()
            camera.capture(stream, format='jpeg')
            stream.seek(0)
            tmpImage = Image.open(stream)
            tmpImg = ImageTk.PhotoImage(tmpImage)
            previewPanel.configure(image = tmpImg)
            #sleep(0.5)
                
    print("Quit")        
    #camera.stop_preview()
    
def startCamHandler():
    camThread = Thread(target=camHandler)
    camThread.start()

def quit():
    global rqs
    rqs=RQS_QUIT

    global tkTop
    tkTop.destroy()

def capture():
    global rqs
    rqs = RQS_CAPTURE
    labelCapVal.set("capturing")

tkTop = Tkinter.Tk()
tkTop.wm_title("Raspberry Pi Camera")
tkTop.geometry('800x500')

previewWin = Tkinter.Toplevel(tkTop)
previewWin.title('Preview')
previewWin.geometry('400x300')
previewPanel = Tkinter.Label(previewWin)
previewPanel.pack(side = "bottom", fill = "both", expand = "yes")

tkButtonQuit = Tkinter.Button(
    tkTop, text="Quit", command=quit)
tkButtonQuit.pack()

tkButtonCapture = Tkinter.Button(
    tkTop, text="Capture", command=capture)
tkButtonCapture.pack()

SCALE_WIDTH = 780;

labelCapVal = Tkinter.StringVar()
Tkinter.Label(tkTop, textvariable=labelCapVal).pack()

scaleSharpness = Tkinter.Scale(
    tkTop,
    from_=-100, to=100,
    length=SCALE_WIDTH,
    orient=Tkinter.HORIZONTAL,
    label="sharpness")
scaleSharpness.set(0)
scaleSharpness.pack(anchor=Tkinter.CENTER)

scaleContrast = Tkinter.Scale(
    tkTop,
    from_=-100, to=100,
    length=SCALE_WIDTH,
    orient=Tkinter.HORIZONTAL,
    label="contrast")
scaleContrast.set(0)
scaleContrast.pack(anchor=Tkinter.CENTER)

scaleBrightness = Tkinter.Scale(
    tkTop,
    from_=0, to=100,
    length=SCALE_WIDTH,
    orient=Tkinter.HORIZONTAL,
    label="brightness")
scaleBrightness.set(50)
scaleBrightness.pack(anchor=Tkinter.CENTER)

scaleSaturation = Tkinter.Scale(
    tkTop,
    from_=-100, to=100,
    length=SCALE_WIDTH,
    orient=Tkinter.HORIZONTAL,
    label="saturation")
scaleSaturation.set(0)
scaleSaturation.pack(anchor=Tkinter.CENTER)

scaleExpCompensation = Tkinter.Scale(
    tkTop,
    from_=-25, to=25,
    length=SCALE_WIDTH,
    orient=Tkinter.HORIZONTAL,
    label="exposure_compensation")
scaleExpCompensation.set(0)
scaleExpCompensation.pack(anchor=Tkinter.CENTER)

print("start")
startCamHandler()

Tkinter.mainloop()


Next:
- Python to capture image from Pi Camera Module, with White Balance setting

Wednesday, December 16, 2015

Python to capture image from Pi Camera Module


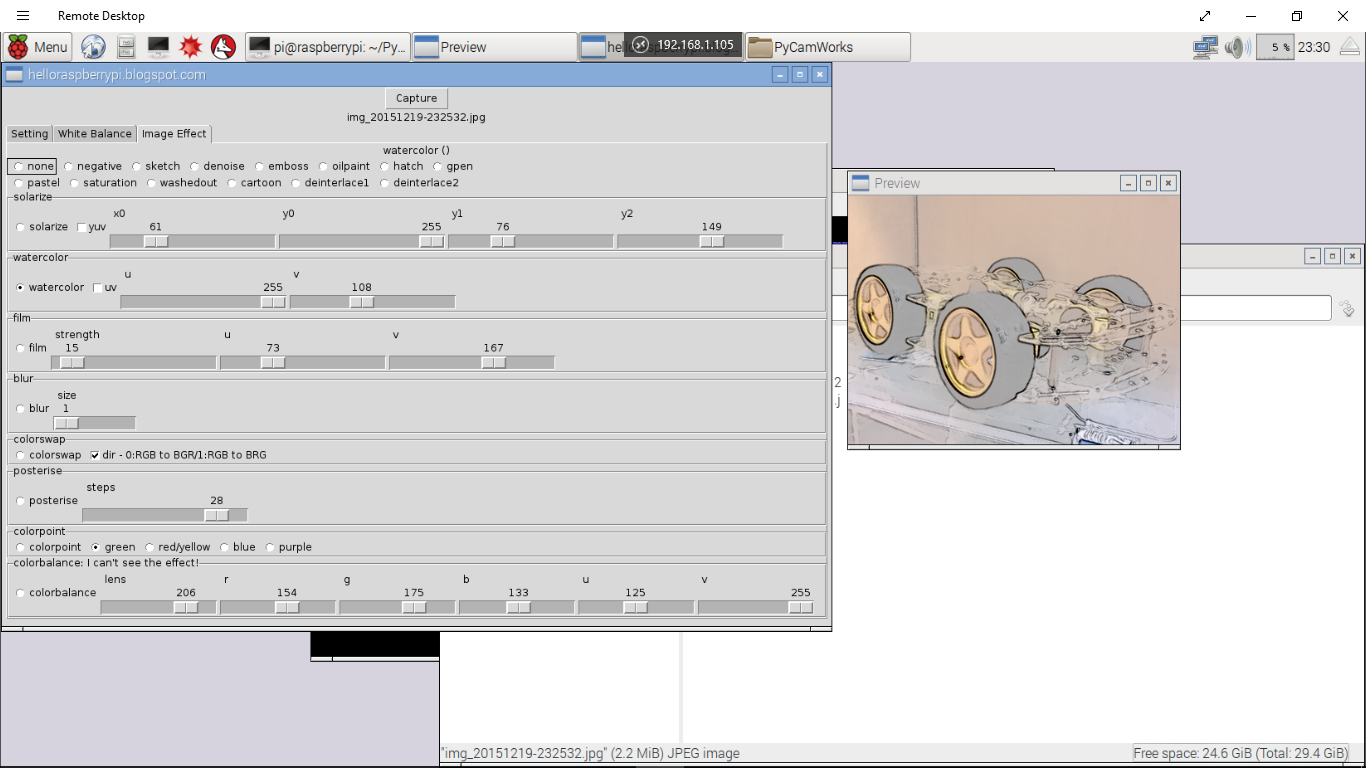
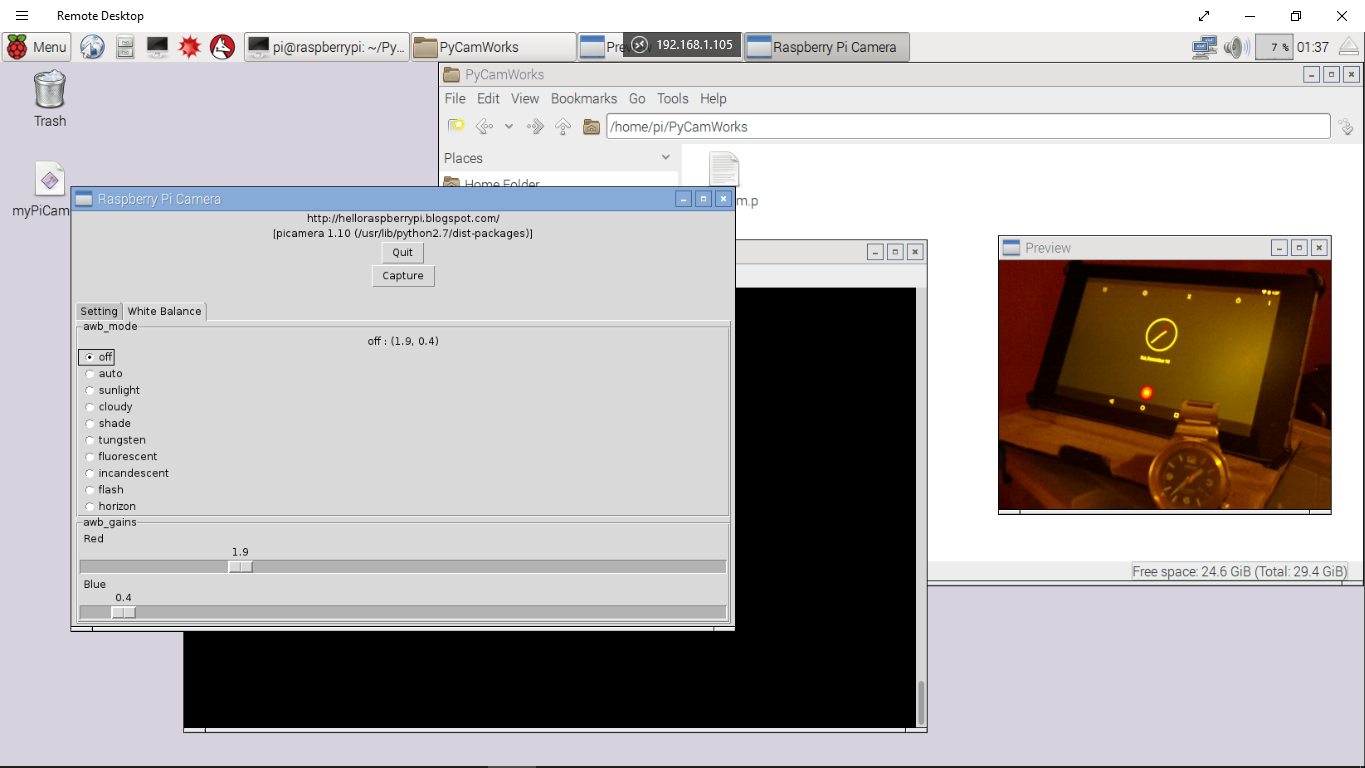
In order to take my RPi outdoor to take photos using Camera Module, I prepare a simple Python program to capture image with GUI to easy capture image, with some simple control; such as sharpness, contrast, brightness, saturation and exposure_compensation.

Such that I can login my Pi (with xrdp installed) from mobile phone with GUI and run the Python to take photo.

Here how it work:


Program list, myPiCam.py
import picamera
from time import sleep
import Tkinter
import time
from PIL import ImageTk, Image

def quit():
    camera.stop_preview()
    global tkTop
    tkTop.destroy()

def loadJpg(file):

    JpgWin = Tkinter.Toplevel(tkTop)
    JpgWin.title('New Window')
    JpgWin.geometry('400x300')

    image = Image.open(file)
    image = image.resize((400, 300), Image.ANTIALIAS)
    img = ImageTk.PhotoImage(image)
    panel = Tkinter.Label(JpgWin, image=img)
    panel.pack(side = "bottom", fill = "both", expand = "yes")

    JpgWin.mainloop()

def capture():
    #set parameter
    camera.sharpness = scaleSharpness.get()
    camera.contrast = scaleContrast.get()
    camera.brightness = scaleBrightness.get()
    camera.saturation = scaleSaturation.get()
    camera.exposure_compensation = scaleExpCompensation.get()
    
    timeStamp = time.strftime("%Y%m%d-%H%M%S")
    jpgFile='img_'+timeStamp+'.jpg'
    camera.capture(jpgFile)
    loadJpg(jpgFile)

camera = picamera.PiCamera()

#set default
camera.sharpness = 0
camera.contrast = 0
camera.brightness = 50
camera.saturation = 0
camera.ISO = 0
camera.video_stabilization = False
camera.exposure_compensation = 0
camera.exposure_mode = 'auto'
camera.meter_mode = 'average'
camera.awb_mode = 'auto'
camera.image_effect = 'none'
camera.color_effects = None
#camera.rotation = 0
camera.rotation = 270
camera.hflip = False
camera.vflip = False
camera.crop = (0.0, 0.0, 1.0, 1.0)
#camera.resolution = (1024, 768)
camera.resolution = (2592, 1944)
#end of set default

camera.start_preview()
camera.brightness = 50

tkTop = Tkinter.Tk()
tkTop.wm_title("Raspberry Pi Camera - Brightness")
tkTop.geometry('800x500')

tkButtonQuit = Tkinter.Button(
    tkTop, text="Quit", command=quit)
tkButtonQuit.pack()

tkButtonCapture = Tkinter.Button(
    tkTop, text="Capture", command=capture)
tkButtonCapture.pack()

SCALE_WIDTH = 780;

scaleSharpness = Tkinter.Scale(
    tkTop,
    from_=-100, to=100,
    length=SCALE_WIDTH,
    orient=Tkinter.HORIZONTAL,
    label="sharpness")
scaleSharpness.set(0)
scaleSharpness.pack(anchor=Tkinter.CENTER)

scaleContrast = Tkinter.Scale(
    tkTop,
    from_=-100, to=100,
    length=SCALE_WIDTH,
    orient=Tkinter.HORIZONTAL,
    label="contrast")
scaleContrast.set(0)
scaleContrast.pack(anchor=Tkinter.CENTER)

scaleBrightness = Tkinter.Scale(
    tkTop,
    from_=0, to=100,
    length=SCALE_WIDTH,
    orient=Tkinter.HORIZONTAL,
    label="brightness")
scaleBrightness.set(50)
scaleBrightness.pack(anchor=Tkinter.CENTER)

scaleSaturation = Tkinter.Scale(
    tkTop,
    from_=-100, to=100,
    length=SCALE_WIDTH,
    orient=Tkinter.HORIZONTAL,
    label="saturation")
scaleSaturation.set(0)
scaleSaturation.pack(anchor=Tkinter.CENTER)

scaleExpCompensation = Tkinter.Scale(
    tkTop,
    from_=-25, to=25,
    length=SCALE_WIDTH,
    orient=Tkinter.HORIZONTAL,
    label="exposure_compensation")
scaleExpCompensation.set(0)
scaleExpCompensation.pack(anchor=Tkinter.CENTER)

Tkinter.mainloop()


If you run on Raspbian Jessie, you need to iinstall python-imaging-tk:
$ sudo apt-get install python-imaging-tk

If you run on Wheezy, you have to "Install PIL (with jpg supported) and ImageTk on Raspberry Pi/Raspbian".

Remark:
This code have to be run in terminal using python:
$ python myPiCam.py

If run in IDLE, it will report following error in next run:
PiCameraMMALError: Camera component couldn't be enabled: Out of resources (other than memory)

Tuesday, December 15, 2015

Pi NoIR photo samples (without and with Hoya R72 filter)


Photo samples of Raspberry Pi Camera Module Pi NoIR, without and with Hoya R72 Infrared filter. All photos resized only, added with black frame and text, no any other touch up.

It seem that the photos using Hoya R72 filter are little blue, may be misfocused for infrared!


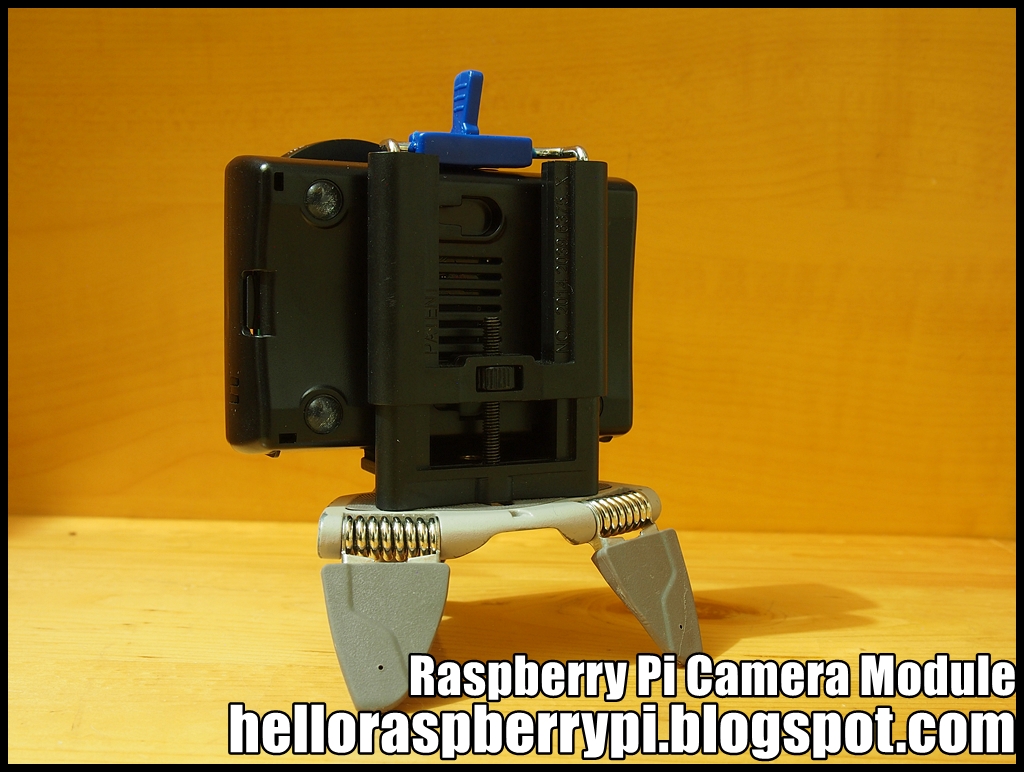
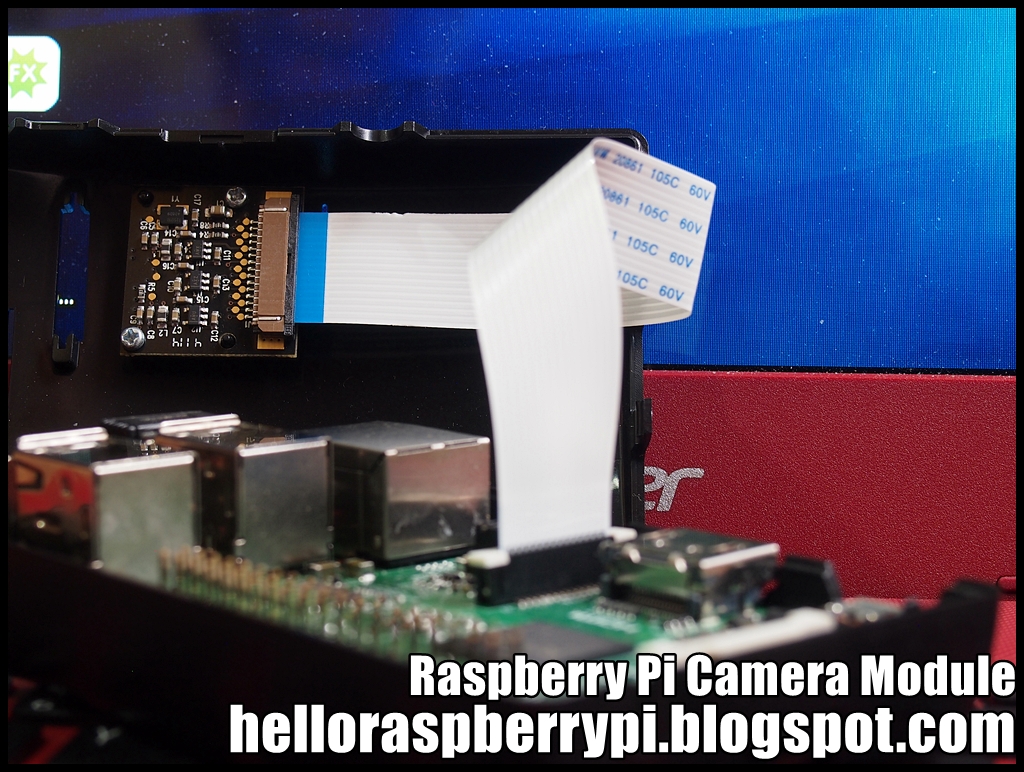
The Raspberry Pi 2 installed xrdp, such that I can remote login from mobile phone.

On the Android phone, I use free aRDP: Secure RDP Client.

Once Raspberry Pi boot-up and connect to Android hotspot, Run aRDP on Android phone, and run the simple "Python program to capture image from Pi Camera Module".


~ My Raspberry Pi Camera Modules series (with programming)

Modify Raspberry Pi 2 case to add 52mm filter mount

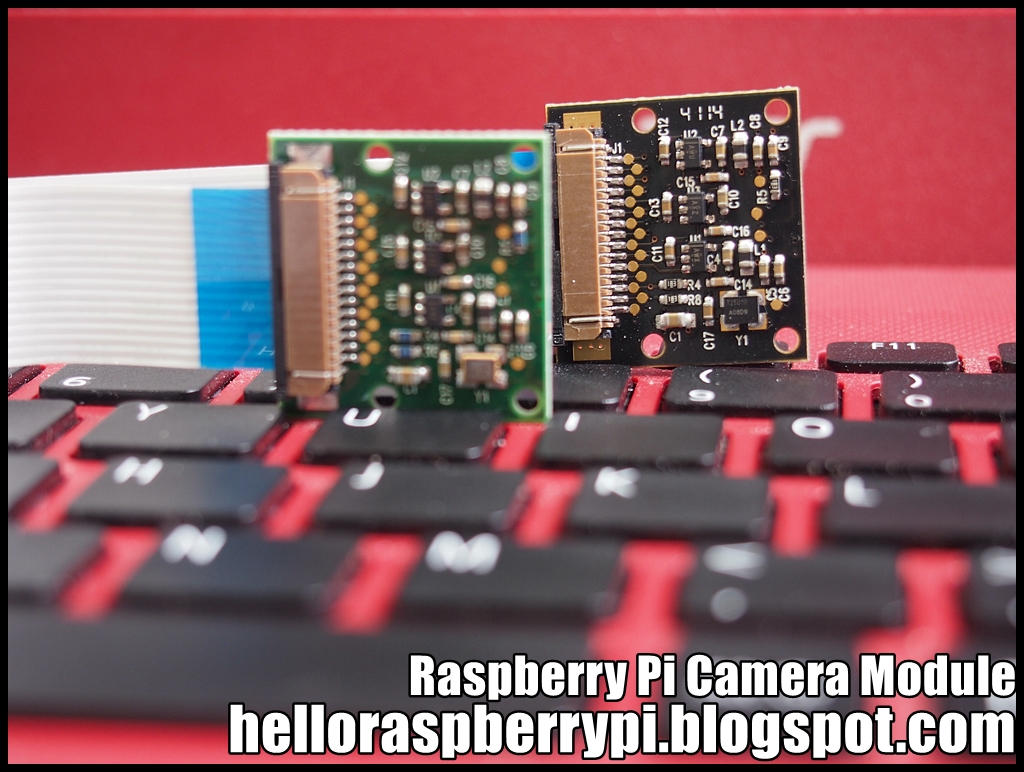
Just bought a Pi NoIR (Infrared version of Camera Module). Then I want to test the effect of infrared photo with Hoya R72 filter (for Infrared Photography to blocks Visible Light Up To 720nm). So I have to add a 52mm filter mount on the Raspberry Pi 2 case.


52mm Hoya R72 Infrared filter:


Attract something like Blu-Tack on a 27-52mm  conversion ring:


Stick on RPi 2 case:


So I can install 52mm Hoya R72 filter on:
\


Finished:


~ Photo samples: Next - Pi NoIR photo samples (without and with Hoya R72 filter)

Sunday, December 13, 2015

Tkinter GUI Application Development Blueprints

Master GUI programming in Tkinter as you design, implement, and deliver ten real-world applications from start to finish

Tkinter GUI Application Development Blueprints

About This Book
  • Conceptualize and build state-of-art GUI applications with Tkinter
  • Tackle the complexity of just about any size GUI application with a structured and scalable approach
  • A project-based, practical guide to get hands-on into Tkinter GUI development
Who This Book Is For
Software developers, scientists, researchers, engineers, students, or programming hobbyists with basic familiarity in Python will find this book interesting and informative. People familiar with basic programming constructs in other programming language can also catch up with some brief reading on Python. No GUI programming experience is expected.

What You Will Learn
  • Get to know the basic concepts of GUI programming, such as Tkinter top-level widgets, geometry management, event handling, using callbacks, custom styling, and dialogs
  • Create apps that can be scaled in size or complexity without breaking down the core
  • Write your own GUI framework for maximum code reuse
  • Build apps using both procedural and OOP styles, understanding the strengths and limitations of both styles
  • Learn to structure and build large GUI applications based on Model-View-Controller (MVC) architecture
  • Build multithreaded and database-driven apps
  • Create apps that leverage resources from the network
  • Learn basics of 2D and 3D animation in GUI applications
  • Develop apps that can persist application data with object serialization and tools such as config parser
In Detail
Tkinter is the built-in GUI package that comes with standard Python distributions. It is a cross-platform package, which means you build once and deploy everywhere. It is simple to use and intuitive in nature, making it suitable for programmers and non-programmers alike.

This book will help you master the art of GUI programming. It delivers the bigger picture of GUI programming by building real-world, productive, and fun applications such as a text editor, drum machine, game of chess, media player, drawing application, chat application, screen saver, port scanner, and many more. In every project, you will build on the skills acquired in the previous project and gain more expertise.

You will learn to write multithreaded programs, network programs, database driven programs and more. You will also get to know the modern best practices involved in writing GUI apps. With its rich source of sample code, you can build upon the knowledge gained with this book and use it in your own projects in the discipline of your choice.

Style and approach
An easy-to-follow guide, full of hands-on examples of real-world GUI programs. The first chapter is a must read as it explains most of the things you need to get started with writing GUI programs with Tkinter. Each subsequent chapter is a stand-alone project that discusses some aspects of GUI programming in detail. These chapters can be read sequentially or randomly depending upon the readers experience with Python.

Friday, December 4, 2015

Windows 10 IoT Core: Major Update and More

Microsoft announced that a new update to Windows 10 IoT Core is now available.

This release supports the new direct memory access bus driver that gives high performance access for GPIO. Additionally, this driver gives you the ability to use “Pin Muxing” rather than the default configuration.

Now have full support for the TX/RX pins on the Raspberry Pi2. Also included an in-box driver for the FTDI USB-to-serial chipset because many devices use that as the interface port for controlling them (for example, Home Automation Systems).

In this release, not only support the official Raspberry Pi Wi-Fi dongle, but also two Realtek Wi-Fi chipsets (RTL8188EU & RTL8192EU).

And it is easier to use existing Arduino Wiring Sketches, libraries, and hardware with Windows 10 IoT Core Universal Windows Apps (UWA). Simply drag-and-drop Arduino Wiring INO and/or library files into Visual Studio, connect hardware to a Windows 10 IoT Core device, and run the code. You'll also be able to mix your Arduino code with other UWA technologies like C# and XAML to get the best of both worlds.

~ Windows IoT Downloads


Wednesday, December 2, 2015

Install and test python-gphoto2 on Raspberry Pi 2/Raspbian Jessie, with libgphoto2 2.5.9


python-gphoto2 is a comprehensive Python interface (or binding) to libgphoto2. This example show how to install python-gphoto2 on Raspberry Pi 2/Raspbian Jessie (2015-11-21 release), work with with libgphoto2 2.5.9.

Before install python-gphoto2, you have to install libgphoto2 first. Refer "Install gphoto2 and libgphoto2 version 2.5.9 on Raspberry Pi 2/Raspbian Jessie 2015-11-21".

- Install python-dev
$ sudo apt-get install python-dev

- install python-gphoto2 with pip
$ sudo pip install gphoto2


If you installed with pip the example files should be in /usr/share/python-gphoto2/examples or /usr/local/share/python-gphoto2/examples or somewhere similar. Otherwise they are in the examples sub-directory of your working directory. In Raspbian Jessie, it should be in /usr/local/share/python-gphoto2/examples.

To test the installed python-gphoto2, connect supported camera (D7000 in my case) to Raspberry Pi 2 via USB, power on the camera. run the script:
$ python camera-summary.py
$ python capture-image.py


Tuesday, December 1, 2015

Install gphoto2 and libgphoto2 version 2.5.9 on Raspberry Pi 2/Raspbian Jessie 2015-11-21


gphoto2-updater is a Gphoto2 compiler and installer script. The current version is target for version 2.5.9.

This video show installing on Raspberry Pi 2/Raspbian Jessie (2015-11-21).
- The Raspbian Jessie is frash new 2015-11-21 release.

- update apt-get:
$ sudo apt-get update
$ sudo apt-get upgrade

- update firmware:
$ sudo rpi-update

- reboot

-install xrdp, such that I can remote controll the RPi and capture screen
$ sudo apt-get install xrdp

Everything else come with Raspbian Jessie, NO gphoto2 installed.

Then run the script:
$ wget https://raw.githubusercontent.com/gonzalo/gphoto2-updater/master/gphoto2-updater.sh && chmod +x gphoto2-updater.sh && sudo ./gphoto2-updater.sh

Once finished, the installed gphoto2 is 2.5.9, but the libgphoto2 is 2.5.4.

Updated@2015-12-11:
gphoto2-updater script updated, it will remove both installed gphoto2 and libgphoto2-port10. So you need not remove libgphoto2-port10 by yourself, as described below.


Then I redo it, with removing libgphoto2-port10 before running the script. After finished, both the installed gphoto2 and libgphoto2 is 2.5.9.

(May be the author of the gphoto2-updater script will update the script soon.)


Next:
Install python-gphoto2 on Raspberry Pi 2/Raspbian Jessie, with libgphoto2 2.5.9, test with capture image.