Showing posts with label how to. Show all posts

Sunday, May 8, 2022

OpenEuler 22.03 LTS (UKUI Desktop) run on Raspberry Pi 4

OpenEuler is an innovative platform nurtured by community collaboration. It aims to build a unified and open OS that supports multiple processor architectures, and to advance the hardware/software application ecosystem.

To download image of OpenEuler 22.03 LTS for Raspberry Pi, visit https://gitee.com/openeuler/raspberrypi (You can switch to English here). It provide various desktops include UKUI, DDE, Xfce and LXDE.

UKUI is a Linux desktop built by the KylinSoft software team over the years, primarily based on GTK and QT. Compared to other UI interfaces, UKUI is easy to use. The components of UKUI are small and low coupling, can run alone without relying on other suites. It can provide user a friendly and efficient experience. UKUI supports both x86_64 and aarch64 architectures.


This video show the steps to download image of OpenEuler 22.03 LTS (UKUI Desktop) for Raspberry Pi, boot on Raspberry Pi 4B/4G and setup changing to English, and some more.


Monday, September 20, 2021

Download and Install openEuler on Raspberry Pi

This video show how to download, install and run openEuler on Raspberry Pi, and switch language to English. Tested on Raspberry Pi 4B/4G with 7 inch mini HDMI LCD. Chinese is set system language by default, this video also show how to switch to English.

Download openEuler image for Raspberry Pi
(prepare on Raspberry Pi)

Visit https://www.openeuler.org/en/, scroll down and click on "use openEuler OS", choose Raspberry Pi.

In the new opened page, scroll down to How to download latest image, (https://gitee.com/openeuler/raspberrypi#how-to-download-latest-image).

Select the image to download, in my test: openEuler 20.03 LTS SP1 alpha4 (DDE desktop and Chinese input method),  openEuler-20.03-LTS-SP1-DDE-raspi-aarch64-alpha4.img.xz.

Extract the downloaded file. Then we can write the extracted image on microSD using Raspberry Pi Imager.

Then you can boot-up Raspberry Pi with the microSD. 

User and password:

The image pre-set with System user/password:
- root/openeuler 
- pi/raspberry

DDE cannot log in with root account, you can login user pi using password "raspberry".


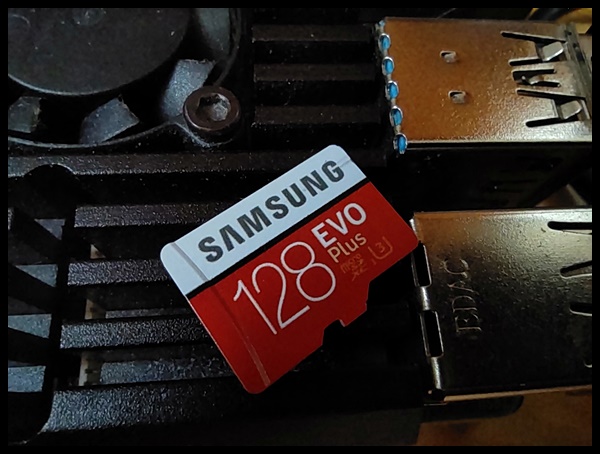
FYI: the microSD I used in this test is 128G Samsung Evo Plus:


Related:

Saturday, September 18, 2021

Install openEuler in VirtualBox, and install Deepin Desktop Environment (DDE)

openEuler is an innovative platform nurtured by community collaboration. It aims to build a unified and open OS that supports multiple processor architectures, and to advance the hardware/software application ecosystem.

This video show how to install openEuler in VirtualBox 6.1/Windows 10.


Visit https://www.openeuler.org/en/download/ to download ISO. It's openEuler-20.03-LTS-SP2-x86_64-dvd.iso in my case.

It's very straightforward to install openEuler in VirtualBox. But there are no desktop environment by default. Deepin Desktop Environment (DDE) can be installed using dnf (a Linux software package management tool).

Most probably you cannot run dnf, fail with error [Could not resolve host: repo.openeuler.org], as shown in the video.

To fix it:
edit /etc/sysconfig/network-scripts/ifcfg-enp0s3
set ONBOOT=yes

save and then reboot.

Then install DDE with command:
sudo dnf update
sudo dnf install dde
sudo systemctl set-default graphical.target
sudo reboot
After the restart is complete, use the user created during the installation process or the openeuler user to log in to the desktop.

dde cannot log in with root account.
dde has built-in openeuler user, the password of this user is openeuler.


Related:

Monday, July 12, 2021

Install Arduino Mbed OS RP2040 Boards on Arduino IDE, to program Raspberry Pi Pico in Arduino framework.

With ArduinoCore-mbed Release 2.0.0, Arduino now support Raspberry Pi Pico officially. To program Raspberry Pi Pico in Arduino framework, install Arduino Mbed OS RP2040 Boards in Arduino IDE's Library Manager.


The video show the steps:

Friday, February 26, 2021

Raspberry Pi Pico: enter bootloader mode without unplug or pull down the RUN/Reset pin

To make your Raspberry Pi enter bootloader mode, it's normally suggested hold down the BOOTSEL button while plugging the board into USB. Alternatively, you can hold down the BOOTSEL button and pull down the RUN/Reset pin.

It's third software approach to enter bootloader mode: run machine.bootloader() at the MicroPython REPL.

It's assumed you have already installed MicroPython firmware on your Raspberry Pi Pico.

Run in MicroPython:
>>> import machine
>>> machine.bootloader()


Your RPi Pico will appear as a USB disk drive you can drag the firmware onto. 


MicroPython updated.


Sunday, May 24, 2020

How to check Raspberry Pi 4B reversion 1.2

When the first time Raspberry Pi 4B released, it is a bug in USB-C power supply circuitry. If you use the official USB-C power supply, it should be no problem. If you use other cables (marked with an "e"), it may be have compatibility problem.

It's fixed in Raspberry Pi 4B rev 1.2. So, how can you identify the reversion of your board? Use any of the commands:

$ pinout


It is shown V1.2 in the output. And also shown c03112 in Revision column, you can check Raspberry Pi revision codes here.

or use the command:

$ cat /proc/device-tree/model


or:

$ cat /proc/cpuinfo

Revision is listed c03112.


You can also check it visually, refer to cnx-software post, Raspberry Pi 4 Rev 1.2 Fixes USB-C Power Issues, Improves SD Card Resilience.


Tuesday, May 19, 2020

pinout command, to query Raspberry Pi GPIO pin-out information.

In update Raspbian, the pinout command was added. It's a funny and informative utility for querying Raspberry Pi GPIO pin-out information.

$ pinout


Related:
How to check Raspberry Pi 4B reversion 1.2, it provide more option to check your board version.


Check model and revision of your Raspberry Pi board

With the upadte Raspbian, you can read model and rev. of your Raspberry Pi board in /proc/device-tree/model. Enter the command in terminal:

cat /proc/device-tree/model


Related:
How to check Raspberry Pi 4B reversion 1.2, it provide more option to check your board version.

Tuesday, December 17, 2019

How to check memory size

To check the memory size of your Raspberry Pi, you can use the command:

$ free -m

or

$ cat /proc/meminfo

Both will show you the total memory.


Updating and upgrading Raspbian

To update software in Raspbian, enter the comamnd in Terminal:

$ sudo apt update
$ sudo apt full-upgrade

Note that full-upgrade is used in preference to a simple upgrade, as it also picks up any dependency changes that may have been made.

When using the above, the kernel and firmware will also be updated.

Reference: Raspberry Pi DOCUMENTATION > RASPBIAN > UPDATING


Wednesday, February 20, 2019

Check glibc version

To check the glibc version in Raspberry Pi/Raspbian, simple enter the command in Terminal:

$ ldd --version

Work on Raspberry Pi/Raspbian:

Also work on Linux Mint:

Tuesday, February 19, 2019

Install Arduino IDE on Raspberry Pi/Raspbian Stretch

This video show how to Install Arduino IDE 1.8.8 on Raspberry Pi 3 B+/Raspbian Stretch. Such that you can program Arduino board on Raspberry Pi.


Setup under test:
Board - Raspberry Pi 3 B+
OS - Raspbian Stretch with desktop and recommended software (Version:November 2018, Release date:2018-11-13)
IDE: Arduino IDE 1.8.8 (Linux ARM)
Arduino Board: Mega 2560

In order to capture the screen action, I remote control the Raspberry Pi from Windows 10 via VNC viewer.

The steps is very straightforward:

- Visit Arduino Download page, download Arduino IDE of Linux ARM.

- After download completed, extract the downloaded file.

- Run the install script:
$ sudo ./install.sh

- After finished, you can run the Arduino IDE in Raspbian desktop Menu -> Programming -> Arduino IDE.

In my case the following error reported when run install.sh:
touch: cannot touch '/root/.local/share/applications/mimeapps.list': No such file or directory
/usr/bin/xdg-mime: 803: /usr/bin/xdg-mime: cannot create /root/.local/share/applications/mimeapps.list.new: Directory nonexistent

It may be caused by mis-located of the file mimeapps.list. Actually the install.sh only add the desktop shortcut, menu item and file associations for Arduino IDE. This error should not affect the functionality. Alternatively, you can run the IDE by switch to the extracted directory, and run the arduino directly.


Add Arduino core for ESP8266 WiFi chip to Arduino IDE:

Arduino core for ESP8266 WiFi chip brings support for ESP8266 chip to the Arduino environment. It lets you write sketches using familiar Arduino functions and libraries, and run them directly on ESP8266, no external microcontroller required.

ESP8266 Arduino core comes with libraries to communicate over WiFi using TCP and UDP, set up HTTP, mDNS, SSDP, and DNS servers, do OTA updates, use a file system in flash memory, work with SD cards, servos, SPI and I2C peripherals.

Once Arduino IDE installed, you can follow the same steps in my old post to "Add Arduino core for ESP8266 to Arduino IDE (run on Raspberry Pi/Raspbian Jessie with PIXEL)".


reference:
Arduino core for ESP8266 WiFi chip project page: https://github.com/esp8266/arduino
Additional Board Manager URLs:
http://arduino.esp8266.com/stable/package_esp8266com_index.json


Arduino core for ESP32 WiFi chip is another similar project to bring support of ESP32 to Arduino IDE. It can be installed to Arduino IDE by following the same step on normal PC. But, I tried to install it to Arduino IDE on Raspberry Pi, it fail due to "Tool xtensa-esp32-elf-gcc is not available for your operating system"!


reference:
Arduino core for ESP32 WiFi chip project page: https://github.com/espressif/arduino-esp32
Additional Board Manager URLs:
https://dl.espressif.com/dl/package_esp32_index.json


Identify my Raspberry Pi board version

To identify the version of your Raspberry Pi, you can enter the command:

$ cat /proc/cpuinfo

The last three lines show the hardware type, the revision code, and the Pi's unique serial number.


Then browse Raspberry Pi DOCUMENTATION > HARDWARE > RASPBERRYPI > REVISION-CODES. You can search your hardware revision to find out the version of you board.

My board is Raspberry Pi 3 B+


Related:
How to check Raspberry Pi 4B reversion 1.2, it provide more option to check your board version.

Thursday, December 13, 2018

Set default resolution for Raspberry Pi/Raspbian

Sometimes, I will use my Raspberry Pi (with VNC enabled) without connecting monitor, I access it from another PC with VNC viewer. But in such case, it will be in low resolution. This video show how to change the default resolution.

Tested device: Raspberry Pi 3 B+
OS: Raspbian Stretch with desktop and recommended software 2018-11-13


Enable VNC on your Raspberry Pi/Raspbian:

Click the Menu -> Preferences -> Raspberry Pi Configuration
Select Interfaces tab -> Enable VNC


Wednesday, May 17, 2017

Scan Raspberry Pi IP address from network neighbor computer, by MAC

Raspberry Pi Foundation has their own range of MAC addresses B8-27-EB-00-00-00 to B8-27-EB-FF-FF-FF. You can check it at http://hwaddress.com/company/raspberry-pi-foundation


Such that we can scan neighbor with MAC address start with B8-27-EB, using arp command.

arp (stands for Address Resolution Protocol) is used to find the address of a network neighbor for a given IPv4 address.

From Linux Terminal:
$ arp -a | grep b8:27:eb

or from Windows DOS prompt (Now you can run most Linux command on Bash on Windows directly)
> arp -a | grep b8-27-eb

In the result, 192.168.1.9 is the IP address of my Raspberry Pi.


Monday, May 15, 2017

Install virtual keyboard on Raspberry Pi/Raspbian Jessie with PIXEL


To install virtual keyboard, matchbox-keyboard, on Raspberry Pi/Raspbian Jessie with PIXEL:

Always update apt-get:
$ sudo apt-get update

Install matchbox-keyboard:
$ sudo apt-get install matchbox-keyboard

Then, you can open the matchbox-keyboard by enter:
$ matchbox-keyboard

This video show how to install matchbox-keyboard on Raspberry Pi 3/Raspbian Jessie with PIXEL (2017-04-10).

Sunday, May 7, 2017

Try RASPBIAN JESSIE WITH PIXEL on x86 PC using VirtualBox/Windows 10


This video show how to download RASPBIAN JESSIE WITH PIXEL for x86, and install on Windows 10 with Oracle VirtualBox.


pixel_x86 image iso can be download here:
http://downloads.raspberrypi.org/pixel_x86/images/

Thursday, April 20, 2017

Pair Raspberry Pi with Bluetooth keyboard.


The video show how to pair Bluetooth keyboard to Raspberry Pi 3 with Bluetooth (running Raspbian Jessie with Pixel rel. 2017-04-10).

Tested on Raspberry Pi Zero W, work also.


Wednesday, July 20, 2016

Check the Vendor ID and Product ID of attached USB devices in Raspberry Pi/Raspbian

To check the Vendor ID and Product ID of attached USB devices in Raspberry Pi/Raspbian Jessie (and also other Linux), we can use the commands dmesg and lsusb.


This video show how to do it in case Arduino Uno is connected to Raspberry Pi 2/Raspbian jessie. Also show the device name, ttyACM0.


Thursday, April 14, 2016

ImportError: cannot import name ImageTk

Current Raspbian Jessie come with PIL installed by default, but no ImageTk. If you run Python script (such as in "Python to capture image from Pi Camera Module, with image effects") reported with error:
ImportError: cannot import name ImageTk

Install python-imaging-tk
$ sudo apt-get install python-imaging-tk