Showing posts with label dev. tools. Show all posts

Tuesday, February 19, 2019

Install Arduino IDE on Raspberry Pi/Raspbian Stretch

This video show how to Install Arduino IDE 1.8.8 on Raspberry Pi 3 B+/Raspbian Stretch. Such that you can program Arduino board on Raspberry Pi.


Setup under test:
Board - Raspberry Pi 3 B+
OS - Raspbian Stretch with desktop and recommended software (Version:November 2018, Release date:2018-11-13)
IDE: Arduino IDE 1.8.8 (Linux ARM)
Arduino Board: Mega 2560

In order to capture the screen action, I remote control the Raspberry Pi from Windows 10 via VNC viewer.

The steps is very straightforward:

- Visit Arduino Download page, download Arduino IDE of Linux ARM.

- After download completed, extract the downloaded file.

- Run the install script:
$ sudo ./install.sh

- After finished, you can run the Arduino IDE in Raspbian desktop Menu -> Programming -> Arduino IDE.

In my case the following error reported when run install.sh:
touch: cannot touch '/root/.local/share/applications/mimeapps.list': No such file or directory
/usr/bin/xdg-mime: 803: /usr/bin/xdg-mime: cannot create /root/.local/share/applications/mimeapps.list.new: Directory nonexistent

It may be caused by mis-located of the file mimeapps.list. Actually the install.sh only add the desktop shortcut, menu item and file associations for Arduino IDE. This error should not affect the functionality. Alternatively, you can run the IDE by switch to the extracted directory, and run the arduino directly.


Add Arduino core for ESP8266 WiFi chip to Arduino IDE:

Arduino core for ESP8266 WiFi chip brings support for ESP8266 chip to the Arduino environment. It lets you write sketches using familiar Arduino functions and libraries, and run them directly on ESP8266, no external microcontroller required.

ESP8266 Arduino core comes with libraries to communicate over WiFi using TCP and UDP, set up HTTP, mDNS, SSDP, and DNS servers, do OTA updates, use a file system in flash memory, work with SD cards, servos, SPI and I2C peripherals.

Once Arduino IDE installed, you can follow the same steps in my old post to "Add Arduino core for ESP8266 to Arduino IDE (run on Raspberry Pi/Raspbian Jessie with PIXEL)".


reference:
Arduino core for ESP8266 WiFi chip project page: https://github.com/esp8266/arduino
Additional Board Manager URLs:
http://arduino.esp8266.com/stable/package_esp8266com_index.json


Arduino core for ESP32 WiFi chip is another similar project to bring support of ESP32 to Arduino IDE. It can be installed to Arduino IDE by following the same step on normal PC. But, I tried to install it to Arduino IDE on Raspberry Pi, it fail due to "Tool xtensa-esp32-elf-gcc is not available for your operating system"!


reference:
Arduino core for ESP32 WiFi chip project page: https://github.com/espressif/arduino-esp32
Additional Board Manager URLs:
https://dl.espressif.com/dl/package_esp32_index.json


Thursday, January 31, 2019

CDP Studio is now free for home projects


CDP Studio is a development platform for industrial control system, now coming with a free version for non-commercial use. The system can run on a Raspberry Pi, support C++, open source libraries and has a large feature toolbox including GPIO, I2C and MQTT.

~ FREE Download for NON commercial


Saturday, December 15, 2018

Install Kotlin Command Line Compiler on Raspberry Pi/Raspbian

Every release of Kotlin ships with a standalone version of the compiler. We can download it from GitHub Releases. The latest release is 1.3.11. This video show how to download and install Kotlin  Command Line Compiler on Raspberry Pi/Raspbian, and also create a Hello World using the command line compiler.


Tested hardware: Raspberry Pi 3 B+
OS: Raspbian Stretch with desktop and recommended software 2018-11-13

To download the latest standalone compiler from GitHub:
- Browser to http://kotlinlang.org/.
- Click LEARN on top.
- Select the Tutorials tab on top.
- Select Getting Started -> Working with the Command Line Compiler on the left.
- There should be a section of "Downloading the compile", with a download link to the latest release of Kotlin.

- Download and extract the file, in my case I extract to my ~/kotlinc/ directory.
- Add the path by enter the command in Terminal:
$ export PATH=~/kotlinc/bin:$PATH


Tuesday, April 12, 2016

Install and run Arduino IDE on Raspberry Pi/Raspbian Jessie


Now Arduino IDE for Linux ARM Preview is provided in Arduino - Software -  HOURLY BUILDS. You can install on Raspberry Pi.

This video show how to install Arduino IDE for Linux ARM (1.6.9 currently) on Raspberry Pi 3/Raspbian Jessie.


Insert Arduino UNO to Raspberry Pi, run and program UNO. No more setting needed:)


remark:
Intel Curie Boards for Arduino/Genuino 101 is not supported currently!


Updated@2017-06-14:
~ Re-tried again on Raspberry Pi 3 with Raspbian Jessie with PIXEL (2017-04-10 release).

Updated@2019-02-19:
Please check the updated post: Install Arduino IDE 1.8.8 on Raspberry Pi/Raspbian Stretch release 2018-11-13.


Saturday, March 19, 2016

Install Qt5/Qt Creator for Raspberry Pi 3/Raspbian Jessie


This post show how to install Qt5 and QtCreator on Raspberry Pi 3 running Raspbian Jessie release 2016-03-18.

install qt5-default and qtcreator:
$ sudo apt-get install qt5-default
$ sudo apt-get install qtcreator

(Actually same as the steps to install on Raspberry Pi 2)

This video show installation remotely from Windows running PuTTY and Xming.


Remark:
The MicroSD used is:
Kingston Micro SDHC 32GB Class 10/U1 (Up to 80MB/s Read)
(KINGSTON SDC10G2/32GB - 80MB/s)


Remark@2017-04-11:
Please also read Jakob Brunhart comments below.


Friday, February 26, 2016

Install Qt5/Qt Creator for Raspberry Pi 2/Raspbian Jessie


For Raspbian Jessie, qt5-default (Qt 5 development defaults package) is included in default repository. Here show how to install Qt5 and Qt Creator on Raspberry Pi 2 running frash new Raspbian Jessie, release 2016-02-09.

As my usual practice, update apt repository and firmware:
$ sudo apt-get update
$ sudo apt-get upgrade
$ sudo rpi-update

Then reboot if need.

Install xrdp, such than I can control Raspberry Pi remotely from Windows, and capture screen action.
$ sudo apt-get install xrdp

install qt5-default and qtcreator:
$ sudo apt-get install qt5-default
$ sudo apt-get install qtcreator


Once installed, you can run Qt Creator from desktop menu:
Menu > Programming > Qt Creator

or, enter the command in LXTerminal:
$ qtcreator

In my test, Qt Creator CANNOT run remotely from Windows using Microsoft Remote Desktop:


It can run locally:


And can run remotely from Windows using Putty/Xming:


As show in the videos, the code cannot be compiled with default setting caused by:
"Qt Creator needs a compiler set up to build. Configure a compiler in the kit options"

To fix it, refer to the above videos.

But, in my test, the compiler option cannot be saved, and I have to correct it every-time running Qt Creator.

Related:
- Same steps to Install Qt5/Qt Creator for Raspberry Pi 3/Raspbian Jessie


Friday, November 13, 2015

Download and Install Netbeans IDE 8.1 on Raspberry Pi 2/Raspbian Jessie

Netbeans IDE 8.1 run on Raspberry Pi 2/Raspbian Jessie
To download and install Netbeans IDE 8.1 for Raspberry Pi 2/Raspbian Jessie:
  • Visit netbeans.org,  download NetBeans IDE 8.1 for platform of OS Independent Zip.
  • After the download of the platform-independent ZIP file completes, extract it to any folder on your system.
  • Switch to the /netbeans/bin, run ./netbeans
(reference: https://netbeans.org/community/releases/81/install.html#install_zip)


Friday, April 17, 2015

Install Qt5 on Raspberry Pi/Raspbian and Hello World


Updated@2016-02-27: 
For Raspbian Jessie, qt5-default (Qt 5 development defaults package) is included in default repository. Refer the updated post "Install Qt5/Qt Creator for Raspberry Pi 2/Raspbian Jessie".

A member mentioned in the post on raspberrypi.org forums that there are "backports" packages of Qt5 you can install.


Edit the file: /etc/apt/sources.list and add:
deb http://twolife.be/raspbian/ wheezy main backports
deb-src http://twolife.be/raspbian/ wheezy main backports

Install the required key:
$sudo apt-key adv --keyserver keyserver.ubuntu.com --recv-key 2578B775

Then get Qt5 and esoteric requirements installed:
$ sudo apt-get update
$ sudo apt-get install qt5-default qt5-qmake libegl1-mesa libgles2-mesa


Hello World Qt5 on Raspberry Pi/Raspbian (console application)

- Create a directory, for example, named helloworld. And change to it.
- Create a cpp file, named helloworld.cpp.

#include <QCoreApplication>
#include <QDebug>
#include <stdio.h>

int main(int argc, char *argv[])
{
    printf("Qt Version %s\n", QT_VERSION_STR);
    QCoreApplication app(argc, argv);
    qDebug() << "Hello Qt5"; 
    return app.exec();
 
}

Make it with Qt5:
$ qmake -project
$ qmake
$ make


Hello World Qt5 on Raspberry Pi/Raspbian (with GUI widgets)

- Create a directory, for example, named helloqt5. And change to it.
- Create a cpp file, named helloqt5.cpp.

#include <QtWidgets/QApplication>
#include <QtWidgets/QLabel>
#include <stdio.h>

int main(int argc, char *argv[])
{
    printf("Qt Version %s\n", QT_VERSION_STR);
 
    QApplication app(argc, argv);
    QLabel *label = new QLabel("Hello Qt5");
    label->show();
    return app.exec();
}

Make it with Qt5:
$ qmake -project
$ qmake
$ make

Now you have some error reported. Like this:

helloqt5.cpp:(.text.startup+0x1c): undefined reference to `QApplication::QApplication(int&, char**, int)'
helloqt5.cpp:(.text.startup+0x50): undefined reference to `QLabel::QLabel(QString const&, QWidget*, QFlags<Qt::WindowType>)'
helloqt5.cpp:(.text.startup+0x60): undefined reference to `QWidget::show()'
helloqt5.cpp:(.text.startup+0x64): undefined reference to `QApplication::exec()'
helloqt5.cpp:(.text.startup+0x70): undefined reference to `QApplication::~QApplication()'
helloqt5.cpp:(.text.startup+0x84): undefined reference to `QApplication::~QApplication()'


Now open and edit helloqt5.pro, add the line "QT += widgets":

TEMPLATE = app
TARGET = helloqt5
INCLUDEPATH += .

QT += widgets

# Input
SOURCES += helloqt5.cpp


Now re-make the project:
$ qmake
$ make


Saturday, April 4, 2015

Install latest version of Mono and MonoDevelop on Raspberry Pi/Raspbian

My previous post show Install Mono/MonoDevelop on Raspberry Pi/Raspbian using the default package repository. The installed version will be mono 3.2.8 and monodevelop 3.0.3.2. Alternatively, we can update the package repository on the system to install with latest release: mono 3.12.1 and monodevelop 5.7.0 currently.


The page http://www.monodevelop.com/download/linux/ and http://www.mono-project.com/docs/getting-started/install/linux/#debian-ubuntu-and-derivatives provide instructions to install MonoDevelop and Mono on Linux, include Debian. We can follow the steps to install on Raspberry Pi/Raspbian.

My steps is summrized here:
sudo apt-key adv --keyserver keyserver.ubuntu.com --recv-keys 3FA7E0328081BFF6A14DA29AA6A19B38D3D831EF

echo "deb http://download.mono-project.com/repo/debian wheezy main" | sudo tee /etc/apt/sources.list.d/mono-xamarin.list

echo "deb http://download.mono-project.com/repo/debian wheezy-apache24-compat main" | sudo tee -a /etc/apt/sources.list.d/mono-xamarin.list

sudo apt-get update
sudo apt-get upgrade

sudo apt-get install mono-devel
sudo apt-get install mono-complete
sudo apt-get install referenceassemblies-pcl

sudo apt-get install monodevelop
sudo apt-get install monodevelop-nunit
sudo apt-get install monodevelop-versioncontrol
sudo apt-get install monodevelop-database

The videos show how to, on Raspberry Pi 2/Raspbian:


Here how it run remotely via ssh:


and via xrdp on Raspberry Pi and remmina on Ubuntu Linux:


Related:
- Solve MonoDevelop error: cannot execute "...". File name hase not been set.

Thursday, April 2, 2015

Install Mono/MonoDevelop on Raspberry Pi/Raspbian

MonoDevelop run on Raspberry Pi 2/Raspbian


Mono, sponsored by Xamarin, is an open source implementation of Microsoft's .NET Framework based on the ECMA standards for C# and the Common Language Runtime.

MonoDevelop enables developers to quickly write desktop and web applications on Linux, Windows and Mac OS X.


Always run this commands to update your apt before installation:
$ sudo apt-get update
$ sudo apt-get upgrade

To install Mono/MonoDevelop on Raspberry Pi running Raspbian:
$ sudo apt-get install mono-complete
$ sudo apt-get install monodevelop

This video show how to install on Raspberry Pi 2 running Raspbian version 2015-02-16.


The current installed version is mono-complete 3.2.8 and monodevelop 3.0.3.2.


Once installed, run it with Menu > Programming > MonoDevelop


THis video show a "Hello World" of C# console program build using MonoDevelop running on Raspberry Pi 2:


Next:
- Create Gtk# application using C#/MonoDevelop on Raspberry Pi 2

Related:
- Solve MonoDevelop error: cannot execute "...". File name hase not been set.


Updated: Install latest version of Mono and MonoDevelop on Raspberry Pi/Raspbian

Monday, March 23, 2015

Set JAVA_HOME for Raspbian pre-loaded java 1.8.0

Current Raspbian (version 2015-02-16) preload with java 1.8.0. By default, both java and javac are in PATH (that's why we can run java and javac directly), but no JAVA_HOME set.

This video show how to verify java location, set JAVA_HOME in .bashrc, and verify using jEdit.


- By default, java should be in /usr

- Edit hidden file .bashrc with command:
$ nano .bashrc

- Add the line:
export JAVA_HOME=/usr

- Save and reboot.


Sunday, March 22, 2015

Install C/C++ plugins for NetBeans on Raspberry Pi 2/Raspbian

It is assumed you have NetBeans 8.0.2 installed on your Raspberry Pi 2/Raspbian. By installing C/C++ plugins to NetBeans IDE, you can develop in C/C++.


- Click Tools -> Plugins
- Select Available Plugins tab
- Search C/C++, and check it.
- Click Install


Install NetBeans IDE on Raspberry Pi 2/Raspbian, to program using Java

NetBeans IDE is the official IDE for Java 8. With quad-core ARM Cortex-A7 CPU on Raspberry Pi 2, pre-loaded Java 8 on Raspbian, it's easy to install NetBeans 8 on Raspberry Pi.


Visit NetBeans Download page (https://netbeans.org/downloads/), select Platform of OS Independent Zip, download and un-zip to any folder you want.

Switch to the unzipped /netbeans/bin folder, run the executable file netbeans:
$ ./netbeans

This video show how to download and install NetBeans IDE 8.0.2 on Raspberry Pi 2.


It is seem JavaFX not supported currently


x Error of failed request: BadMatch (invalid parameter attributes)

In the above demo video, I log-in Raspberry Pi 2 remotely with xrdp run on RPi 2, and remmina (Remote Desktop Client) on another PC running Ubuntu Linux.

Originally, I set Color depth of High color (15 bpp), it work once only. After then, I run netbeans next time, it fail with following error:

x Error of failed request: BadMatch (invalid parameter attributes)
  Major opcode of failed request: 72 (x_PutImage)
  Serial number of failed request: 51
  Current serial number in output stream: 55

To fix it in my case, set Color depth of High color (16 bpp).


Next:
- Install C/C++ plugins for NetBeans on Raspberry Pi 2/Raspbian

Related:
- A example of Java to get CPU frequency, build with NetBeans on Raspberry Pi, the jar run on other Linux machine also.

Install jEdit on Raspberry Pi


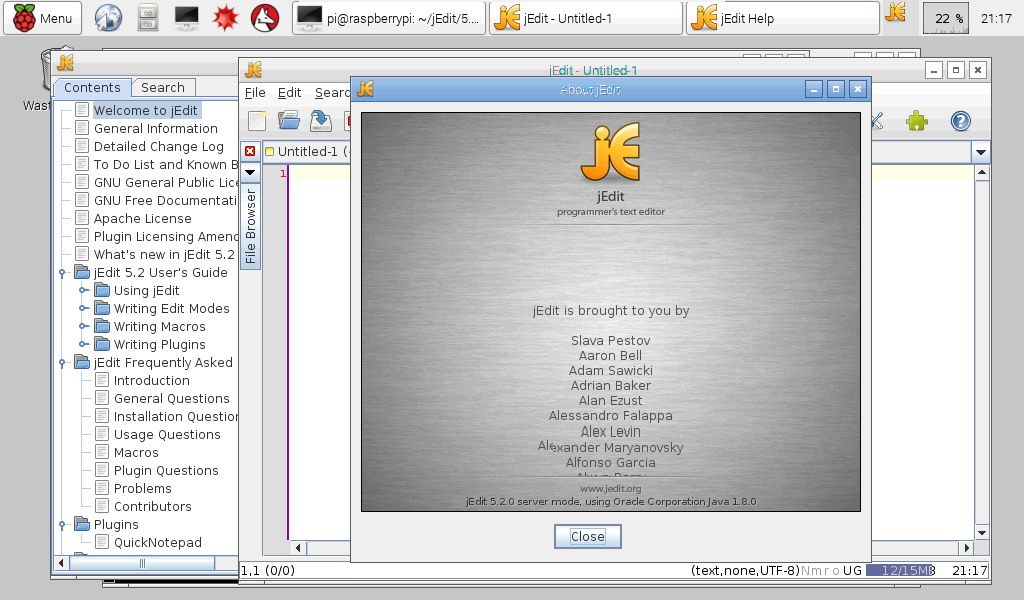
jEdit is a mature programmer's text editor. It provide a Java-based installer, for any operating system. To install jEdit on Raspberry Pi, visit http://jedit.org/index.php?page=download, click to download the Java-based installer.

Then open a Terminal, switch to the downloaded location, run it with java with -jar option:
$ java -jar <downloaded jar>

and follow the steps.

Thursday, March 19, 2015

Install Eclipse JDT on Raspberry Pi 2/Raspbian


To install Eclipse with JDT (Java development tools) on Raspberry Pi 2/Raspbian, enter the commands:
$ sudo apt-get install eclipse
$ sudo apt-get install eclipse-jdt

This video show how to:


Please notice:
- The installed version of Eclipse 3.8.0
- After installed, the default java and javac will be changed to 1.6.0 of OpenJDK!


This video show example of "Hello World" using Eclipse JDT.

Tuesday, September 16, 2014

Tuesday, September 2, 2014

Web base, remotely visual programming Raspberry Pi/Galileo with Wyliodrin

You can program your embedded devices using a browser on any computer.

Here is a short tutorial on how to program the Raspberry Pi with the new visual interface from Wyliodrin.


https://www.wyliodrin.com/

Saturday, June 21, 2014

Install gcc/g++ 4.7 on Raspberry Pi and set as default

Install gcc-4.7 g++-4.7 on Raspberry Pi, enter the commands:

$ sudo apt-get install gcc-4.7 g++-4.7
$ sudo update-alternatives --install /usr/bin/gcc gcc /usr/bin/gcc-4.6 60 --slave /usr/bin/g++ g++ /usr/bin/g++-4.6
$ sudo update-alternatives --install /usr/bin/gcc gcc /usr/bin/gcc-4.7 40 --slave /usr/bin/g++ g++ /usr/bin/g++-4.7

Then run the the command and select gcc-4.7.
$ sudo update-alternatives --config gcc

Tuesday, January 28, 2014

Node-RED: A visual tool for wiring the Internet of Things

Node-RED
Node-RED
Node-RED is a browser base, on top of Node.js, to provide visual tool for wiring the Internet of Things. It support hardwares include Arduno, Raspberry Pi and BeagleBone Black.

Visit: http://nodered.org/

Thursday, January 23, 2014

Cross compile Raspberry Pi kernel from source on Ubuntu

This post show how to build Raspberry Pi kernel on Ubuntu, then copy the kernel.img and other files to Raspbian installed SD Card.

Create our working directory, raspberrypi:
  • $ mkdir raspberrypi
  • $ cd raspberrypi
Before start our works, install the necessary tools and source code of Raspberry Pi linux:
  • $ git clone https://github.com/raspberrypi/tools.git
  • $ git clone https://github.com/raspberrypi/linux.git
Prepare the .config file from pre-packaged config, bcmrpi_cutdown_defconfig:
  • $ cd linux
  • $ make ARCH=arm CROSS_COMPILE=/usr/bin/arm-linux-gnueabi- bcmrpi_cutdown_defconfig
Build kernel:
  • $ make ARCH=arm CROSS_COMPILE=/usr/bin/arm-linux-gnueabi-
  • $ mkdir ../modules
  • $ make modules_install ARCH=arm CROSS_COMPILE=/usr/bin/arm-linux-gnueabi- INSTALL_MOD_PATH=../modules/
  • $ cd ../tools/mkimage/
  • $ ./imagetool-uncompressed.py ../../linux/arch/arm/boot/Image
Now insert a Raspbian installed SD Card, and run the command:
  • $ sudo rm /media/<boot-partition>/kernel.img
  • $ sudo mv kernel.img /media/<boot-partition>/
  • $ sudo rm -rf /media/<rootfs-partition>/lib/modules/
  • $ sudo rm -rf /media/<rootfs-partition>/lib/firmware/
  • $ cd ../../modules/
  • $ sudo cp -a lib/modules/ /media/<rootfs-partition>/lib/
  • $ sudo cp -a lib/firmware/ /media/<rootfs-partition>/lib/
  • $ sync
Now you can remove the SD Card and use it to boot Raspberry Pi with the new kernel.

- The original kernel run 3.10.25+

- The new generated kernel run 3.10.27+