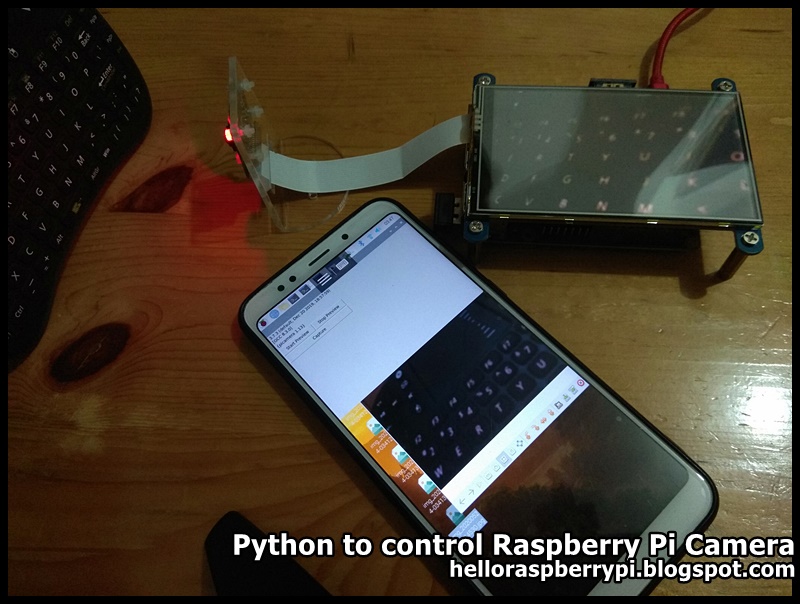
In my usage scenario: The Raspberry Pi 4B/8G is installed with HQ Camera
Module (mount with manual focus lens) and a 4 inch HDMI IPS Touch Display.
Remote control with Android with xrdp/Microsoft Remote Desktop. Such that I
can control camera on remote Android device, adjust focus/aperture on the
lens, and check the effect on local HDMI preview at real-time.
Python3 code, qCam240_20210323.py
import sys
import picamera
from pkg_resources import require
import time
import picamera

from PyQt5.QtWidgets import (QApplication, QWidget,
                             QPushButton, QLabel, QRadioButton,
                             QMessageBox, QHBoxLayout, QVBoxLayout)
from PyQt5.QtGui import QPixmap, QImage
from PyQt5.Qt import qRed, qGreen, qBlue
from signal import signal, SIGINT

print(sys.version)
print(require('picamera'))

rpi_icon = 'rpi_icon_240.png'

class AppWindow(QWidget):

    camPreviewState = False  #not in Preview

    def __init__(self):
        super().__init__()

        self.camera = picamera.PiCamera()
        self.camera.resolution = (240, 240)

        lbSysInfo = QLabel('Python:\n' + sys.version)
        lbPicameraInfo = QLabel(str(require('picamera')))
        vboxInfo = QVBoxLayout()
        vboxInfo.addWidget(lbSysInfo)
        vboxInfo.addWidget(lbPicameraInfo)

        #setup UI
        btnPreview = QPushButton("Start Preview", self)
        btnPreview.clicked.connect(self.evBtnPreviewClicked)
        btnCapture = QPushButton("Capture", self)
        btnCapture.clicked.connect(self.evBtnCaptureClicked)

        lbFileName = QLabel('save as (Desktop/):')
        self.rbtnImage = QRadioButton('image.jpg')
        self.rbtnImage.setChecked(True)
        self.rbtnStamp = QRadioButton('img_<timestamp>.jpg')

        vboxCamControl = QVBoxLayout()
        vboxCamControl.addWidget(btnPreview)
        vboxCamControl.addWidget(btnCapture)
        vboxCamControl.addWidget(lbFileName)
        vboxCamControl.addWidget(self.rbtnImage)
        vboxCamControl.addWidget(self.rbtnStamp)
        vboxCamControl.addStretch()

        self.lbImg = QLabel(self)
        self.lbImg.resize(240, 240)
        self.lbImg.setStyleSheet("border: 1px solid black;")

        try:
            with open(rpi_icon):
                pixmap = QPixmap(rpi_icon)
                self.lbImg.setPixmap(pixmap)
        except FileNotFoundError:
            print('File Not Found Error')

        hboxCam = QHBoxLayout()
        hboxCam.addWidget(self.lbImg)
        hboxCam.addLayout(vboxCamControl)

        self.lbPath = QLabel(self)

        vboxMain = QVBoxLayout()
        vboxMain.addLayout(vboxInfo)
        vboxMain.addLayout(hboxCam)
        vboxMain.addWidget(self.lbPath)
        vboxMain.addStretch()
        self.setLayout(vboxMain)

        self.setGeometry(100, 100, 500,400)
        self.show()

    def evBtnPreviewClicked(self):
        if self.camPreviewState:
            print('Stop Preview')
            self.camera.stop_preview()
            self.sender().setText('Start Preview')
            self.camPreviewState = False
        else:
            print('Start Preview')
            self.camera.start_preview()
            self.sender().setText('Stop Preview')
            self.camPreviewState = True

    def evBtnCaptureClicked(self):
        print('evBtnCaptureClicked()')
        print("Capture")

        if self.rbtnImage.isChecked():
            targetPath="/home/pi/Desktop/image.jpg"
        else:
            timeStamp = time.strftime("%Y%m%d-%H%M%S")
            targetPath="/home/pi/Desktop/img_"+timeStamp+".jpg"

        print(targetPath)

        self.camera.capture(targetPath)
        self.lbPath.setText(targetPath)

        try:
            with open(targetPath):
                pixmap = QPixmap(targetPath)
                self.lbImg.setPixmap(pixmap)

                #as a exercise, get some info from pixmap
                print('\npixmap:')
                print(pixmap)
                print(type(pixmap))
                print(str(pixmap.width()) + " : " + str(pixmap.height()))
                print()

                print('convert to Image')
                qim = pixmap.toImage()
                print(qim)
                print(type(qim))
                print()

                print('read a pixel from image')
                qrgb = qim.pixel(0, 0)
                print(hex(qrgb))
                print(type(qrgb))

                r, g, b = qRed(qrgb), qGreen(qrgb), qBlue(qrgb)
                print([hex(r), hex(g), hex(b)])
                print()

        except FileNotFoundError:
            print('File Not Found Error')

    def closeEvent(self, event):
        confirmClose = QMessageBox.question(self,
                                            "Quit App?",
                                            "Confirm to Quit?",
                                            QMessageBox.No | QMessageBox.Yes,
                                            QMessageBox.Yes)
        if confirmClose == QMessageBox.Yes:
            print('Confirmed Close')
            self.camera.close()
            event.accept()
        else:
            event.ignore()

if __name__ == '__main__':
    print('run __main__')
    app = QApplication(sys.argv)
    window = AppWindow()
    sys.exit(app.exec_())

print("- bye -")
Download the thumbnail image, save as "rpi_icon_240.png" in the same
folder. Used as a default image only.
It's a Python3 code run on Raspberry Pi to control Camera Module with various
setting. The preview display on local HDMI.
In my usage scenario: The Raspberry Pi 4B/8G is installed with HQ Camera
Module (mount with manual focus lens) and a
4 inch HDMI IPS Touch Display. Remote control with Android with
xrdp/Microsoft Remote Desktop. Such that I can control and change setting on remote Android device,
adjust focus/aperture on the lens, and check the effect on local HDMI
preview at real-time.
It's a long time ago, I make a similar code with preview stream video,
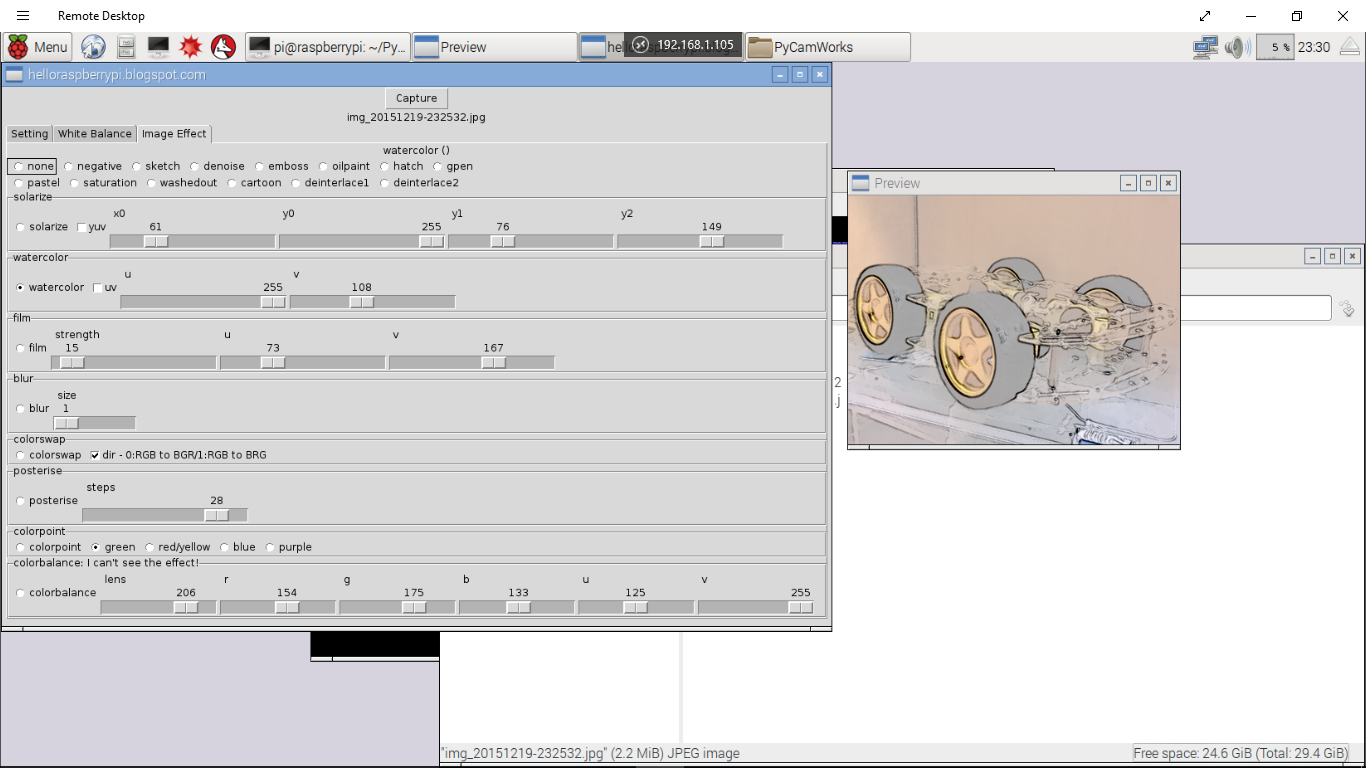
both control and preview on remote desktop, Python to capture image from Pi Camera Module, with image effects. But I'm not satisfied by the delay of stream video, that's why I
re-develop this code again.
The lens shown on the video is a Nikkor ais 28mm f2.8 manual focus lens, connected to HQ Camera Module via a Nikon F to C mount adapter.
As this is writing, picamera is still 1.13, so the maximum resolution is 3280x2464 for V2, not HQ.
~ Another minimum version: with minimum functions preview and capture only, using PyQt5 GUI, fixed resolution 240x240, and display the captured image on GUI. You can also choice save file name; image.jpg or img_<timestamp>.jpg, under Desktop folder.
With Microsoft's Remote Desktop on Android device, it can be run remotely. The camera preview will be displayed on local screen.
xredp have to be installed in Raspberry Pi, with command: $ sudo apt-get install xrdp
This video show how it run on Raspberry Pi 3 with Waveshare 4" HDMI LCD, run it on Android phone with Remote Desktop app. The local mounted display (4" HDMI LCD) is used as viewfinder.
Remark: If you run the script locally, the preview will cover the GUI, but you can still click on it. Click the original position of the Stop Preview button to close the preview.
NOT WORK on High Quality Camera
Once I received High Quality Camera and tested on it, the script fail when capture continuously. Then I make a simple script to take photos using RPi Camera Module, work on v2.1, but also faile on High Quality Camera with "picamera.exc.PiCameraRuntimeError: No data received from sensor."
What's wrong on the script? or my Raspberry Pi High Quality Camera defected?
Tested on:
- Raspberry Pi 3B+
- Update Raspberry Pi OS
- Python 3.7.3
- picamera 1.13
doCappp.py
import picamera
import time

with picamera.PiCamera() as camera:
    camera.start_preview()
    for i in range(5):
        camera.resolution = (1280, 720)
        time.sleep(1)
        filename = 'imageA%02d.jpg' % i
        camera.capture(filename)
        print('Captured %s' % filename)
    time.sleep(7)

    print("End")
    camera.stop_preview()
    time.sleep(1)
    print("End End")
    camera.close()
    print("End End End")
1.11 on the surface consists mostly of enhancements, but underneath includes a major re-write of picamera’s core:
Direct capture to buffer-protocol objects, such as numpy arrays (#241)
Add request_key_frame() method to permit manual request of an I-frame during H264 recording; this is now used implicitly by split_recording() (#257)
Added timestamp attribute to query camera’s clock (#212)
Added framerate_delta to permit small adjustments to the camera’s framerate to be performed “live” (#279)
Added clear() and copy_to() methods to PiCameraCircularIO (#216)
Prevent setting attributes on the main PiCamera class to ease debugging in educational settings (#240)
Due to the core re-writes in this version, you may require cutting edge firmware (sudo rpi-update) if you are performing unencoded captures, unencoded video recording, motion estimation vector sampling, or manual sensor mode setting.
Added property to control preview’s resolution separately from the camera’s resolution (required for maximum resolution previews on the V2 module - #296).
There are also several bug fixes:
Fixed basic stereoscopic operation on compute module (#218)
Fixed accessing framerate as a tuple (#228)
Fixed hang when invalid file format is specified (#236)
Fixed multiple bayer captures with capture_sequence() and capture_continuous() (#264)
Fixed usage of “falsy” custom outputs with motion_output (#281)
Many thanks to the community, and especially thanks to 6by9 (one of the firmware developers) who’s fielded seemingly endless questions and requests from me in the last couple of months!
The are additional limits imposed by the GPU hardware that performs all image and video processing:
The maximum resolution for MJPEG recording depends partially on GPU memory. If you get “Out of resource” errors with MJPEG recording at high resolutions, try increasing gpu_mem in /boot/config.txt.
The maximum horizontal resolution for default H264 recording is 1920. Any attempt to recording H264 video at higher horizontal resolutions will fail.
However, H264 high profile level 4.2 has slightly higher limits and may succeed with higher resolutions.
The maximum resolution of the V2 camera can cause issues with previews. Currently, picamera runs previews at the same resolution as captures (equivalent to -fp in raspistill). You may need to increase gpu_mem in /boot/config.txt to achieve full resolution operation with the V2 camera module.
The maximum framerate of the camera depends on several factors. With overclocking, 120fps has been achieved on a V2 module but 90fps is the maximum supported framerate.
The maximum exposure time is currently 6 seconds on the V1 camera module, and 10 seconds on the V2 camera module. Remember that exposure time is limited by framerate, so you need to set an extremely slow framerate before setting shutter_speed.
Here is a video show how it run remote run on Raspberry Pi 3 with Camera Module, from Android phone. Where the phone act as WiFi hotspot, and remote login Raspberry Pi with aRDP app to run the script.
The Raspberry Pi 3 (with Camera Module) powered with portable battery, such that I can bring it outside. It installed with RDP and config to connect to my WiFi hotspot automatically.
updated@2016-04-15:
Current Raspbian Jessie come with PIL installed by default, but no ImageTk. If you run Python script reported with error: ImportError: cannot import name ImageTk